Introduction
The Magnus is a realm outside of the Black Desert world. You can access the Magnus by falling through a well to travel through a world rift. Once inside, you can complete various challenges set in parallel worlds. These parallel worlds are called “Abyssal Pockets”.
- You will automatically leave an abyssal pocket if you spend more than 1 hour inside.
- There is a 1-minute waiting time before you can re-attempt an abyssal pocket.
There are 9 total wells you can unlock (one for each main city). You can find their locations on the map once you have unlocked them.

How to start the questline
To begin, you need to have completed at least one of the following:
- The Balenos main questline up to the quest “[Balenos] Farewell, Grusha,” “Embarking on an Adventure,” or “Big Fish in a Small Pond”.
- The Mountain of Eternal Winter questline up to the quest “[Everfrost] Beyond the Doors of Alyaelli”.
- The Simplified questline up to “[Special Growth] Fughar’s Memorandum – Chapter 1”.
You can then take the Magnus quest line from your Black Spirit and start your adventure in Velia.

After arriving in Velia, you will be taken to Bartalli farm and speak with Emma. Here you discover a powerful rift and can enter the Magnus realm by jumping into the well.

Once you are inside, follow the main questline until you are told to open your inventory.
Whilst inside the Magnus, you don’t have access to your gear and inventory from the Black Desert World. Equip all of your special Abyss One Equipment by clicking on each item in the list.

Continue with the questline until you reach your first Challenge! Use our walkthrough section to guide you through all of the challenges!

Rewards
If you complete all the challenges by finishing the Magnus main questline, you can unlock 4 special rewards including a free PEN boss armor and Abyssal skills for all your characters.
Free PEN (V) Boss Gear
- You’ll be able to choose one free PEN boss defense gear (once per Family).
- This is identical to the guaranteed PEN (V) boss gear you can obtain through the questline with Jetina, and thus cannot be registered on the Central Market.
- For the helmet and armor pieces, if you enhance it past Caphras Lv. 10, you’ll be able to craft it into one of the Slumbering Origin Armor pieces (Fallen God’s Armor, Labreska’s Helmet), which then can be registered on the Central Market.
| Select one of the following items | |||
|---|---|---|---|
 PEN (V) Giath’s Helmet
|
 PEN (V) Dim Tree Spirit’s Armor
|
 PEN (V) Muskan’s Shoes
|
 PEN (V) Bheg’s Gloves
|
 PEN (V) Griffon’s Helmet
(recommended)
|
 PEN (V) Red Nose’s Armor
|
 PEN (V) Urugon’s Shoes
|
 PEN (V) Leebur’s Gloves
|
I recommend taking either the PEN Griffon Helmet or PEN Bheg’s Gloves from the Magnus PEN Boss gear reward. The reason Griffon Helmet is recommended is because it is harder to obtain the materials to enhance it to PEN using Jetina’s guaranteed PEN Method. You can also upgrade the Griffon to a Labreska Helmet at a later date. While PEN Bheg’s Gloves are also a good option because they give a lot of Accuracy, which you will be lacking at first as a new player, you can take this instead if you already have a PEN Griffon/Giath Helmet.
Fast Travel to Major Cities through the Magnus
- You can utilize the Magnus realm, to travel between major cities.
- You can find abyssal wells that are connected to the Magnus on the World Map (M).
- Fast travel between the different locations cost 5 million silver
| Magnus Teleport Locations | |||
|---|---|---|---|
|
Bartali Farm in Balenos Moretti Plantation in Serendia Gabino Farm in Calpheon Altinova Gateway in Mediah Erdal Farm in Valencia Grana Dirt Farm in Kamaslyvia Marak Farm in Dreighan Delmira Plantaion in O’dyllita Erethea’s Belt in Everfrost Nampo Moodle Village in Land of the Morning Light Muzgar in Ulukita Oquilla’s Eye Yukjo Street in Land of the Morning Light (Seoul) |
Once you are at the Magnus Well location, interact with the Abyssal Well to open a map and select your destination. You can then jump into the well to teleport to that location.

Remote Access to Other Regions’ Storage
- Due to all regions now being connected through the Magnus, all inventory items can be accessed from any region.
- You can move and store all inventory items from storages across all regions through a Storage Maid NPC

- You can use Storage Maids to transfer items to different storages even if you are not in that area

- The feature is only available in regions that are lit up on the map. (Not available in Muiquun and Port Ratt.)
- You cannot transport trade items, exchange items, treasure items, Ornette’s Spirit Essence, Odore’s Spirit Essence, and basic potion items via this function.
New Skills for All Classes – Abyssal Legacy
- Once you completed the main questline, you can receive a new skill for your class called the “Abyssal skill”.
- If you have completed the main questline on another character, you do not need to do the questline again for another class. Simply talk to your Black Spirit to obtain the following quests:
- “[The Magnus] Abyssal Revelation”
- To accept and complete the “[The Magnus] Abyssal revelation” quest, your character needs to be level 60 or higher


- Upon completing “[The Magnus] Abyssal Revelation,” you’ll obtain [Secret Book] Abyssal Legacy x1 and [Event] Armstrong’s Skill Guide (1 Day) x1.
- If you lose the secret book item, as long as your character has completed the “[The Magnus] Revelations” quest, you can get another one by talking to Cruhorn Wyrmsbane.
- Once you use the secret book and learn the new skill, it will replace the skill commands of one Absolute skill in your character’s kit.
- You can still add and use the replaced Absolute skill via Quick Slot.
Once per Family Quest Rewards
- As you progress through the story of the Abyss One: The Magnus main questline, you’ll be able to obtain the following items (once per Family).
- Each time you learn the “Abyssal Veins” knowledge of each region, you’ll be able to accept the quest to claim the following rewards by talking to the Black Spirit (/).
- Complete the quest objectives in the Magnus, then return to our world in Black Desert to talk to a traveler and claim the following rewards.
| Rewards for Opening the Following Abyssal Veins | |||
|---|---|---|---|
| Abyssal Veins: Valencia |
   Elion’s Tear x5, Blessed Message Scroll (120 min) x5, Item Collection Increase Scroll x5
|
||
| Abyssal Veins: Calpheon |
  Valks’ Cry x5, Artisan’s Memory x5
|
||
| Abyssal Veins: Mediah |
  Sealed Compass (7 Days), [Event] Sealed Book of Combat (7 Days)
|
||
| Abyssal Veins: Valencia |
  [Event] Sealed Book of Life (7 Days), Secret Book of Florin x5
|
||
| Abyssal Veins: Kamasylvia |
  [Event] Tachros’ Spirit Stone, [Event] Stella’s Spirit Stone
|
||
| Abyssal Veins: Drieghan |
  [Event] Shakatu’s Luxury Box, [Event] Enhancement Help Kit III
|
||
| Abyssal Veins: O’dyllita |
  [Event] Golden Blessing of Agris x3, [Event] Supreme Old Moon Scroll x3
|
||
| Abyssal Veins: Mountain of Eternal Winter |
  Item Brand Spell Stone x3, Patrigio’s Apparel Bag
|
||
| Abyssal Veins: Balenos and complete the entire questline |
   Advice of Valks (+120) x1, Cron Stone x500, Value Pack (15 Days)
|
||
Obtainable Titles
- Proceed with the Magnus main questline to obtain the following titles.
| Titles | |||
|---|---|---|---|
| Young and Reckless Dunce Snot-faced Wuju Monster Singularity Eileen’s BFF Anomaly Normalizer Copycat One of a Kind Got the Chills Dimensions Apart Exhausted More Bark than Bite Abyssal Traveler Well, Well, Well??? (Warriors can obtain a special title by proceeding with the main questline) |
Challenge Walkthrough
All quests are finished by interacting with the black cat. You can press ESC and click Retry if you get stuck!

Peaceful Vagabond
- For your first challenge, you will be in the middle of the ocean with a row boat and a cat
- There will be a white light, follow the white light and wait in it until it disappears, then another white light will appear to follow
- At one point, the light will split into two different paths, the cat will “Meow!” if you are going towards the correct light.
- If you make a mistake, you can just go back.

- When you reach the last light, a message will appear, press R to get off the boat and swim over to interact and complete the first challenge

Sad Red-nosed Imp
- Turn left and go down to the cave
- Do not get caught by Red Nose, who will run around the cave looking for you
- Pick up the 3 pearls around the cave and drop them on the yellow light in the center of the pillar.
- Was changed from 5 pearls to 3 pearls in an update – this is why screenshots show 5 pearls


- Once 5 pearls are placed on the light, a cat will appear in its place instead, follow the cat towards the exit then interact with it to complete the challenge
- Known Bug: Sometimes the cat will not appear or does not move. Move away from the cat and then go back towards it again. If it keeps saying “Meow” then you will eventually be able to interact with the cat. Then press ESC and return to the Magnus when you have the next quest.
Pendulum Goes Clickety-clack
- Pick up pearls and drop them on the yellow light (once)
- Be careful not to touch the floating blue/white lights that move from side to side. These will make you drop the pearl so you have to do it again.

- Once you’ve moved the pearl, the cat will appear to complete this challenge.

- After talking to Wuju, interact with the Magnus to return to Serendia.
- Follow the questline to Moretti Plantation.
- Climb up the ladder on the barn at Moretti Plantation and interact with the light.
- You have now unlocked the 2nd well, and remote access between Serendia and Balenos will now be possible.
- Jump down the well to go back into the Magnus.

Golden Lion of Serendia
- Known Bugs: This map has quite a few bugs such as Jordine not interacting, the iron gates not opening, two iron gates and other issues. If you have any problems, press ESC and “Return to the Magnus” instead of clicking Retry.
- Talk to Jordine so that he stands on the pressure plate that will open the iron gate.
- Stand on the pressure plate on the other side of the gate. The gate will now stay open when you move.
- Look back to the starting room and you will see a pillar on the right, next to the pillar is a mysterious waterfall.

- Interact with the waterfall to get a water bubble around you, you can then slowly step close to the fire in the next room to put the fire out.
- Do not step on the fire! If you die just press retry.

- Stand on the pressure plate in front of the iron gate to open it.
- Talk to Jordine to make him move ahead, do not walk into the black auras because they will attack you.
- Talk to Jordine again to ask him to stand on the first pressure plate.
- A pearl will appear near the pillar. Pick it up and place it on the pressure plate in the top right. Jordine will stand on the pressure plate on the bottom left. This will open the prison gates on the left.
- If Jordine doesn’t move, you can do this part without needing him by putting a pearl on one pressure plate and standing on the other then quickly running into the prisons.

- Interact with the objects inside the prison to collect the Rusty Helmet and the Ancient Orders
- Interact with the Old Crank near the gates to get back out.
- Move the pearl from the pressure plate and place it on the top left platform, then stand on the bottom right open the prison gates on the right side.

- Interact with the flag in the corner of the room, then the sword and shield next to it.
- There are 4 altars, two in each of the prisons. On the left side is altar 1 and 2 and the right side has altar 3 and 4.
- Place the items in each of the altars.
- 1st: Ancient Orders, 2nd: Old Flag, 3rd: Rusty Helmet, 4th: Quiver

- This will open the door to the final room. Soldiers will appear out of a rift. Use skills to kill them then attack the gate to destroy it.
- You will now come to the snake boss, when it uses its AOE attack, hide behind the walls to avoid it. After defeating the boss the cat will appear.

Exploding Fireworks
- There is a red light on the left, and if you talk to the snake and then stand in the red orbs, you will get a Chariot to start this challenge. Jump onto the back of the Chariot to be able to interact with it.
- Known Bug: The Chariot doesn’t always appear and sometimes can’t be jumped onto, try adjusting your graphics settings between Low > Medium, or re-entering. You can also reset the map by running into the middle.


- The invasion will now start, you need to protect the tower in the middle of the map until the invasion is over.
- Tip: You can continuously fire by using LMB fire 3 times, then RMB.
To the Dragon Palace
- Talk to the sphere on the other side to teleport to a different structure and start the challenge.

- On each structure there are several spheres, only one of them is the correct one, and the others will teleport you back to the start.
- The correct sphere is called “Spacetime Afterimage”, while the fake ones are called “Spatial Afterimage”. The correct sphere also has a slight glow around it.
Correct Spheres:
- The 2nd to last sphere, on the right side
- The sphere on the opposite side
- The same as before, the 2nd to last sphere on the right
- The sphere on the narrow pathway
- Look to the left, the correct sphere is the 2nd closest one
- Turn around and move to the sphere which is furthest away
- Once you’ve interacted with all the correct spheres, you will be on top of the structure. Look down and you will see 4 rafts in the sea. Jump into the middle of them and then swim and interact with the glowing Abyssal Blur
- After completing this puzzle you will unlock the storage access to Calpheon.

Some Adventurer’s Grave
- Interact with the floating square device to start.
- In this room, the floating spheres are intrusion devices that will attack you with lasers if you are detected.
- Use crouch (Q) to move to the other side of the room to the yellow light beam.

- Hit the device at the yellow beam to get a pearl from it. Now the intrusion devices will only attack when the red circles appear.
- Take the pearl and walk through the devices when the red circle isn’t up. Drop the pearl on the yellow light to finish this challenge.
The Girl Who Lost the Sea
- Interact with the bonfire to take the quest
- Interact with the rock next to the bonfire to pick up the flint
- Go back to the bonfire and start the fire.

- Talk to Lara to get the next quest and keep talking to her until you get the “Gather Material #1” quest from her. Talk to her again to ask for the location of the tree.
- You will now see a yellow light which will show you where the “hard tree” is. Go back to Lara each time and interact with her to get the light to reappear.

- Collect the “Hard Tree” 2 times, then hand over the materials. If you get stuck, you can jump into the water to teleport back to Lara (does not reset).
- Talk to Lara then ask her again to show you the location of the Hardened Resin and the Tough Tree Branch.
- Melt the hardened resin on the bonfire then hand them over to Lara.
- Build the raft with Lara and then speak with her. Follow her to the water and speak with her once more. You can now go into the water and interact with the raft. If it bugs out, swim over to the cat in the distance.
Only Thing That Matters
- Interact with Gorgath to start the puzzle.
- Follow the light and go to the bush nearby to collect Sunrise Herbs and Evening Primrose for him.
- Talk to Gorgath to obtain the quest and several pillars will appear around him.

- When you interact with a pillar, it will turn so that the sphere inside is facing a different direction.
- Interact with all of the pillars so that they are all facing the opposite way to Gorgath. The sphere will glow when it is facing the correct way.
- After completing this puzzle you will unlock remote storage access to Mediah and Ulukita.

Beneath the Surface
- Talk to Zobadi to start the puzzle.
- You will see dust on the floor which are moles moving in the ground.
- When you stand near the dust, a small mole will come up.

- There is a “Ferocious Mole” which does not pop up when you stand near the dust, instead, you need to follow the dust several times until it comes up.
- Attack the Mole when it appears.
- Talk to Zobadi again to complete the quest, a yellow light will then appear next to him.

Look Before You
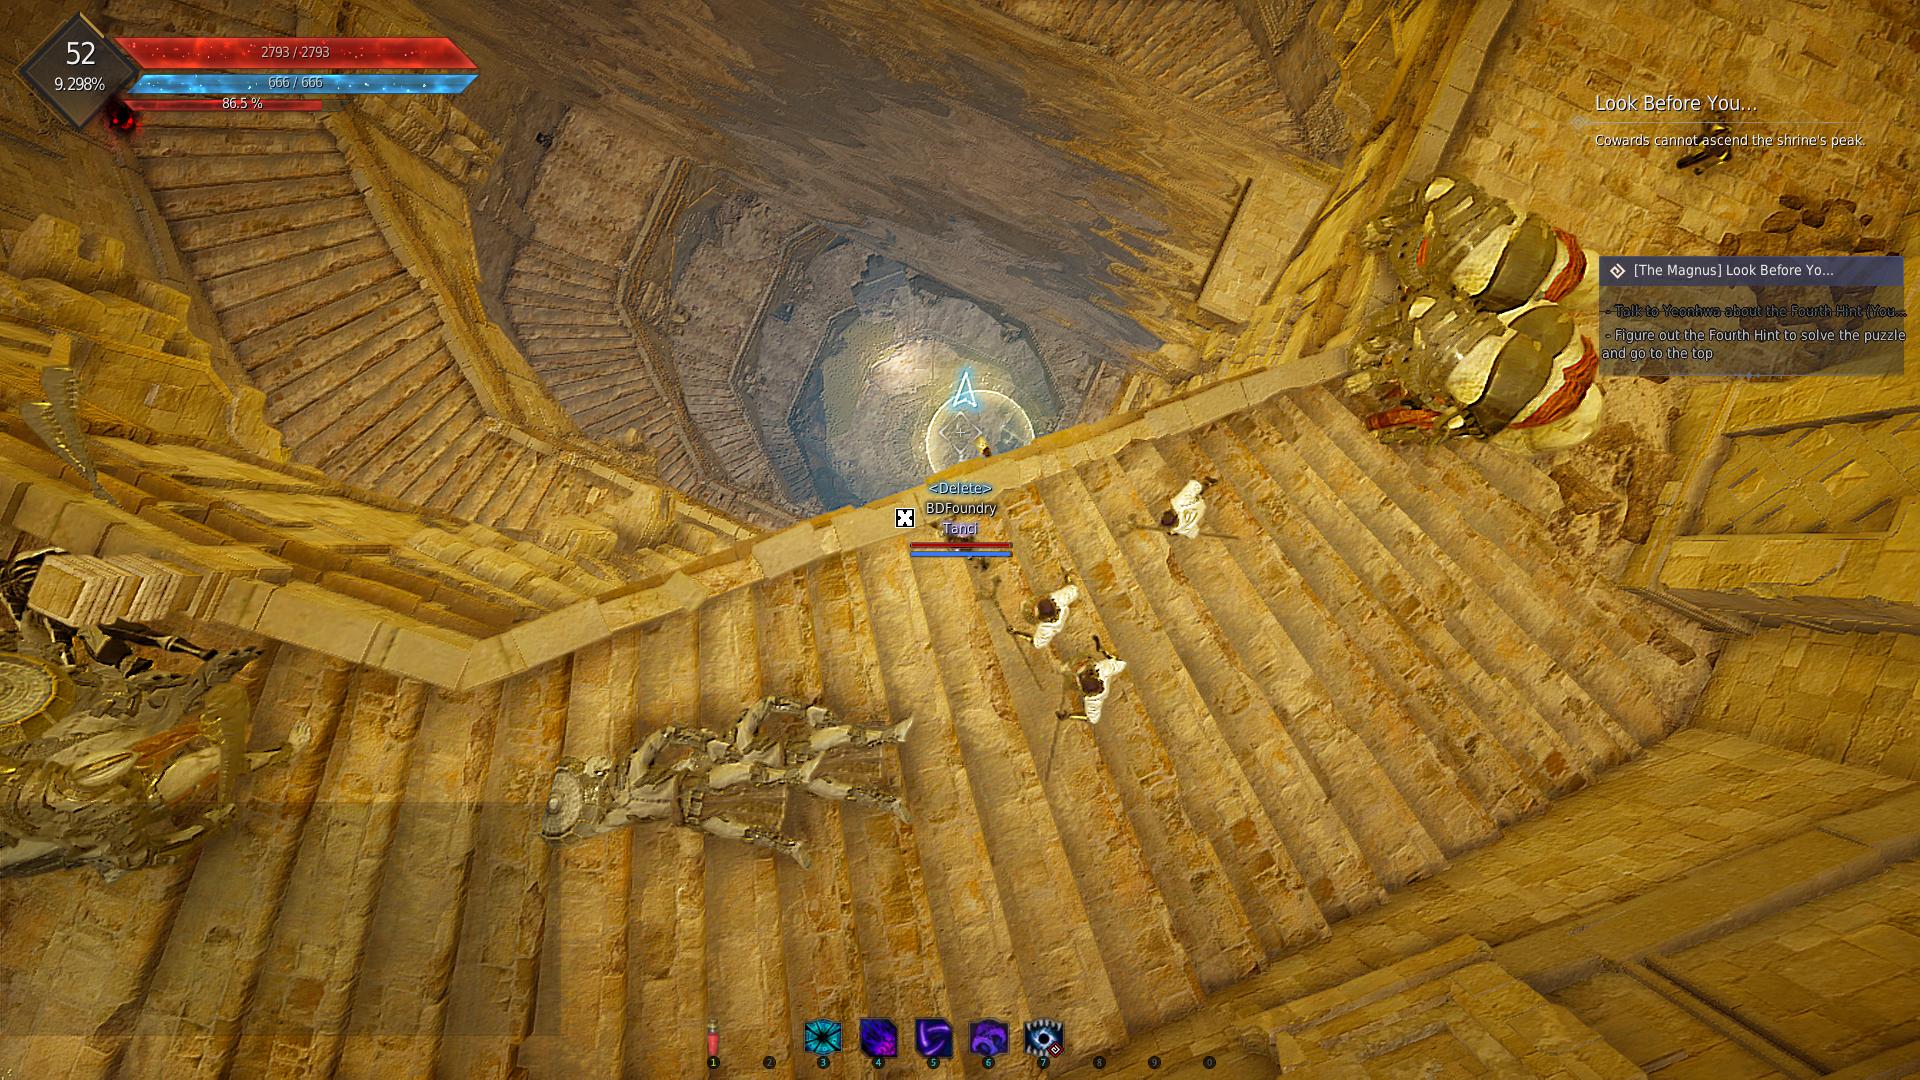
- Interact with the Maehwa then climb up to the top of the temple where the stairs are completely broken. Interact with the wall to reveal the hidden text.

- Go back down the stairs to where they are half broken and there is a lamp you can interact with on the wall.
- Walk backward off the stairs in the gap and there is a hidden see-through ledge you will fall onto.
- Interact with the device on the wall and turn it to the left.

- Drop back down and then climb back up to the top of the stairs to interact with the text and receive the next part of the quest.
- There will now be 3 monsters on the stairs and 3 devices behind each one. When you kill one, it will appear to drop coins. The correct lever is behind the monster which drops the most coins.
- Go back up to the text to get the 3rd hint.
- A bridge will appear near the maehwa. Move across the bridge and don’t get hit by the white lights that appear on the sides (this will teleport you back off the bridge)
- Kill Belmorn on the other side of the bridge

- Go back up to the top of the stairs and interact with the text to complete the final hint.
- Now lots of monsters will appear and come towards you. Look over the stairs and you will see a floating chicken over the side
- Jump onto the chicken and it will turn into an elevator. After the elevator goes up, there will be additional platforms to follow until you reach the end and can talk to the cat.


Stormy Hills
- Interact with the vase to start the challenge.
- A yellow magnetic barrier will appear around you which will come closer and closer. Make sure you are not in the yellow magnetic field each time it moves.
- Move so that you are in the center green circle at the end.
- Do this 5 times to complete the challenge.


Struggle for Survival
- Kill each wave of the monsters in the middle
- After defeating Kutum and Nouver the challenge will be complete
- Completing this challenge will unlock the Kamaslyvia remote storage.

Soar Like A Bird
- Answer the quiz questions from Baulo
- Correct answers:
- Two eagles flew by
- Seagull

Scarlet Thread
- For this challenge, you will see a red/yellow/blue floating sphere and a matching red/yellow/blue figure.
- You need to connect the sphere and the figure with a colored line without overlapping them.

- Interact with the figure, then stand on a nearby circle to change the color.
- Be careful not to move too fast or the color won’t change
- You will get a message when they are connected and can put the object down again.
- Once you are done, the puzzle will turn white and you can interact with the purple beam to complete the challenge.


Peculiar Library
- Answer the quiz questions correctly:
- Wind and Lightning
- If there’s no bread, then cake!
- Everlasting Glory of the Vedir, Ordore
- If you choose the incorrect option, you can either retry or read the bookcase and come back!
- The cat will then appear down the steps behind the NPC once you’ve answered the 3 questions, go further down and jump through the portal to go back and complete
- Completing this challenge will unlock the remote storage for Dreighan!

End of Tomorrow
- Talk to Oberin next to the wagon, then climb on top of the wagon and interact with the pearl to pick it up
- Move the pearl to the NPC without being hit by the falling meteors and repeat to the end
- If you get hit by the meteors, you will drop the pearl and will have to go back to Oberin to restart
- At the gate with the two pillars, drop the pearl on the floor and speak to Oberin to complete


Southward Travels
- Talk to Maehwa, at the gate and then interact with the device to open the door

- In the middle of the room, there is a brazier, as well as two braziers near the gate. There are also torches all around the middle of the room.
- Interact with a torch to take the kindling from the torch, and then interact with the brazier in the middle to light it.
- If it is the correct torch kindling, then the brazier will light and stay on. If it is the wrong torch kindling then the brazier will not light.
- There is a random pattern that is different each time. If the brazier lights, do the same with the other two braziers to unlock the gate.


- Move into the next room, avoid the red circles and follow the Maehwa to the exit.
- When you get to the exit, turn around and you will see a pattern on the wall.


- In each of the 4 rooms you just went through, there is a ruin in the center of the room which is a certain shape (Prism, triangle, sphere, and donut). Interact with the shape shown on the puzzle wall, then go back to the pattern to insert it into the wall.
- If you insert the wrong piece, the pattern will not change, so go back and insert the correct shape.
- If you insert the correct piece, it will change to a different shape. Repeat this to finish the challenge, then follow the Maehwa down to the cat.

Riddle of the Slumbering Sage

- For this puzzle, you will see 2 monsters appear which you need to remember.
- Then the monsters will disappear and it will show 2 monsters again.
- Stand on top of the monster that did NOT appear the first time.
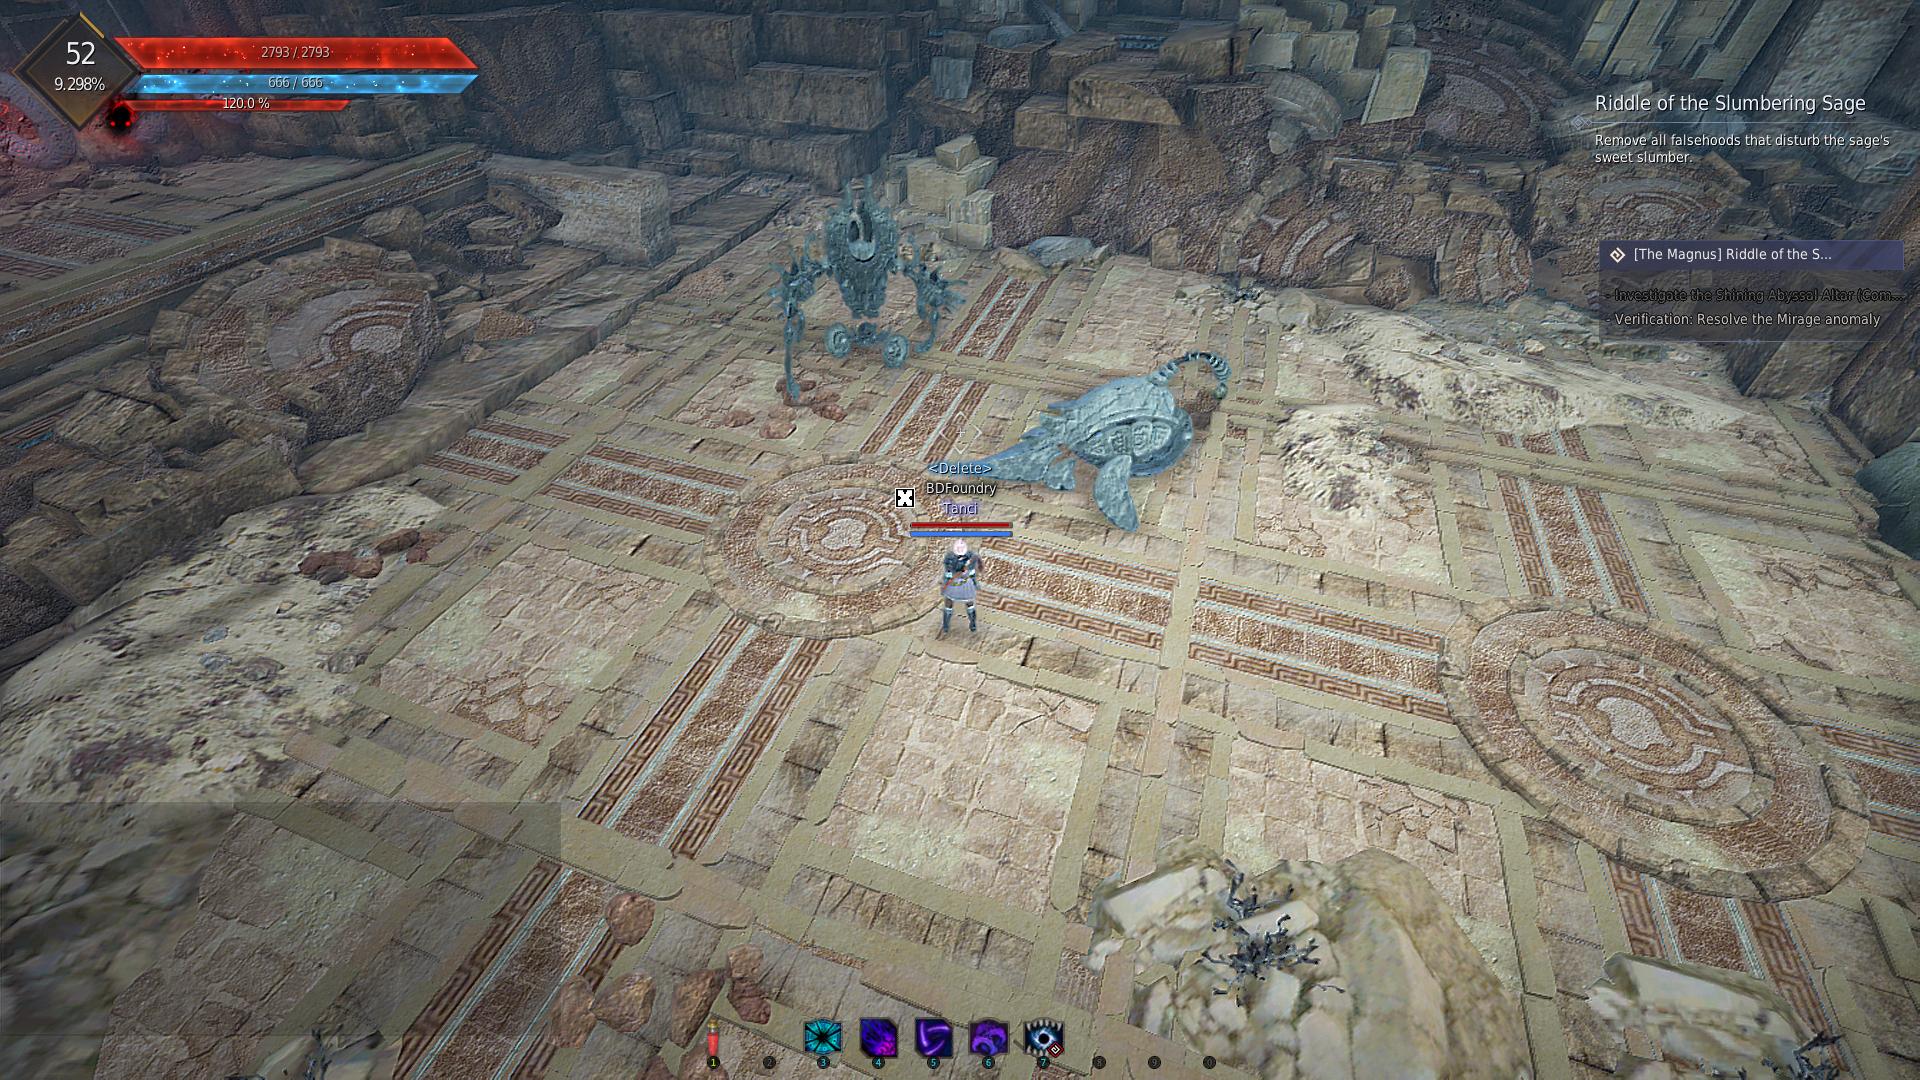
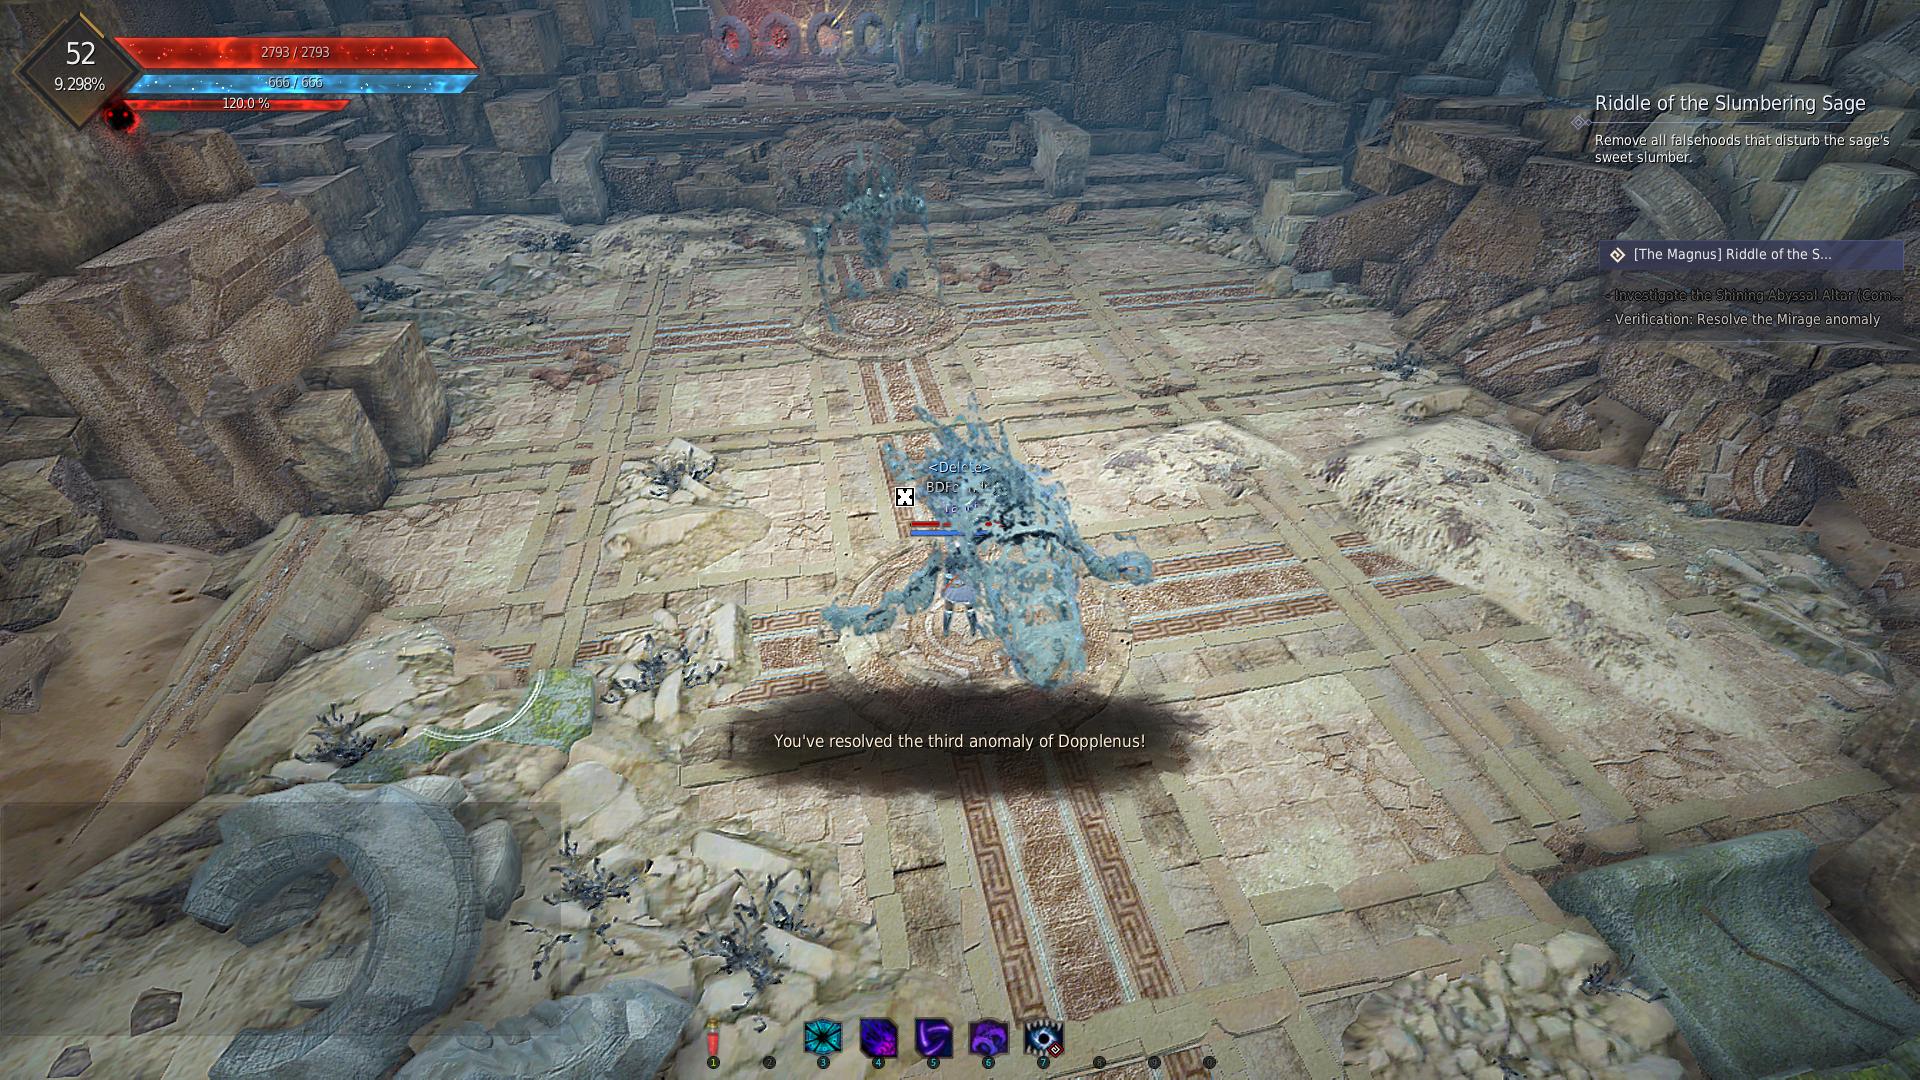
- You will then be shown 3 monsters that you need to remember, before selecting the monster that has not been shown to you.
- You need to do this 3 times until all of the floating donuts are glowing yellow instead of red. Each time, the number of monsters you need to remember will increase.
- Take a screenshot to help you remember in the harder rounds!
- Completing this challenge will unlock the remote storage for O’Dyllita.

The Third Laboratory
- Go into the cave and talk to the Chimera to start the puzzle
- One of the four pillars will turn blue at random
- Red Nose is in the middle and a yellow barrier is around him which will go bigger and smaller
- Hitting the blue pillar will make the barrier bigger, and hitting a red pillar will make the barrier smaller
- You must keep the size of the barrier under control so that it is big enough to contain red nose but not too big that it goes outside the pillars

- A message will appear saying that red nose has “Stabilized” if you are doing it correctly. You must stabilize Red Nose 3 times before the test is complete.
- Look at the messages as a hint as to whether you should be hitting red or blue. Eg. if the message says it is “decreasing rapidly” you need to hit the blue pillar to counteract it.
- Once the test is finished, interact with one of the turned off pillars to complete the challenge and the cat will appear
- Tip: Be careful using skills with DOTs as they will continuously hit the pillar

Where the Dragon Sleeps
- Crouch (Q) and move towards Garmoth without touching the jars around the room
- When the pathway splits, go to the left, and around the back toward his wing
- Open the treasure chest behind Garmoth to finish the challenge


Light-bearing Pot
- In this challenge, you will see lots of jars lined up in a row
- You must hit the jars until you see the yellow light appear from one randomly
- Interact with the light to finish the challenge and the cat will then appear
- You will fail and reset the challenge if you destroy more than 40 jars without interacting with the light
- Completing this challenge will unlock the remote storage for Eilton!


Into the Fire
- When you approach the NPC in the middle a red circle will appear which you have to dodge
- A yellow/blue object will then appear nearby which you can interact with to pick up a pearl


- Dodge the red circles and shadows while you move the pearl to place it on the pressure plates around the NPC
- Move all 5 pearls onto the pressure plates to complete the challenge

Rhutums Strike Back
- Interact with the Rhutum wizard outside the fort. He will take you inside the fort using his powers. You can then interact with the gate yourself to open and close the barrier to the Rhutum fort
- Interact with the Rhutum wizard again to start the puzzle.

- Stay near the gate and close it when you see any other Rhutum that is not a wizard (even if it is just one)
- Once they reach the gate, they will turn into monsters that you can kill


- Open the gate to let them inside if there are only wizards (holding a staff). The wizards will look like the NPC standing near the gate. These are the only ones that are safe to come inside the fort.
- After enough friendly wizards are inside the fort, you can talk to the main Rhutum wizard again to complete the challenge and then the cat will then appear.
- Tip: The wizards usually come in groups of 2.


Dreaming Kamaslyve
- This is the final challenge where you will battle a boss called “Goyen”
- You can choose easy difficulty or normal difficulty (the story and rewards remain the same)
- If you need to change the difficulty afterward you can abandon the quest and return to the Magnus to reselect

- Dodge the red cones which indicate his attack directions and deal damage to him when it is safe
- When the boss reaches 20% for the first time, he will heal.
- Goyen will also do a large AOE attack when reaching 20% the second time.
- You can now kill him and complete the challenge
- Finish the storyline to collect the rest of your rewards!

- After completing the questline on your character, you can use the book given to you in your inventory to learn your new Abyssal skill.
- To obtain the skill on your other characters, talk to your Black Spirit and complete the “[The Magnus] Abyssal Revelation” quest on them to receive the book.
- Your additional characters do not need to complete the entire questlne to receive their Abyssal skill.

Land of the Morning Light – Additional Questline
An additional questline was added at a later date to prepare for the arrival of the Land of the Morning Light region.
This questline is not mandatory to obtain your Magnus skill and other Magnus rewards, but completing it will unlock fast travel to Nampo Harbor in the Land of the Morning Light. It is also required to start the main story quests in Land of the Morning Light.
After accepting the quest, you will need to complete 3 new puzzles.
| Quest progress conditions |
|---|
| 1. From Lv. 56 2. Completed the [The Magnus] Chest from the Abyss quest (Abyss One: The Magnus Main Questline) 3. Either completed or have not accepted the quest, What Are You Doing Here? Talk to the Black Spirit(,) and accept following questline from Main Quest (Q). |
| Continuous Quest Name |
| [LoML] Yeonhwa’s Departure [LoML] Snotface Wants To See You [The Magnus] Last Abyssal Vein [The Magnus] Another Anomaly [The Magnus] Memories of the Deep Sea [The Magnus] Damaged Record Device [The Magnus] Unseen Shadow [The Magnus] Netherworld Registry Institute [The Magnus] Morning’s Breeze |
To accept the quest, make sure you are NOT inside the Magnus realm.

Memories of the Deep Sea
- There will be a yellow beam on a platform in the middle, stand on the yellow beam to start the puzzle
- 7 pearls will appear all around you in a circle, and will have a white light beam coming from them.

- When the white light disappears, it will then appear on a pearl at random before disappearing again.
- You must memorize the order that the pearls light up.
- Tip: You do not have to stand in the middle during the light beams, and can move to a better position where you can see the pearls easier.
- Once the pattern is finished, go to the first pearl and pick it up, then put it in the center platform.
- If the platform glows white/blue, you brought the correct pearl to the center. Continue until all 7 pearls are in the center in the correct order.

- If the platform glows black, the order was incorrect and you will need to wait for the puzzle to reset.

- After completing the puzzle, a cube will appear on the platform, interact with the cube to complete the quest, then speak to the cat to teleport back out of the Magnus.
Unseen Shadow
- For this puzzle, you will be back in Aakman Temple. At the bottom of the stairs, there will be a spire tower.
- Interact with the spire and click the text to start the timed quest.
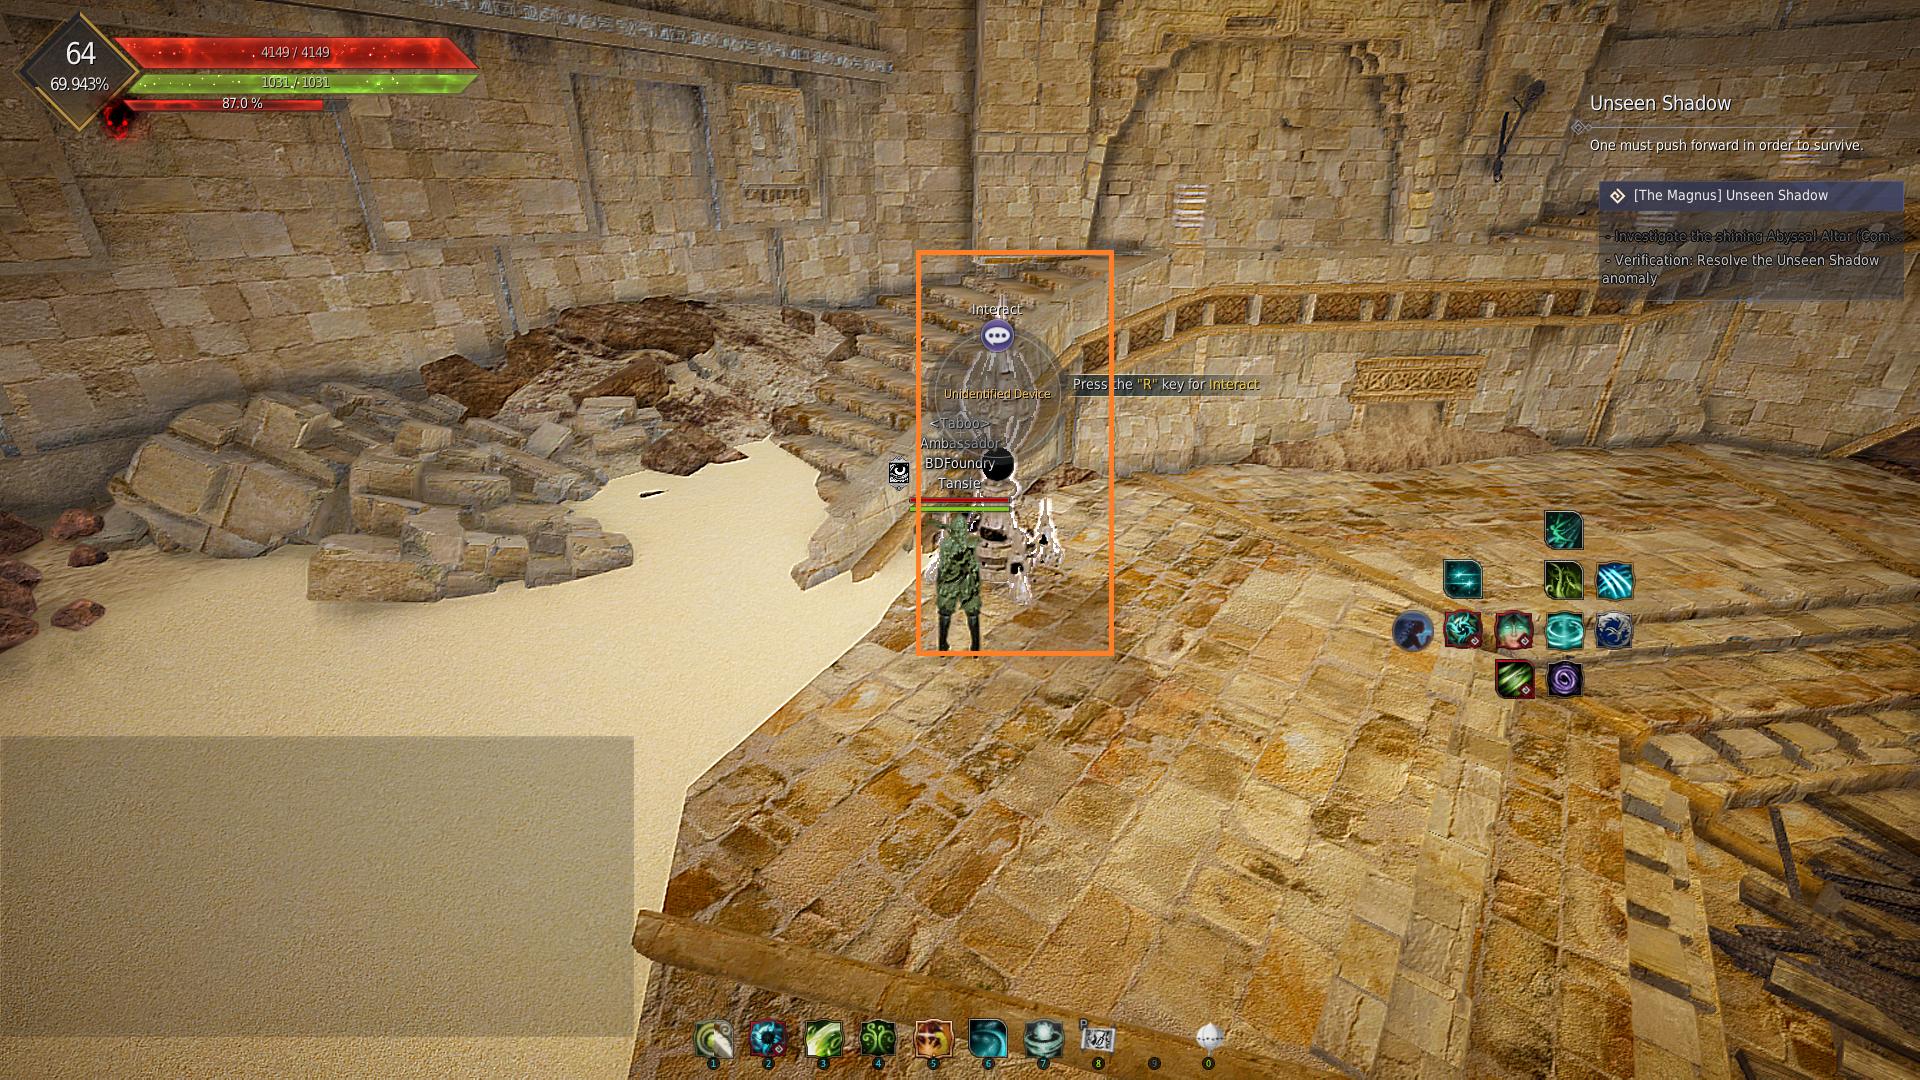

- Make sure your weapon is put away, and sprint all the way up the stairs to the next spire tower.
- Interact with all of the towers on the way up the stairs to make sure the platforms are activated, allowing you to stand on them to move up to the next set of stairs.

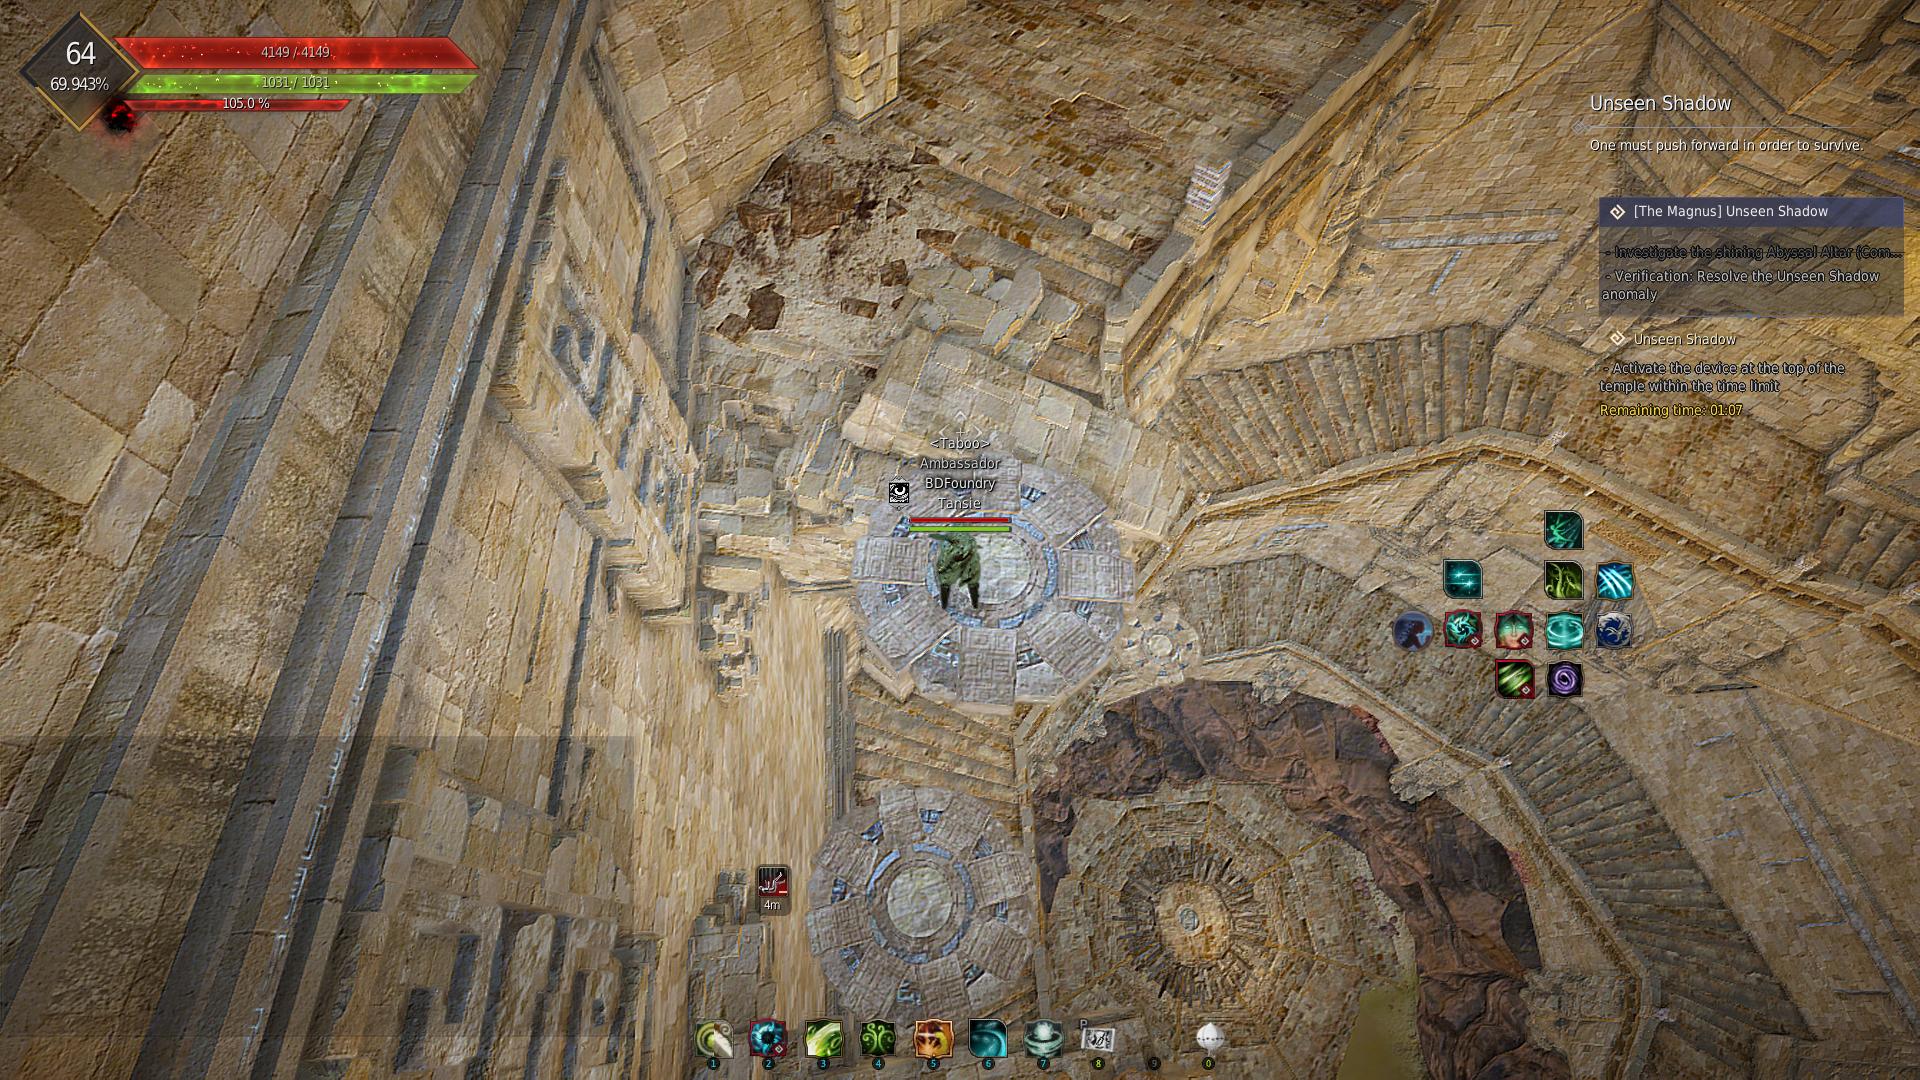
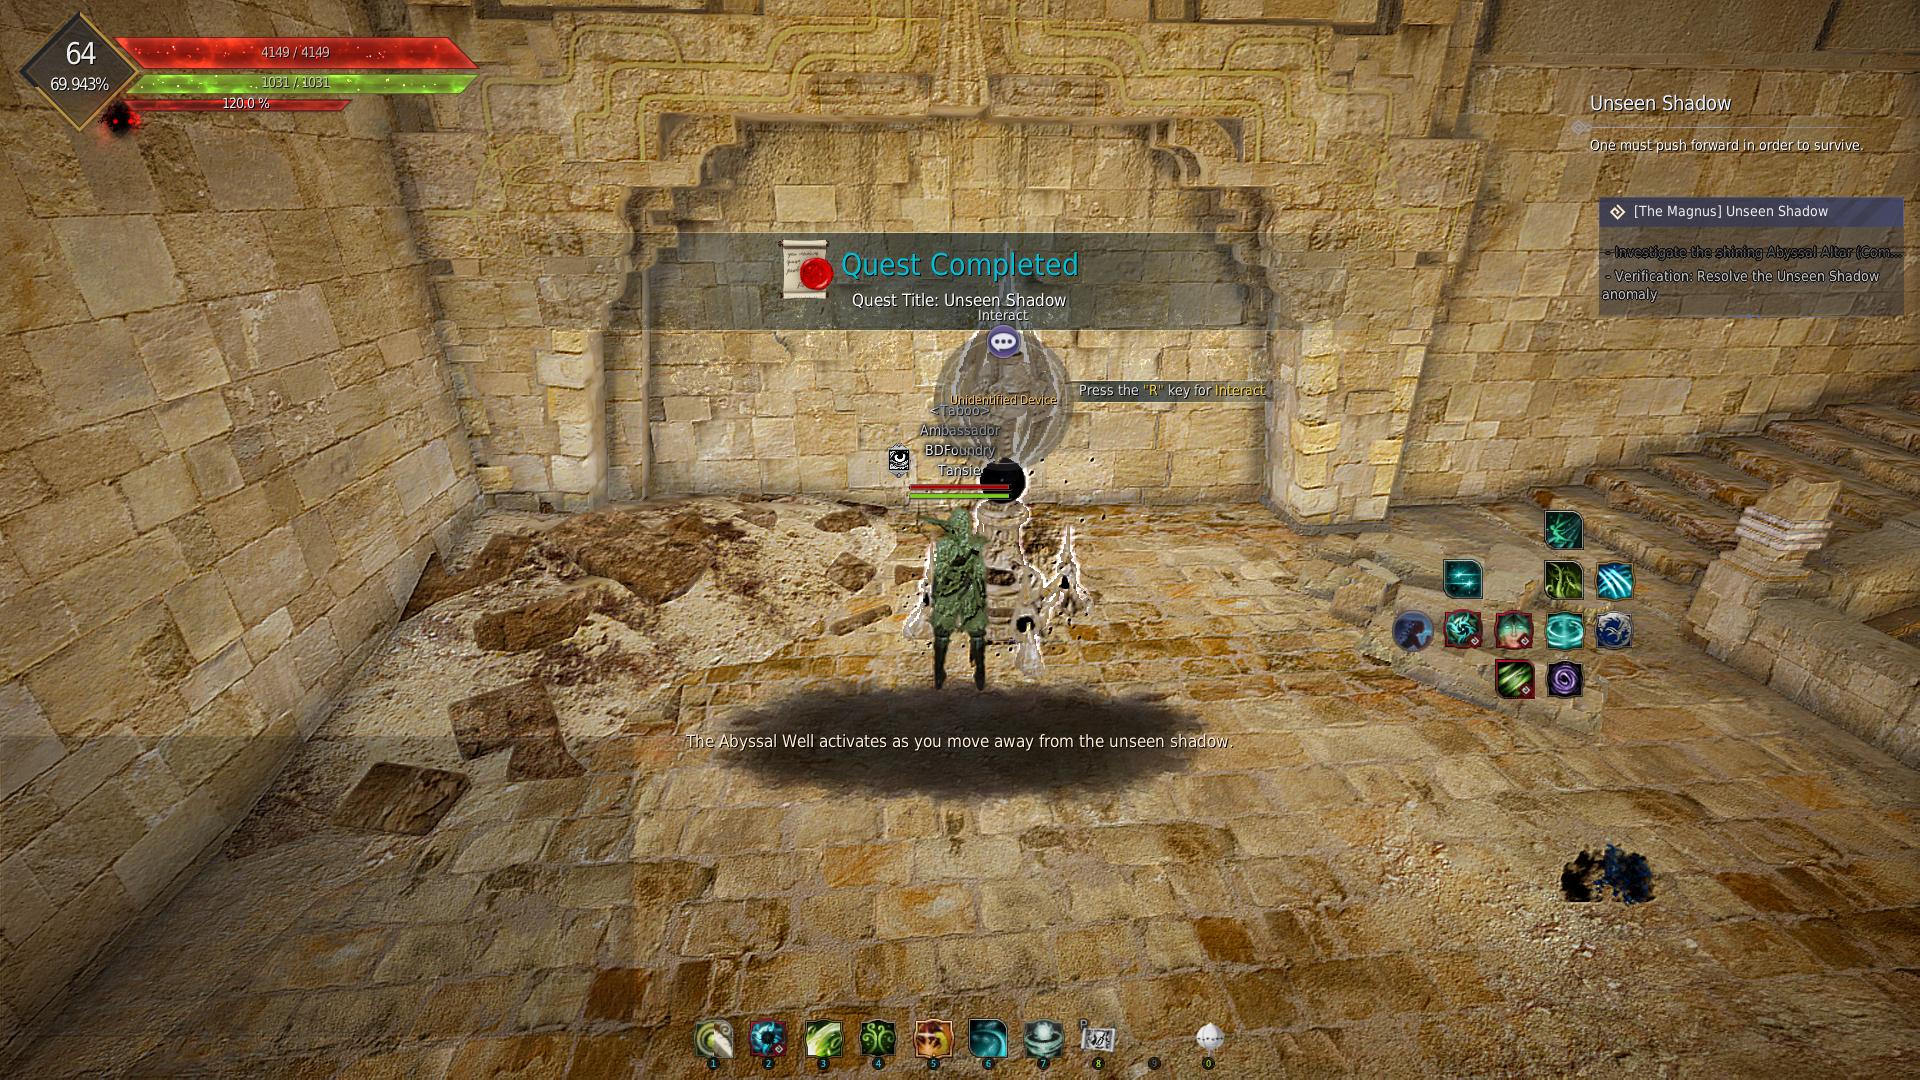
- The timed quest is only complete once you hand in the quest at the very top of the stairs.
- After handing in the quest, use the chat option on the spire to spawn the cat.
- If you fail to get there in time, abandon the quest and jump down to the bottom to try again (no fall damage).
Netherworld Registery Institute
- For the 3rd puzzle, talk to the man in the center of the room to first obtain the quest.

- There will be different objects around the outside walls of the room. Interact with the different objects.
- A popup quest objective will appear when you interact with the correct objects.
- After interacting with the 2 correct objects, go back to the NPC to hand over the items.


After completing the 3rd and final puzzle, go to the Abyssal Vein to complete the final quest and unlock teleportation to Land of the Morning Light.

Knowledge
- Most of the knowledge can be obtained through the main Magnus story quest
- However, there are a few additional entries to collect after the mainquest, which will finish the Adventure Journals (under H > Adventure Journal > Abyss One: The Magnus Journal)
- Completing both of the adventure journals will give you 2 energy
- ※ You must interact with the NPCs on the character who completed the Magnus main quest. If you go to another character, the NPC will not be visible.
- One of the knowledge entries in the Adventure Log II can only be completed by finishing the Magnus quests on both a Warrior class and another class – this knowledge isn’t required for the energy
First go to the Calpheon Library (autopath to Annolisa Rosie). Go round to the south side of the library on the bottom floor and you will find Eileen and Gorgath. Interact with them to receive and complete a quest which will give you the missing knowledge
Next go to Velia Wharf and you will find Yeonhwa on the dock standing nearby Criox the Wharf Manager
Next you can find Jordine in Serendia near Southwestern Gateway (west of Glish). He is hiding down in the valley between the rocks.
Finally the last NPC is Goyen. He is found in the highest building at Kusha in Mediah. Interact with Goyen to recall the final cutscene from the story! (Don’t worry you can skip it with ESC this time)
There is also some extra knowledge you can obtain from inside the Magnus.
- Before going into the Magnus, press “P” and go to the “Title” tab.
- Search “Snot” (case sensitive) and apply the title “Snot-faced Wuju”

Now enter the Magnus through a nearby portal, go up the stairs and talk to Wuju. He will have 2 knowledge entries for you.
The next knowledge can also be found near Wuju. Interact with the orb named “Magnus Power Engine” and spend 5 energy to receive the knowledge.



Not mentioned on the page but fwiw and for anyone using ctrl+f to find it: you unlock Valencia remote storage after Beneath the Surface – there’s a couple quick quests in Abyss One after, but as far as actual anomaly quests go. Also, it’s called a Thief Mole not Ferocious Mole – at least currently in March 2026
For the quest “Unseen Shadow” you can get to the top of the stairs by using only two towers. The two towers are located on platforms that are before broken stars and the elevator disc spawns on the right side of the platform.
For the Quest “The Girl Who Lost The Sea” I couldn’t see the ball of light at first. Until i increased the Effect opacity to 100. for those who cannot see the ball of light guidance.
Perfect! Thank You!