Originally Published on 16th February 2016
Last Updated on 26th February 2018
This guide is intended for new players to answer some of the most commonly asked questions and go into the basics of some of the features in Black Desert. If you’re looking for more in-depth guides, check out our guides list. If you are still left confused or have additional questions which are not covered in this guide, comment below or leave a topic in our forums under “Help & Support” so we can not only help you, but help others who may be looking for the same answer. You can also join our Discord channel for help and useful links, as well as all BDO news, night alerts, boss alerts and golden bell alerts.
If you are a completely new player, you may want to level to 56 by questing and when you go AFK, set your character to train stamina. It’s important to take your time at the beginning because the game is very overwhelming. I only recommend rushing to level 56+ if you have friends to help you learn the game, or if you really want to push to be competitive and this isn’t your first MMO.
New Players
Introduction to the UI
Leveling
What are these stats and how do I increase them?
What professions are there?
Where do I get my first horse?
Mounted Combat
What are Exchange items?
Introduction to Knowledge and Vigor (Energy)
Introduction to Contribution, Nodes, Housing and Workers
Introduction to Enchanting
Why do I need an alt?
What can I do whilst AFK?
How do I make money?
How does party grinding work?
What are the best things to buy from the Pearl Store?
What is the Mileage Store and Achievements/Rewards?
Other Tips
Other Common Questions
Class Specifics
Choosing your Class
Which Class should I play whilst I wait for new classes?
Armor, Weapons and Accessories
Future Content
Media
Valencia Part I
Valencia Part II
Valencia Part III
Kamasylvia
Other
Useful Links/Resources
New Players BACK TO TOP
Introduction to the UI
Common Controls
Movement: Forward [W], Left [A], Backwards [S], Right [D], Jump/Climb [SPACE], Crouch [Q] (Q again to stand, SPACE to crawl, SHIFT to roll), Sit [Q] against something, Lean [S + Q]
Shortcuts: Black Spirt [,], Inventory [I], Quest Log [O], Character Info [P], World Map [M], Guild [G], Knowledge [H], Dyeing [J], Skills [K], Processing [L], Friends List [N], Mail [B], Interact [R], Next [F], Autorun [T], Black Spirit Commands [Z, X], Emergency Evasion [V], Help [F1], Crafting Notes [F2], Pearl Store [F3], Beauty Store [F4], Cancel [ESC]
Chat: General [/S, ALT + 1], World Chat [/Y, ALT + 2], Party [/P, ALT + 3], Whisper [/R, /W], Link Items [SHIFT + CLICK]
Screenshot mode: Hide UI [CTRL + U], Move Camera [↑ , ↓ , ← , →], Change Angle [CTRL + ← / →], Blur/Sharpen [CTRL + ↑ / ↓], Rotate [SHIFT + ← / →], Zoom [SHIFT + ↑ / ↓], Alpha Mask [SHIFT + PRINT SCREEN]
How to edit and show/hide the UI
To edit the UI, go to the main menu [ESC] then click “Edit UI” (the button will only show once you complete the tutorial quests). Here you can hide and show different parts or move them around. Just make sure to save! You can also hide all of the UI using [CTRL + U].
How to set an auto-run loop
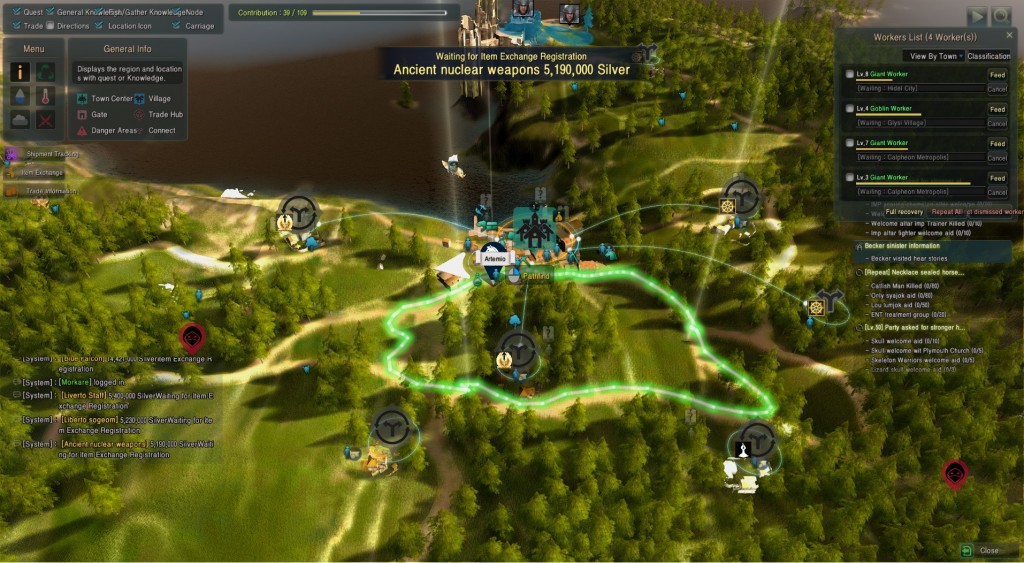
You can use an auto-run loop to make your character run back and forth between two or more points, or in a continuous circle. This can be used to AFK level your stamina, strength, or horse level.
To set up an auto-run loop, open your interactive world map [M], then hold the [ALT] key and right-click the first point of the loop. You can continue to hold [ALT] and add extra points in the route, or end the loop by placing your mouse over where your character is currently standing, then right-clicking whilst holding [ALT]. The loop should turn green when you mouseover your characters position. You can now close the map again by pressing [M] then hold [T] to auto-run.
Magnifying glass
You can use the Magnifying Glass (NPC) next to your mini-map to locate the closest NPC of a certain type and set a path route to them. The types of NPCs you can locate are: Skill Instructor, Repair, Storage, Transport, Stable, Wharf, Guild, Trade Manager, Goods, Weapon, Jeweler, Furniture, Material, Fishing, Cooking, Worker, Marketplace, and Imperial Delivery. You can also serach for the name of an NPC or look through the regions/towns to find the one you are looking for, but you will need to have discovered the NPC first.
You may not start off with the Magnifying Glass and it might only unlock at around level 20.
Leveling
Grinding vs. Questing
Grinding without a doubt is the fastest way to level in Black Desert. However, if it is your first character I highly recommend taking your time to learn the game and following the questline because level 1 – 50 (perhaps even 56) is considered a tutorial to the game. BDO can be very overwhelming at first and unless you are leveling an alt or really want to push for higher level quickly, it’s much safer to just follow the quests. It’s also important to note that there are some quests (Black Spirit quests) which are REQUIRED and very important for your character to complete. The quests give you important things like bag space, knowledge/energy and contribution points. These can be done at a later date but you might end up at level 56 and no idea where to start with it all. That’s why if it is your first character we recommend that you follow all of the quests to 50 and take your time to learn the game.
If you do decide to grind and forget about questing, we have a guide that lists all of the bag space quests. There are also many repeatable quests that will give you the contribution points you lack. It is much faster to grind to level 56 and then go back and do the quests you have missed out on, than to level to 56 by following quests.
Basics to Questing
Quests can be obtained from NPCs or your Black Spirit. You will be notified if your Black Spirit has a quest for you. Important story quests will also be indicated on your map with a little yellow icon with a black [!].
By default, not all quests will show up, only important quests such as story line quests and black spirit quests will be avialble. You must turn on other quests such as life skill quests, by pressing [O] to open your quest log, then click all of the quest type buttons at the bottom, making sure they are highlighted.
If an NPC has a quest for you there will be one of four icons above the NPCs head. If the icon is yellow, it means the NPC has a general quest for you. If the icon is green, the NPC has a profession quest for you. A blue icon indicates that the quest is in progression and a red icon means that the quest is completed and you can now hand it in.
![2015-05-02_9083240[-819_-30_-508]](https://i1.wp.com/blackdesertfoundry.files.wordpress.com/2015/05/2015-05-02_9083240-819_-30_-508.jpg?resize=52%2C50)
![2015-05-03_47727541[-1723_50_578]](https://i0.wp.com/blackdesertfoundry.files.wordpress.com/2015/05/2015-05-03_47727541-1723_50_578.jpg?resize=58%2C50)
![2015-05-02_9093928[-820_-30_-507]](https://i1.wp.com/blackdesertfoundry.files.wordpress.com/2015/05/2015-05-02_9093928-820_-30_-507.jpg?resize=51%2C50)
![2015-05-02_9361791[-820_-30_-509]](https://i0.wp.com/blackdesertfoundry.files.wordpress.com/2015/05/2015-05-02_9361791-820_-30_-509.jpg?resize=54%2C50)
Once you have your quest, you can open your Quest Log by clicking [O]. Here you can abandon, set a route to the target or view quest information and rewards. You also have a mini quest tracker just under your mini-map where you can hover over a quest to see this information and use these controls.
Quests may reward you with items, equipment, inventory space, vigor, contribution points, XP, or silver. You can also unlock additional quests by gaining high amity with the NPC (using Story Exchange).
There are 4 types of quests:
- Kill quests – These quests require you to kill a certain amount of monsters in the area(s) marked on the map, the number is usually at least 10 and can go as high as 50. These quests may also require you to kill 3 or 4 different classes of the same monsters, such as warriors, mages and soldiers. They may require you to kill monsters for a certain “item drop”. You don’t have to loot to obtain the item needed to complete the quest, and the item does not appear in your inventory or take up any space in your inventory.
- Knowledge quests – These quests require you to keep killing the monster until you gain “knowledge” of them. This can take a very long time to complete because it is totally random when you gain knowledge.
- Collection quests – These quests involve going to an area on the map and collecting an item. These quests can be quite unique and have different requirements. Some examples include collecting wild herbs in a field, using a fruit basket to collect a tamed raccoon or moving a trade pack.
- Escort quests – These quests are quite rare and involve escorting an NPC to another area, whilst battling monsters and keeping them safe. These quests are quite simple and easy to complete.
What are these stats and how do I increase them?
You have 3 different types of stat that you can level. These are stamina (breath), strength and health. Leveling these are very important on Black Desert and it’s important to note that these stats do not share across your characters. To read about each in more detail, check out our Stamina & Health guide or Weight Limit guide.
Stamina (breath)
Leveling your stamina will increase your maximum stamina so that you can sprint for longer and use certain skills more before being drained. These skills are: kicks, dodges, jumps and blocks. To level your stamina, all you need to do is move your character. It doesn’t matter if you walk, run or sprint, each time you move a certain distance you will gain experience towards leveling your stamina. The “softcap” level for stamina is 30 and the hardcap is 50. Having a stamina level of 30 will give you a total of 500 extra stamina. Some people recommend that you don’t use a horse whilst leveling so you are force to run everywhere and will level your stamina quickly. You can also level this whilst AFK by setting up an autorunloop.
Strength
Leveling your strength will increase your maximum weight limit, which increases the amount of weight you can carry, and in-turn the amount of items you can carry. To level your strength you will need to carry a trade pack and move your character, whilst your current weight is above 100%. This stat isn’t really that worth leveling because it takes too long to level and you can’t really do anything whilst leveling it. This is the stat that I would level last because having higher stamina and health is more important. You can also buy additional weight limit from the Pearl Store and Loyalty Store. The “softcap” level for strength is 30 and the hardcap is 50. Having a strength level of 30 will only give you an extra 40LT. You can level this whilst AFK by setting up an autorun loop, but be careful not to go outside safe zones because there are bandits along the roads which will attack you if you are carrying a trade pack.
Health
Leveling your health will give you bonus health and mana/spirit/energy (depends which resource you use for your class). To level your health you will need to eat food (cooking). The higher grade of food, the more experience you will gain. The “softcap” level for this stat is level 30 and the hardcap is 50. Having a health level of 30 will give you a bonus of 290 health and 200 mana/spirit/energy.
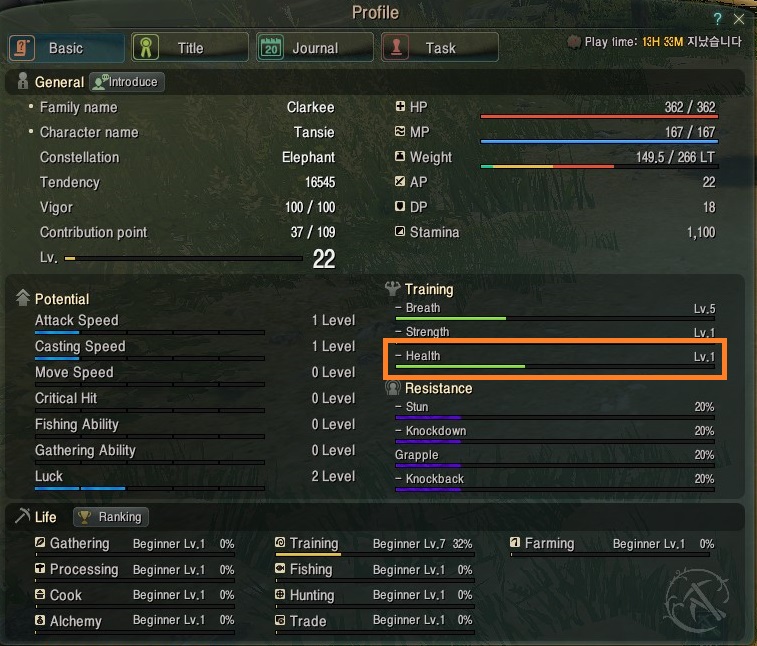
Besides the above stats, you also have various other character stats such as: Attack Power, Defense Power, Accuracy, Evasion, Damage Reduction, Attack/Casting Speed, Luck, Movement Speed, HP Recovery, etc. These stats are dependent on your gear, crystal sockets, level and some buffs.
What professions are there?
There are currently a total of 10 professions. Each one has separate life experience and can be profitable in different ways. There are a total of 6 profession ranks which determines how skilled you are in your profession. In order of lowest to highest, these ranks are: Apprentice, Experienced, Professional, Artisan, Master, Degree. In each rank there are also 10 levels. For example, you may be Professional Lv.10 then when you level up you move to Artisan Lv.1 rank. You do not have to specialize in one particular profession, it is possible to become Degree in all professions if you put in enough time. There are also different costumes for each profession which can be worn to increase your profession level.
Gathering [Consumes energy]
Gathering is the process of collecting materials for processing, cooking/alchemy, crafting or selling. It does take up your vigor to gather a material but each time you gather you will earn experience towards leveling up the profession. Higher leveling profession enables you to use better gathering tools (allowing you to gather faster), as well as gathering rare materials such as diamonds or emeralds. You can also gather Sharp/Hard Crystal Shards through gathering and there are no restrictions to who can gather these materials.
You can buy beginner gathering tools from a Materials Merchant. Higher level gathering tools need to be crafted with a tool workshop. There are currently 7 different tools for gathering:
- Axe – This tool is used to chop wood. You can go up to almost any tree, equip your axe, and use [R] to chop the tree down for different types of wood.
- Sap – This tool is used to collect sap from trees or blood from animals. You can go up to almost any tree, or a dead animal, equip your sap tool, and use [R] to collect the material.
- Hoe – This tool is used to harvest plants. You do not need to use this to harvest plants on your own farm. You can also use your own hands to gather plants but you will be much less likely to collect a rare plant. Go up to almost any bush/plant, equip your hoe, and use [R] to collect the plant.
- Knife for Slaughter – This tool is used to collect meat from animals. Go up to almost any dead animal, equip your knife, and use [R] to collect the meat.
- Knife for Tannery – This tool is used to collect skin/fur from animals. Go up to almost any dead animal, equip your knife, and use [R] to collect the skin/fur.
- Pickaxe – This tool is used to collect ores or gemstones. You can go up to almost any mining node, equip your pickaxe, and use [R] to collect the material.
- Empty Bottle – This tool is used to collect water from rivers, ponds or lakes. You must be standing in the water, right-click the empty bottle to begin gathering water. You can also tick the box under the loading bar to continue gathering. You must have 2 inventory slots free or you cannot gather.
- Shabby Shovel – This tool is used in the Valencia desert to collect various materials such as ores and also Bags of Muddy Water. You must be in the Valencia desert, right-click the shabby shovel to begin gathering water. You can also tick the box under the loading bar to continue gathering. You must have 2 inventory slots free or you cannot gather.
Processing
Processing is the profession for crafting raw basic materials. These materials may then used for more complex crafting, in cooking/alchemy recipes or various other uses. You can open the processing window at any time by pressing [L]. From here you can do various actions to materials to create something else. There are several different actions such as Shaking, Grinding, Chopping, Drying, Filtering, Heating, Simple Alchemy, Simple Cooking, Imperial Cuisine, Imperial Alchemy, Manufacture. You can combine up to 5 different materials and use the actions to turn them into a completely different product. It’s important to note that if the action is not available on a particular material/combination of materials, you will not lose your materials.
Cooking
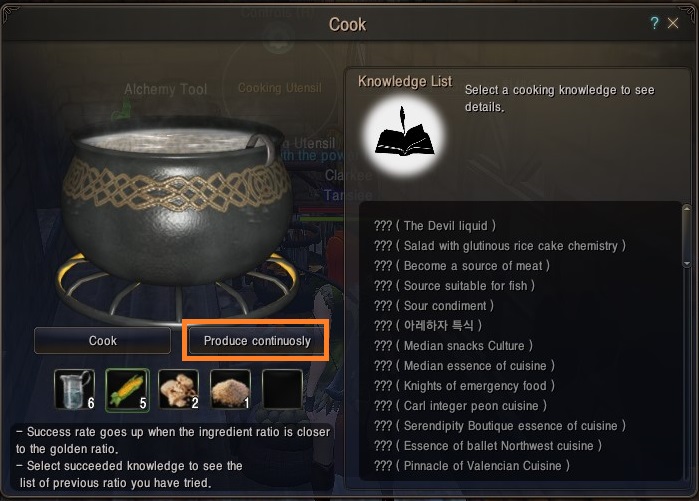
Cooking is used to create different foods and drinks. To begin cooking, you will need a basic Cooking Utensil which can be bought from a food merchant for 1,000 silver. You can also craft them using a Tool Workshop. Once you’ve acquired a Cooking Utensil, you will need to place it inside a house to use it. After this has been done, use the stove by pressing the [R] button and add the ingredients you wish to cook. Even if the recipe is wrong, you will lose your materials. You can also mass produce a particular item if you have enough ingredients.
Higher cooking skill will enable you to create Imperial Cooking packages. These are created using the Processing profession, but will require food created with the Cooking Profession. You can then deliver these packs to an Imperial Crafting Delivery NPC to earn high profits and Golden Seals (Cooking), which can be exchanged for rewards.
Check out our Cooking guide or recipes list for more details.
Alchemy
Alchemy is used to create different various items, such as elixirs, crystal sockets and alchemy stones. To begin alchemy, you will need a basic Alchemist Tool which can be bought from a potions merchant for 5,000 silver. You can also craft them using a Tool Workshop. Once you’ve acquired a Alchemist Tool, you will need to place it inside a house to use it. After this has been done, use the tool by pressing the [R] button and add the parts you wish to use. Even if the recipe is wrong, you will lose your materials. You can also mass produce a particular item if you have enough materials.
Higher alchemy skill will enable you to create Imperial Alchemy packages. These are created using the Processing profession, but will require elixirs or other items created with the Alchemy Profession. You can then deliver these packs to an Imperial Crafting Delivery NPC to earn high profits and Golden Seals (Alchemy), which can be exchanged for rewards. Higher alchemy skill also enables you to begin creating Alchemy stones. These can be equipped to give you additional buffs.
Check out our Alchemy guide or recipes list for more details.
Training
The Training profession effects your mounts. Higher profession rank will give your horses more EXP when you are riding them, making it faster to level up a hore with high profession. It will also improve your chances of catching wild horses and you will need to be Apprentice Lv.5 or higher to tame a horse at all.
Fishing
Fishing can be done at any body of water. You can buy a fishing rod at a Fishing Merchant to get started Simply equip the rod then press the [SPACE] button to cast your line. You can then sell any fish you catch at a Trade Administrator. The Fishing profession will effect the rarity of the fish you can catch. Each time you catch a fish you will earn experience towards leveling the profession. At higher profession rank, you will begin to catch blue grade fish or higher. These can be sold to an Imperial Delivery NPC for more profit and Golden Seals (Fishing), which can be exchanged for rewards. You will also need higher fishing profession to use harpoons.
Hunting
The Hunting profession is used to hunt various animals, such as Humpback Whales, Giant Boars, Giant Big-Horned Deer and Crocodiles. You must use a hunting rifle, which you can craft using a Tool workshop. Higher profession will allow you to use the better hunting rifles which deal more damage. Higher damaging rifles will help a lot when hunting harder monsters such as the Blue Whale and Fugitive Khalk. Some cooking recipes use Whale Meat which can only be collected by hunting the Blue Whale and some elixirs use the items dropped from Fugitive Khalk.
Trading
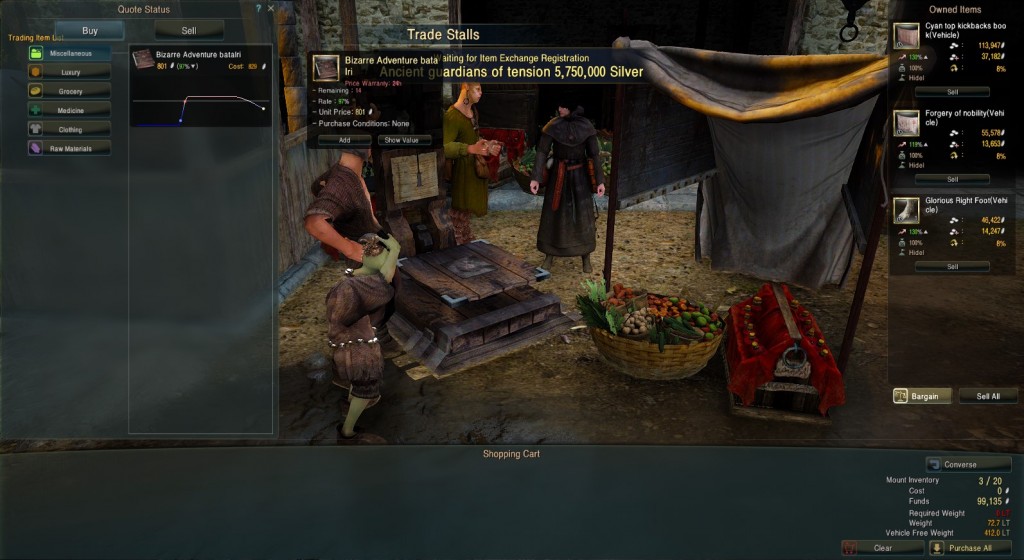
The Trading profession involves buying (at a Trade Administrator) or crafting trade packs, then transporting them and delivering them for a profit. To transport the trade pack, you can carry them yourself, use a donkey/horse, wagon/boat, or the Warehouse transportation. There are bandits along the roads which will attack you if you are transporting a trade pack. You also have to make sure the nodes are connected to make a profit. At the beginning, you are only able to transport items between a few towns, but once you reach higher profession rank, you will unlock higher quality items and can also start transporting Imperial Trading packs and Illegal Trading packs.
Imperial Trading works the same way as normal trading but isn’t always available and actually occurs at random times in the game. When Imperial Trading is available, normal trading goods may have a notice next to them (eg. Serendia) indicating that they are available for Imperial Trading in that area. To partake in Imperial Trading, purchase the marked items and deliver them to the town specified in the notice. It’s important that when you arrive, you need to sell the pack to an Imperial Delivery NPC, not a Trade Administrator.
Finally, the last kind of trading is “Illegal Trading”. These packs are only available from an NPC which spawns between 10PM and 7AM. You must be professional rank or higher to purchase the items. The packs cost between 30,000 to 100,000 silver and weigh about 300LT. When you buy a pack you will be marked as an Illegal trader, with a bright red icon above your head. You will also be flagged for PvP and once you sell the item you will lose 5000 karma (per item). You may make between 50,000 and 100,000 silver for each pack you hand in. It’s important to note that even if you die with a trade pack, you will not lose it.
Farming [Consumes energy]
The Farming profession is used to grow crops on your private farm. You can rent a farm from a materials merchant for the price of contribution points. You can then place the farm almost anywhere which is flat and not in a safe zone. You will need to buy seeds from a seed merchant, or gather them from various crops and then place them on your private farm to grow. There are lots of different types of seeds and you can also use haystacks or chicken feed to gather milk and eggs.
You must check up on the farm using your map to see if the crops need tending to. Scarecrows and Waterways can also be placed on your farm to decrease the amount of time you need to spend tending your farm, and increase the quality of your crops. You can also use fertilizer to decrease the amount of time it takes your crops to grow. Workers can be used to also tend to your farm for you but you will not gain any farming EXP. Farming is very easy to get into but more maximum efficiency I’d recommend reading our Farming Guide which will teach you things like farm placement and tending to your farm.
Higher farming profession will reduce the energy cost when tending to your farm and will also reduce the time it takes to tend to your farm.
Sailing
The sailing lifeskill can be leveled by sailing an Epheria Sailboat, Epheria Frigate or Guild Galley through the Margoria Sea, Vadabin Sea or Juur Sea. Currently the fastest way to level your sailing lifeskill is by completing the daily quest from Sihuram at Port Ratt. You must deliver a quest item to either Velia, Epheria, Ancado or Altinova depending on which of the daily quest you decide to do. You can only do one of them and I would advise on taking the Ancado quest because it gives the most EXP due to the distance you are travelling. I would advise on sailing to Epheria then getting on your horse to travel the rest of the way. The daily quest does not require you to use or have one of the Margoria ships and you can take the ferry instead. As well as this you also should be doing the other sailing dailies that require you to kill sea monsters.
You will need a certain level of sailing skill to use special skills. Skills also use up your ships power stat and are only available on the Epheria Sailboat, Epheria Frigate and Guild Galley.
| Sailing Skill | Skill Name | What it does | How to use it |
|---|---|---|---|
| Beginner 1 | Ram | Travels forwards for 5 seconds and rams into targets to damage them. Stops the ship for 2 seconds afterwards. | Q |
| Apprentice 1 | Power Accel. | Use whilst the ship is standing still to quickly accelerate for 8 seconds then return to the ships maximum speed. | SPACE + W |
| Skilled 1 | Breezy Sail | Accelerate the ship for 10 seconds then returns the ship to it’s maximum speed. | SHIFT + W |
| Professional 1 | Swift Retreat | Quickly reverse the ship | S |
| Artisan 1 | Abrupt Turn | Quickly turn on the spot | S+ A/D |
| Master 1 | Smooth Turn | Quickly turn whilst moving | A/D |
| Guru 1 | Bullseye | Shortens cannon reloading time | Passive |
Where do I get my first donkey/horse?
You can get your first donkey from a level 15 – 17 quest in Velia Town at the NPC “Igor Bartali”. Talk to him by pressing “R” then accept and complete the quest. As a reward you will be given an emblem which you give to a stable master in exchange for a donkey. Talk to the stable master and select “Stable” then “Register Item”. Right-click the emblem in your inventory and enter a name for your donkey.
You will not be given a horse from questing and must obtain it by other means:
- Buy a beginner horse from a stable master for 15,000 silver. Talk to the stable master and select “Shop” then choose between a brown or grey horse emblem and register the horse.
- Tame a wild horse. To tame a horse you will need to level your “taming” skill beforehand by riding and leveling up your donkey. (More details on horse taming).
Once you have your first donkey/horse, you can take it out of the stable by talking to the stable master, going to “Stable” then clicking the icon of your mount and selecting “Take mount”. The mount will appear next to the stable master and you can then mount it by pressing “R” closeby. As soon as you take your mount out of the stable, an icon will appear in the top-left underneath your progression bar. You can left-click this icon to call the mount to come to you (short distance) or right-click to show it’s location on the map.
There is no way to desummon/summon a mount. You can put them back in a stable if you don’t want to use it. It’s also important to know that your donkey/horse has a health bar, and can die if you leave it near monsters, if it drowns or falls off a cliff. You can resurrect it at a stable master but the deaths do effect your horses and each time it dies it will cost more and more. There is also a stamina bar which will lower as you use your mount. When it hits zero stamina, your mount will become significantly slower. You can replenish stamina by feeding your mount carrots, which can be bought at a stable master.
Mounted Combat
You can use some of your skills whilst on a horse. To do this you will need stirrups, which can be bought at a stable master for 10,000 silver. Stirrups are unavailable at first from the shop but you can unlock them by building your relationship with the NPC to 100 amity. For details on how to do this, click here. You can also buy stirrups from the marketplace or craft them yourself.
Mounted Combat is quite tricky to control at first but it just takes practice to get used to. Some skill combos will change when you are on your horse, you can look at the combo by pressing “K” to open your skill window, then hovering over the skill and it should say the combo followed by “while on horse”. Mounted Combat is not availalbe with awakening skills or if you have a second person riding your horse.
What are Exchange Items?
Exchange items are loot drops you get by killing monsters, opening bags and leftovers from cooking/alchemy. You will always earn more silver by handing them in to the Exchange NPC instead of just selling them to a vendor. Exchange NPCs may give you sums of silver, profession experience, Black Stones, equipment, etc. To find where to hand in any exchange item, you can right-click the item in your inventory and then click “NPC Location”. This will show you a route on your map to the closest NPC. It will show the point of the other NPCs on the map with a light beam, but will not set a route to them.
Introduction to Knowledge and Energy
Knowledge
Knowledge is the information you learn whilst playing the game. Knowledge is shared across your family and you can view your knowledge at any time by pressing “ESC” to go to the Menu then “Knowledge” or by using the hotkey (H) to open the interface directly. There are several different types of knowledge you can learn about and some can be used as topics in the Story Exchange. I would advise reading our Knowledge & Energy guide for a more detailed explaination because it is very complex.
Types of Knowledge:
- Character – discovering different NPCs by talking to them. Some NPCs can only be unlocked by gaining knowledge of a different NPC first.
- Topography – discovering nodes on the map and points of interest. As you travel around the world you will discover new areas and reveal them on your map. Some nodes can only be discovered by talking to the “Node Manager” and buying the knowledge of the node with your energy
- Ocean – discovering islands and points of interest in the ocean. As you travel around the world you will discover new areas and reveal them on your map. Some nodes can only be discovered by talking to the “Node Manager” and buying the knowledge of the node with your energy
- Ecology – discovering monsters. The health bar of a monster will not appear until you earn knowledge of the type of monster. There are different ranks of knowledge (C, B, A, A+, S) and each rank gives points which goes towards increasing your passive item drop chance percentage. Each time you kill the monster you have a random chance of learning knowledge about it or increasing your knowledge rank on that particular monster. Higher ranks of monsters will enable you to kill them easier and the “S” rank will give you a higher drop rate for that particular monster. You can reset your knowledge, at the Calpheon Library or turn it into a bookshelf to place in your home for extra interior points.
- Adventure Journal – discovering various things related to your quests and journey through the game. These can be discovered by talking to an NPC (some require amity), interacting with an object, or the knowledge might be locked behind a long questline reward.
- Academics – discovering knowledge by interacting with books or speaking to NPCs.
- Life Skill – discovering knowledge that is linked to professions. These do not reward you with an energy but there are some “certificates” you must unlock to be able to do further crafting and processing actions.
- Learning the Ropes – discovering knowledge by completing tutorial quests throughout the game. This section currently doesn’t have any rewards for completing it.
- Trade – discovering knowledge when collecting various trade materials. This section currently doesn’t have any rewards for completing it.
Energy
Energy increases as you gain new knowledge. It can be used for various interactions in-game such as:
- Greeting NPCs
- Stealing from NPCs
- NPC Tutorials (Adventure Journal)
- Story Exchange
- Node Investment
- Gathering
- Farming
- Speaking in World Chat
- Hiring Worker Contracts
- Night Vendor
Your Energy will regenerate automatically over time (1 energy every 3 minutes). Completing quests may restore your energy as part of the reward. You can also sleep in a bed to regenerate your energy at a faster rate. Beds are obtainable in-game (craft-able, bought from NPC, etc.) will give you 2 energy every 3 minutes, whilst Pearl Store beds will give you 3 energy every 3 minutes.You can also use a Kamaslyve Blessing to give you 3 energy every 3 minutes.
There is also an NPC in velia called “Alustin” who will convert your energy into potions to use at a later date or sell on the Market Place. For more information on this check out our Knowledge and Energy guide.
Introduction to Contribution, Nodes, Housing and Workers
Contribution Points
Contribution Points are a type of currency in Black Desert and are used to invest in a node, purchase housing, or rent items from an NPC. You will always get your Contribution Points back when you withdraw from a node, sell the housing or return the rented items. The amount of Contribution Points you have, and your Contribution experience bar is shown on the 3rd bar in the top-left, next to your character level.
Contribution Points are primarily earned by completing quests. Most quests will reward you with experience towards earning a Contribution Point and there are lots of daily quests which will give you experience as well. You can also earn Contribution experience when you turn in certain exchange tokens.
Nodes
Nodes are locations on the map. You can connect nodes using Contribution Points, to give you bonuses such as more loot drops, or higher profit when trading. You can also send workers to the nodes you connect, to collect resources used for crafting.
There are two different types of Nodes: Adventure Nodes and Production Nodes. Adventure Nodes are locations such as towns, cities, gateways, trade posts, etc. Whilst Production Nodes are forests, mines, farms, etc. Production Nodes are the locations which you send your workers to and it’s important to note that you must invest in the Adventure Node AND the Production Node.
To connect nodes, you must start from Towns or Cities you have discovered and then work your way outwards. If two nodes can be connected, you will see a white line between them on your in-game map (M). Go to the Node Manager NPC at the node you would like to connect, then speak to him/her and press “Check Node”. Here you can invest in the node.
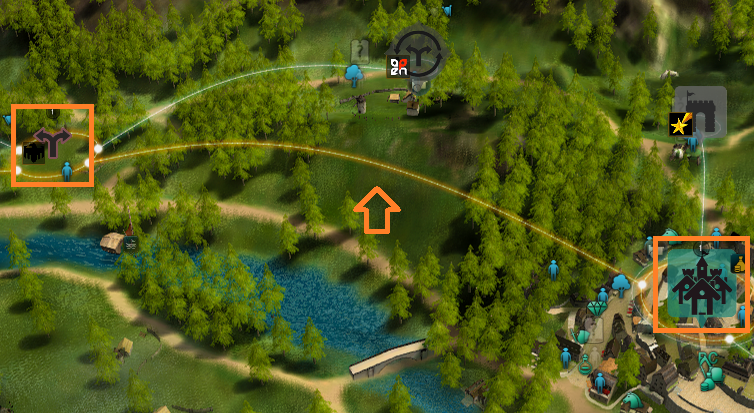
You can withdraw from the Node at any time, or further invest in the node (using energy). Further investing in an adventure node will give you more frequent loot drops, while production nodes will increase the amount of resources your workers gather at the node. You can also invest in Towns/Cities to increase your amity gain in that particalar area.
Make sure you check out our Node Calculator on our interactive map to calculate how many Contribution Points are needed to connect the nodes.
Housing
Housing in Black Desert is half instanced. Meaning every player has the ability to own the same house, but you can go up to the house in the open world and when you go inside the interior will change depending on the owner of the house and how they have decorated it.
Housing is bought using Contribution Points. You can purchase a property at any time by clicking the node symbol to view all of the available housing then selecting a housing icon. You can also purchase housing by going up to the door of the property. Blue house icons are houses that you can purchase, white icons are the houses you own, and grey icons are the houses you need to unlock first. To unlock the houses, you will need to purchase the houses connected to it first.
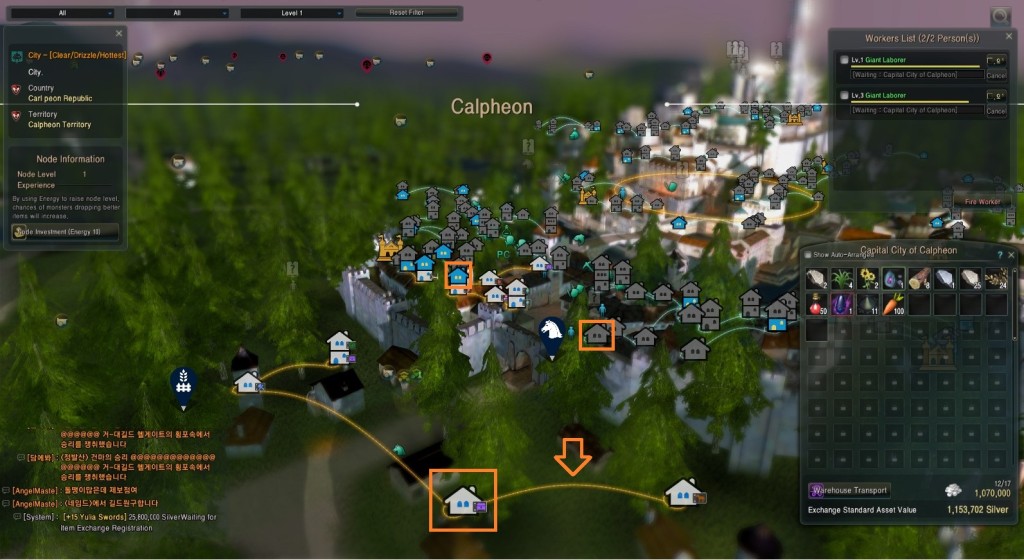
There are several different types of housing which are used for many different things and are controlled by clicking on the property.
Check out our Housing Guide for more information on how to use properties.
NAME |
PROPERTY USE |
MAXIMUM LEVEL |
| Residence | A residence is a player house and can be decorated with furniture. Residences can be bought directly without having to unlock the other properties beforehand. You can only own a maximum of 5 “residences” in the game (but as many properties as you can afford). | 1 |
| Storage | Adds extra storage space to the warehouse in that region. | 5 |
| Lodging | Allows you to hire additional workers | 5 |
| Horse Ranch | Add extra stable space to the stable located at that node. | 5 |
| Refinery | Used to craft Black Stone Powder, Black Stones and Reform Stones | 3 |
| Jeweler | Used to craft accessories | 5 |
| Manos Jeweler | Used to craft Manos accessories | 3 |
| Armor Workshop | Used to craft Reblath, Agerian, Steel Taritas, Talis, Zereth and Grunil armor sets | 5 |
| Carpentry Workshop | Used to craft bows, shields, waterways and scarecrows | 4 |
| Ceramics Workshop | Used to craft pottery, bottles and vases | 3 |
| Costume Mill | Used to craft costumes | 2 |
| Furniture Workshop | Used to craft furniture | 5 |
| Handcraft Workshop | Used to craft various weapons and coral belts | 4 |
| Horse Gear Workshop | Used to craft horse gear | 3 |
| Shipyard | Used to craft different kinds of ships. Margoria ships can only be crafted in Epheria. | 3 |
| Ship Part Workshop | Used to craft equipment for ships | 4 |
| Siege Weapon Workshop | Used to craft cannonballs, traps, barricades, bombs, flashbangs and flares | 3 |
| Tool Workshop | Used to craft gathering tools, cooking and alchemy utensils, fishing rods, fishing floats, anvils and matchlocks | 4 |
| Wagon Workshop | Used to craft wagons | 3 |
| Wagon Part Workshop | Used to craft equipment for wagons | 3 |
| Weapon Workshop | Used to craft various weapons | 4 |
| Crop Factory | Used to craft crop trade crates | 1 |
| Fish Factory | Used to craft fish trade crates | 1 |
| Mineral Workbench | Used to craft mineral trade crates | 1 |
| Mushroom Factory | Used to craft mushroom trade crates | 1 |
| Wood Workbench | Used to craft wood trade crates | 1 |
| Florin Workshop | Used to craft Florin furniture (only available at Florin) | 3 |
| Tarif Workshop | Used to craft Tarif furniture (only available at Tarif) | 3 |
| Arehaza Workshop | Used to craft Arehaza furniture (only available at Arehaza) | 3 |
| Safe Asset Management Bank | You can choose to invest a small amount of silver into this workshop and you may receive the same amount of silver back or a higher amount. | 1 |
| Risk Asset Management Bank | You can choose to invest silver into this workshop and you may receive a much smaller or much larger amount of silver back. Profit is not always guarenteed. | 1 |
Workers
For an in-depth guide on using workers I recommend checking out our Workers Guide.
Workers in Black Desert are used to collect resources so you don’t have to spend your own time and energy. Workers are also used to craft items from the properties you have purchased, such as a refinery or workshop.
To hire workers, you will need to go to a “Worker Manager” and buy a contract. It will cost 5 energy to have a look at a contract and an extra 5 energy each time you continue to browse. Once you have bought the contract, right-click it to hire the worker. You can have a maximum of 3 workers at each town/city, and will need to purchase “Lodging” properties to unlock more space.
To make your Workers collect materials, you must first make sure that the production node is connected to the town/city your worker is in. You can then click on the production node, select the worker and then “Start Work”.
To make your Workers craft something for you, you must buy the property first then open your property interface in your world map and select the material you would like to craft then click “Production Management”.
It’s important to note that all materials, collected or crafted, will go straight into your warehouse storage. You must also place the required crafting materials in your warehouse for your workers to use, beforehand.
Workers have a level, grade and various stats which effect the way they work and some workers may be better at different jobs. Check out our full workers guide for more information.
Workers also have a hunger bar and each time you make your worker do a task, their hunger bar will drop. To refill their hunger bar, you will need to feed your worker. The cheapest worker food you can craft is beer, check out our recipes list for the ingredients.
Introduction to Enchanting
We’re going to keep this section fairly basic, if you would like to read more details on enchanting you can check out our in-depth Enhancing guide. We will not be covering the follow topics: enchanting titles, enchanting accessories, enchanting horse gear/wagon parts/ship parts, enchanting past +15.
To begin with enchanting, you will need an item known as a “Black Stone”. These are used to enchant various items (armor, weapons, fishing rods, horse armor, boat pieces, wagon pieces, hunting rifles, etc.) and will increase the attack power (AP), defense power (DP), or other stats, such as critical chance, movement speed, luck, etc.
![]() Black Stone (Weapon)
Black Stone (Weapon)
![]() Black Stone (Armor)
Black Stone (Armor)
To enchant something, call your Black Spirit by pressing “,” then select “Enchanting”. Select the piece of equipment you would like to enchant and then the Black Stone, and click “Enchant”. You can “safe enchant” some items, meaning that there is a 100% chance of success. You can “safe enchant” up to, +5 for armor and +7 for weapons. You can enchant past this and up to +15 but there will be a chance of failing each time. If you fail to enchant, you will lose 5 maximum durability on your item, meaning you will have to repair it at a blacksmith more often. You will also gain a fail stack which will increase your chances of success next time you enchant and will be consumed when you succeed. There is a way to force a safe enchant but it will cost a lot of Black Stones and will reduce the maximum durability by a fixed amount (our enchanting guide has all of the statistics).
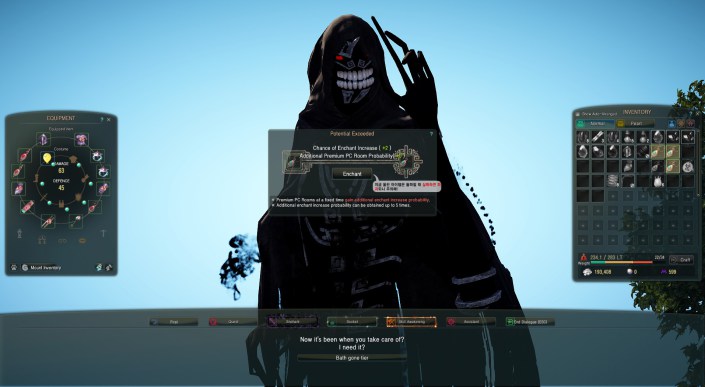
So how do you increase the maximum durability again? You will need the same item to consume in order to repair your enchanted gear. You then go to a blacksmith and click the “Repair” option and then “Maximum Durability recover”. Place the two items in the slots by right-clicking them in your inventory, then click “Recover Max Durability” to confirm. This will increase the maximum durability by 10.
You can also extract Black Stones from enchanted gear by going to a blacksmith then click “Extraction” and “Blackstone Extraction”. Right-click the item from you inventory then click “Extract”. This will destroy the item but you will get all of the Black Stones back that you put into the item. Even if you go above the safe enchant and fail you can still get the Black Stones back when you extract them.
Why do I need an alt?
Everyone should have as many alts as possible in Black Desert.
Characters in the same family share the following:
- Family Name
- Warehouse Storage
- Maximum Energy
- Mounts
- Wagons/Boats
- Houses/Properties
- Contribution Points
- Node Investments
- Pets
- Knowledge
- Titles
- Guilds
Not shared:
- Karma
- Current Energy
- Inventory Space
- Weight Limit
- Some pearl items (such as costumes)
Knowing this you can take advantage of having a second character. If you have already completed all the quests on one character, you can do them again for extra contribution points. Having an alt will also technically double your amount of Energy because your maximum Energy is shared across all characters but your current Energy isn’t. Meaning you can log onto one character and spend all of your Energy, then log onto another and still have full Energy on that character.
Armor and accessories are not class exclusive. This means that you can use your best armor pieces on your main character, then transfer them to an alt in the warehouse, and use it with no restrictions. Weapons are class exclusive but there are some weapons, such as daggers, which are used on both the Ranger class and Wizard/Witch.
There are other ways that an alt can be useful, for example, if you are grinding and your pets are hungry, but you don’t have any food left to feed them, you can quickly log over to your alt in town, buy some pet food, feed the pets then log over again. Pets are shared across all your characters and their hunger bar is also shared across all characters.
You can also use your alt to enchant items for you. We touched on it very briefly in our introduction to enchanting, that when you fail to enchant an item you will gain a fail stack that increases your chances of success next time. If you are successful your fail stacks will be consumed. It’s important to stack this up as high as possible to avoid spending lots of silver repairing your items. If you need to enchant another item but don’t want to waste your fail stacks, you can enchant the item on your alt.
What can I do whilst AFK?
Fishing
You can set up your character to automatically fish whilst you are AFK. Buy a fishing rod from a dock manager or fishing merchant and equip it. Go to any river, lake or sea coast then press the “space” key to automatically fish. This will allow you to catch something every 5 minutes (with the starter fishing rod). It is a lot slower than actively fishing yourself, but is a great way to earn some money whilst you are AFK. You can also check the tick box at the top to throw away useless items. Fishing does take up a lot of inventory space so make sure you clear as much of it before you start fishing. Also double check your weight limit isn’t close to being full before you go AFK. You will stop fishing if your fishing rod runs out of durability, you run out of inventory space, or are overweight.
Training Stats
As mentioned above, you can train your stamina (breath) and strength whilst you are AFK by setting up an autorun loop.
Training Horses
You can train your horse level whilst AFK by setting up an autorun loop. Make sure you also tick the box underneath the horse’s health and stamina to auto-use carrots.
Workers
You really should be using your workers to collect materials or craft for you whenever they can, but you can also set them a list of things to do whilst you are AFK. Even if you log out, your workers will carry on with their current job until it is finished, but they will not start work on the next one. (The boss turns his back for one second and they take a break! Typical…)
Processing
Processing can be done for long periods of time because it doesn’t use energy and will carry on until you are overweight or run out of inventory space/materials. You can also buy a costume from the pearl store which allows you to process directly from your storage and this means you can process for even longer.
Sleeping in a bed
If you are low on energy you can sleep in a bed placed in your house to regain your energy faster.
Travelling
If you’re only going to be away for 5-10 minutes, you can set up an autopath to where you need to be and travel in that time. Using an auto path is slower than controlling the horse/character yourself, but if you’re going to be AFK anyway then it’s really useful.
How do I make money?
Grinding is one of the fastest and most reliable ways of making silver but it is heavily reliant on your gear and clear speed. There are other ways to make money and you don’t need to grind all the time. But grinding will also increase your progression on your character in other ways such as level and skill points.
If you are new and between level 50 – 54 then grinding at Helm’s Post or Elric is a great place to grind for silver and EXP. If you are level 54 – 56 then I recommend trying out Sausan’s Garrison and if you are 56 – 58 then you should try Pirates Island or Desert Naga Temple. There are also other places mentioned in our Level 50+ Farming and Grinding guide which have rare accessory drops that can sell for a crazy amount of silver. These places aren’t as reliable for money but if you get lucky you can make a lot of money all at once here.
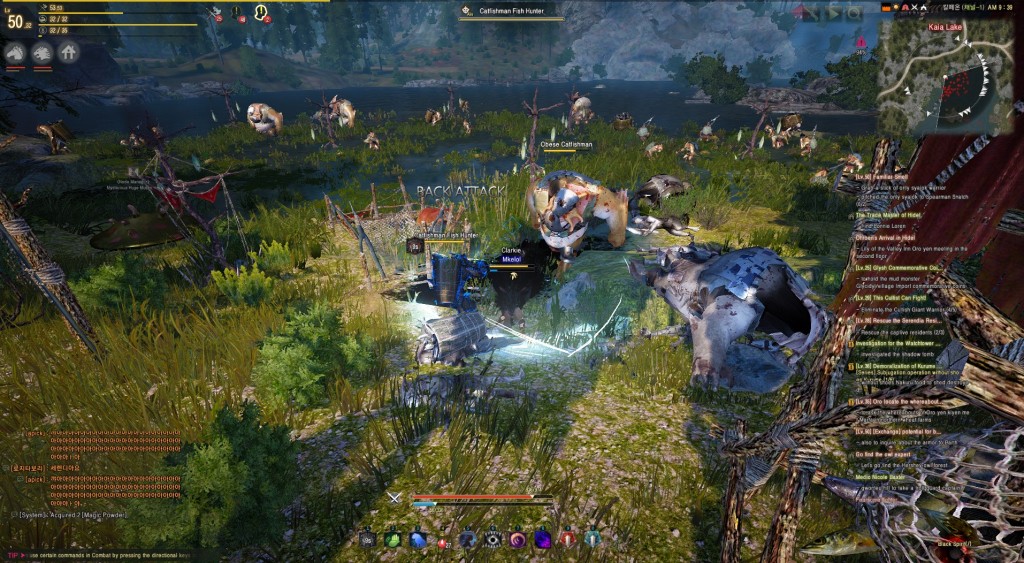
So besides grinding, what other ways are there to earn a bit of cash whilst actively playing? There are plenty of ways to make money and pretty much everything you do will earn you some silver. But here are some of the most popular money making alternatives!
Gathering
Gathering is a great way to earn money but it is limited by the amount of energy you have. You should gather as much as possible between grinding to collect materials for AFK activities such as cooking/alchemy/workshops/processing. Sharp/Hard Crystal Shards also have a chance of dropping when gathering. These are good to sell for profit but you may also want to hold onto them because they are used for enhancing gear past +15. If you don’t know what to start gathering, then Lamb Meat from the Sheep at Lynch Ranch (North West of Heidel) is a good place to start. You may also want to gather Fir for processing because it is a good way to make profit and the logs you get from gathering are highly desirable as well. You can stock pile these to build an Epheria boat, or sell them and make high profit if they go to pre-order.
Savage Rift
Savage Rift is another good alternative to grinding. Each Savage Rift will take a maximum of 20 minutes and there are silver rewards as well as EXP. Savage Rift can get boring however but it is easy and doesn’t require good gear.
Other types of income:
Passive Income (Workers)
Passive income is money you make regardless of what your character is doing. This is basically the money you get by collecting/crafting using your workers. You can sell the materials you earn or further craft them actively or AFK. You should always have your workers running in the background and one of the more popular ways to earn money with workers is to craft Trade crates. I don’t recommend going straight into crafting trade crates because it takes a lot of time to collect the materials and really begin to make money. You will also be lacking contribution points at this time so it’s better to just collect as many materials as possible. Items you should aim to collect at the beginning are Wheat/Barley/Potatoes/Sweet Potatoes/Corn (for cooking beer). You can also collect various alchemy ingredients if you would like to focus on that profession, or collect ores/wood for selling or processing/crafting. It really depends on what professions you would like to develop.
AFK Income (Fishing/Processing/Horse Breeding)
AFK income is the money you make when doing AFK activities. Some of the more popular AFK activies are fishing and processing. Fishing in Kamaslyvia or Margoria is great for earning Relic Shards and will give you a lot of profit if you decide to sell them. Processing wood or metals is also great but harder to get started with because you will go through a lot of materials quickly. The least popular AFK income is Horse Training and Breeding. This is because the results are very irregular and it takes up too much time.
How does party grinding work?
Our leveling guide is possible with party grinding and viable as long as each member pulls their weight.
You can invite another player to your party by typing /invite CharacterName in the chat box or having them whisper you in-game, then clicking their name in the chat box and selecting “invite to party”. Alternatively, if this person is on your friends list, you can invite them from there.
Each member of the party will be shown in the top left corner just underneath your characters level. You will see a “WIFI” symbol next to each members name, indicating how far away they are from you. If the signal is too low, this person will not gain EXP from monsters you kill.
There are multiple party loot options:
- Free for All – Whoever picks up the loot first will keep it
- Ordered – Everyone takes turns to pick up loot and keep it
- Random – Each time loot drops, a random member of the party will be able to pick up the loot and keep it
- Party Leader – Only the party leader can pick up the loot and keep it
As well as the party loot options above, the party leader can set additional options. This is the minimum selling price, and grade (rarity) of the items dropped. If these options are set and activated, all items that fit into the category will go directly onto the “Special Deals Market Queue”. For example, if I set the loot options to grade blue, and a blue weapon drops, this item will go directly into the queue. From here you have 3 options:
It’s important to note that these options will only be available to all party members close enough to the loot when it drops, unless stated otherwise.
- Buy Out – You can choose to buy the item and keep it. If the items costs 10,000 silver, and there are 2 other members in the party with you, each member will be given 5,000 silver.
- Gamble – All members who choose to gamble on the item will roll a dice, the member with the highest number will receive the item in their mailbox.
- Decline – You can choose to decline the offer. If all close-by members decline the item, further away members with a low signal will be given the same options. If nobody claims the item, it will be registered on the “Special Deals Market”
The Special Deals Market is a section in the Item Market (Auction House), where every item is sold for it’s minimum price. If the item does not sell, it will start to drop in price until someone purchases it. The silver earned from items on the Special Deals Market, will be split equally between all of the close-by members at the time the item dropped.
What are the best things to buy from the Pearl Store?
Inventory Space
You will start off with a low amount of inventory space at the beginning of the game. There are multiple quests which will give you extra slots but the more the merrier! Just try not to go too overboard. I’d say that 16 extra slots should be enough to start with. It will make things a lot easier whilst grinding and inventory space is very important for some parts of the game, such as fishing, cooking and alchemy. However, you can buy these in the Loyalty store (see Loyalty section below).
Weight Limit
The weight limit in this game can be very annoying at times and I’d recommend buying some extra weight limit from the Pearl Store to avoid being weighed down (literally). However, you can buy these in the Loyalty store as well with a maximum of 4 per character (see Loyalty section below).
Pets
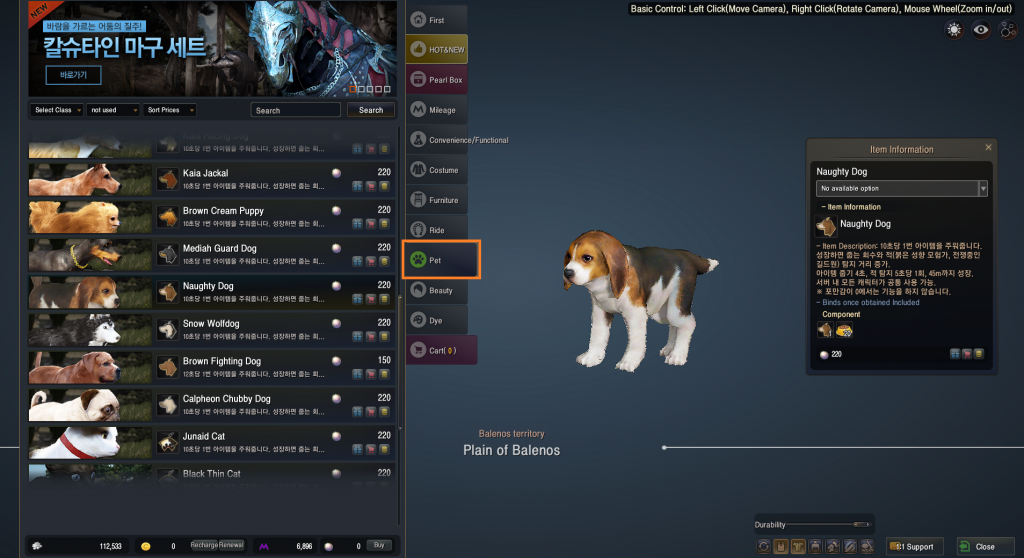
Pets are definitely the best thing on the Pearl Store. Not only are they adorable, they actually loot items for you and make your life so much easier. If you’re willing to spend quite a lot of money on the game then you should buy 3 pets at the very least and a maximum of 5. Each species of pet has different special skills, such as detecting resources, flagged players, and elite monsters. You can also breed the pets to get higher tier pets with other skills that will grant you buffs. Some examples of these buffs are movement speed, AFK fishing speed, experience boost and reduced death penalties. You can check out our in-depth pets guide for pictures of the pets and more information about them.
Underwear
Buying any underwear will give you a +1 luck stat, which permanently increases your drop rate. The underwear is quite cheap to buy and the stat is really useful.
Maids
Maids are used to access your storage or use the marketplace from anywhere. They have some restrictions and a cooldown of 20 minutes, but you can buy multiple maids to get around that. I would recommend going for the storage maid if you are only getting one. But if you have money to spend then having 1 of each and then buying additional storage maids is best. You can check out our Maids Guide for details on how they work.
Tent
The pearl store tent is highly convient and is a great addition if you grind a lot, especially if you grind in the desert. It has multiple uses such as buying potions, repairing gear, storing items and also buying villa buffs. You can place the tent almost anywhere and it saves you a lot of time from not needing to travel. For details on the tent, check out our Tent Guide.
What is the Loyalty Store and Achievements/Rewards?
Each day you log in you will gain 100 Loyalty Points which can be used to buy boss scrolls, EXP boosts, Life Skill boosts, energy potions, and other useful items. To access the Loyalty Store, press (F3) whilst in-game or open the Pearl Store from your main menu (ESC), then go to the “Loyatly” tab.
Achievements/Rewards are earned depending on what you do in the game. This might be for playing over 300 hours, or earning a profession rank, and you can earn some cool rewards. For example, playing over 2000 hours will reward you with a free pet! You can accept the reward or view possible achievement challenges in the rewards window but be aware that the rewards are shared across your account and are a one time use.
Other Tips
- Make sure you learn your skills at a Skill Manager where possible. Otherwise it will cost energy to learn skills.
- Talk to every NPC with a (?) on the map. Talking to them for the first time will give you experience towards increasing your maximum vigor.
- Make use of your energy whenever you can, to avoid wasting it. It should never be full for long.
- Always try to do something whilst you are AFK. Even if you are only going to be away for 5 minutes you can be processing materials or travelling.
- Swap Channels if you are sharing a grinding spot.
- Save pieces of armor for enchanting. For example, if you use Agerian armor and get 2 chest pieces, it’s better to save them both instead of selling one because when you begin to enchant past the safe enchant you will need the spare pieces.
- Save the item “Ancient Relic Crystal Shards”. When you have 5 of them you can combine them to create a boss scroll. To combine them, place them into a + shape in your inventory then click the plus icon on the item at the top.
- Use your boss scrolls in a group to share the rewards.
- Eat food whenever it’s off cool-down to level up your health.
- Use your horse or a wagon to carry extra potions and other heavy items, so that you don’t go overweight and won’t have to go back to town as often. You can even attach your horses to them and level them at the same time.
- Convert silver into gold bars so you can transport large amounts of silver without going overweight.
- Use the filter options (top-right) to filter types of properties on your World Map [M]. This can be really helpful in large cities such as Calpheon or Altinova.
Other Common Questions
Q: I heard player-trading is restricted, is this true and why?
A: Yes it is true. It might seem quite odd that a MMO has restricted player-trading, but the truth is it brings many benefits to the game. It is quite a controversial topic, but restricted player-trading discourages farming bots and gold sellers. We’re sure no one will disagree when we say that this improves your gaming experience completely. Also, if you have friends and want to help them get started, you have to actually go out with them and farm together, teaching them the game instead of just giving them some gear and money. Currently you are only able to trade pots and other low-tier items.
Q: It’s too dark! What do I do?
A: At night and during thunderstorms, Black Desert becomes extremely dark. You can buy lanterns at NPCs, which will light up the area around you when you equip it. By default, you will not be able to see other player’s lantern effects. However, you can change this in your Screen settings.
Q: The health bar doesn’t show when I kill mobs. Is this a bug?
A: It isn’t a bug. The health bar will only show once you have knowledge of that type of monster. Each time you kill the monster you have a chance of learning something about it, once you do the health bar will show. Basically, you need to learn the monsters weaknesses and how it attacks before you will know how to defeat it. Having Knowledge of a monster will also effect how hard it hits you and how quickly you can kill it. Learning knowledge of something will increase your maximum vigor.
Q: At what level can I start to PvP?
A: You can flag for PvP or be PK’d when you are level 50 or higher. To flag up press (ALT) + (C) or click on the sword and shield icon. You may need to unhide the icon in your UI settings.
Q: Are Black Spirit quests compulsory or can I skip some?
A: Black Spirit quests aren’t exactly compulsory but they are very important and some quests will give you weapons and gear, Black Stones, inventory space and EXP. The quests can also teach you how to enchant, craft, recover Black Stones and how to skill awaken. Some of your skills can also only be unlocked once you complete a Black Spirit quest. Once you reach level 50, your Black Spirt will give you daily and weekly quests which are completely optional but will give you boss scrolls and other items such as Black Stones.
Q: Why am I stuck at level 49 with 99.99%?
A: To level up to 50 you have to complete a Black Spirit quest and kill a scroll monster.
Q: Does this game have bosses and dungeons?
A: Yes and no. There are some world bosses as well as solo/group scroll bosses and elite monsters. World bosses do exist and drop the best gear in the game. There are currently no instanced dungeons at all in the game but there is an open world “dungeon” in the game which is basically another grinding spot you can only enter through a portal. For more information on this topic check out our World Bosses and Dungeons guide.
Q: Can other players attack me and steal my trade pack?
A: Other players can attack you and kill you at any time, provided you are not in a safe zone. This includes when you are carrying a trade pack. Dying with trade packs on your person, ship or horse can result in some trade packs being destroyed, but the trade packs cannot be “stolen”.
Q: What is the Night Vendor?
A: The Night Vendor is a merchant NPC which only shows up in certain places at night time. You have to spend energy to see what he has for sale but he can offer items such as Black Stones, shards, and boss gear for 70 – 300% of the item’s market value. Check out our Night/Day Vendors guide for more information on what he sells and where he is.
Class Specifics BACK TO TOP
Choosing your Class
If you still aren’t sure which is the right class for you then hopefully we can help you decide. There is no “trinity” class system (meaning there are no dedicated healers or tanks) and classes are gender locked in Black Desert, but some classes (such as the Witch and Wizard classes) have counterparts. There are currently a total of 16 classes, these are: Warrior, Ranger, Sorceress, Beserker, Valkyrie, Tamer, Wizard, Witch, Kunoichi, Ninja, Musa, Maehwa, Dark Knight, Striker, Mystic and Lahn.
All classes cast skills with either mana, fury or energy but you can replenish each one by using a mana/herb potion. Some skills such as kicks, dodges, jumps, and blocks, will use stamina.
Classes available at launch:
 Warrior
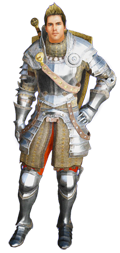
Warriors are the closest class to a typical “tank”. They use a long sword as their primary weapon and a shield as their secondary weapon. The Valkyrie class is the female counter class to the Warrior but Valkyrie has more of a supportive skill set. The Warrior class has some blocks and taunts, but the vast majority of their skill set is offensive attacks. If you’re looking for a high defense class with lots of mobility and damage then we advise learning this class.
Teaser Video – https://www.youtube.com/watch?v=gGu3RAHFqHw
PvP Video – https://www.youtube.com/watch?v=moHR6sOA_K8
 Sorceress
The Sorceress class is a dark magic user with a mixture of melee attacks and ranged attacks. It is a squishy class with a decent amount of AoE skills making them quite good in PvE. They also have high mobility and decent sustain.
Teaser Video – https://www.youtube.com/watch?v=XJmt0LKXyEo
PvP Video – https://www.youtube.com/watch?v=TGGCepPVvYI
 Ranger
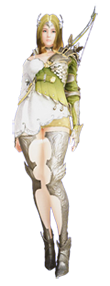
This class uses a long bow as their primary weapon and a dagger as their secondary weapon. The Ranger class has lots of movement and dexterity, allowing you to kite your target and deal damage at long distances. They have high attack damage and have no problem grinding. But they do have low defense and if you are caught out you will most likely end up dead.
Teaser Video – https://www.youtube.com/watch?v=ZiEDwnjgYd4
PvP Video – https://www.youtube.com/watch?v=suwwrI6ihwU
 Beserker
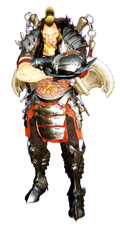
The Berserker class is a melee tanky/bruiser class from the “Giant” race. They are a very chaotic and fun class to play with a unique play style due to their size. Berserkers can wildly stomp, grab and throw enemies with ease. Then when they are finished playing with you, they can deal some serious damage. Their main weapon is duel handed axes and their secondary weapon is an ornament knot.
Teaser Video – https://www.youtube.com/watch?v=cq0rkfAHz-I
PvP Video – https://www.youtube.com/watch?v=w3NVIvFngV8
Valkyrie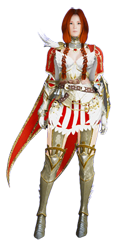
The Valkyrie class uses a sword and shield like a Warrior, focusing on blocking and sword skills. However, they also have an arsenal of light skills to deal damage and support allies.
Teaser Video – https://www.youtube.com/watch?v=CPIwU5qw7Po
PvP Video – https://www.youtube.com/watch?v=EcUtDI1-J1s
Tamer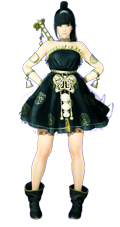
The Tamer class has one of the most unique play styles in Black Desert, along with the Berserker class. It’s a fun class to play and PvE is really easy because you have plenty of AoE skills and your pet “beast” will do most of the work. You can control your beast and even ride it at higher levels. The combat style of Tamer is very fast paced with lots of mobility and low defense.
Teaser Video – https://www.youtube.com/watch?v=_Q82yVYegyg
PvP Video – https://www.youtube.com/watch?v=Il0FXQwlNVc
Wizard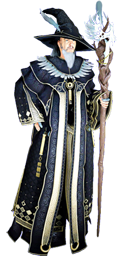
The Wizard class is the “typical” magic elemental caster class with plenty of ranged AoE spells, slows, knock downs and stuns. Their main weapon is a staff and their secondary weapon is a dagger. They are completely identical to the Witch class, which is their female class counterpart. This high damage dealing class can also be played as a support class due to them having some healing, shields and resurrection skills.
Teaser Video – https://www.youtube.com/watch?v=jOSp0nVfQ68
PvP Video – https://www.youtube.com/watch?v=7W3Iyo6JEPw
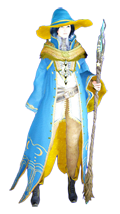 Witch
Witch
The Witch class is the “typical” magic elemental caster class with plenty of ranged AoE spells, slows, knock downs and stuns. Their main weapon is a staff and their secondary weapon is a dagger. They are completely identical to the Wizard class, which is their male class counterpart. This high damage dealing class can also be played as a support class due to them having some healing, shields and resurrection skills.
Teaser Video – https://www.youtube.com/watch?v=jOSp0nVfQ68
PvP Video – https://www.youtube.com/watch?v=7W3Iyo6JEPw
Which class should I play whilst I wait for new classes?
If you are planning to reroll to Musa, Maehwa, Kunoichi or Ninja when they are released, there are certain classes that will make the transfer a little smoother. There are also various things which are shared between all of your characters and you should concentrate on these whist you wait for your main class. Having an alt is also really beneficial in Black Desert so don’t be too disheartened if your favorite class isn’t available straight away.
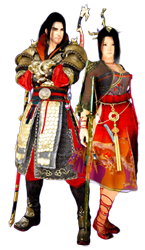 Musa/Maehwa
You can play any class while you wait for Musa/Maehwa. There are two types of armor sets (Tarotus and Agerian) which work well on Musa/Maehwa and one or the other can be used on most classes. I would personally recommend going with Tamer but it’s better to just choose whichever class you are going to find the most fun to play in the meantime.
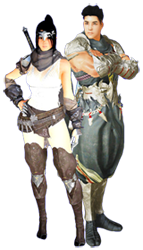 Kunoichi/Ninja
We would recommend playing the Tamer class if you want to reroll to Kunoichi/Ninja when it releases. This is because both classes work well with the Tarotus armor set and use the same primary weapon. Tamers are also one of the best farming classes and you’ll have no trouble grinding towards your Kunoichi/Ninja.
Armor, Weapons and Accessories
At launch, some armor sets, weapons and accessories will not be obtainable. These will only be released with future updates such as the Media or Valencia regions. Below is a list of what will be available and what we would recommend using in the meantime. The list below may not be 100% correct because we currently don’t have any solid information about the timeline of which we will receive some items/updates.
Available at Launch
- Agerian armor set
- Zareth armor set
- Tarotus armor set
- Talis armor set
- Heve armor set
- Fortuna Luck armor set
- Bares weapon
- Seleth weapon
- Yuria weapon
- Azwell weapon
- Aien weapon
- Elisha weapon
- Khalis weapon
- Mark of Shadow ring
- Ogre Ring necklace
- Witch’s earring
- Tree Spirit belt
Media Update
- Grunil armor set
- Krea weapons
- Whale earring
- Belt of Shultz the Gladiator
- Scarla Neckalce
Valencia Update
- Rocaba armor set
- Rosar weapon
- Coral rings
- Coral earrings
- Tungrad earring
- Crescent rings
- Serap’s necklace
- Sicil’s necklace
- Basilisk belt
- Centaur’s belt
Kamaslyvia Update
- Griffon helmet (boss helmet)
- Urigon boots (boss boots)
- Lemoria armor set
- Grana accessories
- Anbelif Earring
- Tungrad Belt
- Narc earring
- Ring of Forest Ronaros
Future Content BACK TO TOP
Media
The Media update will unlock part of the Eastern side of the map and the city “Altinova”, along with level 50+ grinding spots and Pirate Island. We’re expecting to get this update shortly after release (probably ~3 months) but there is no official time frame for updates as of yet. If the EU/NA version follows the same timeline as other regions, we can also expect the Musa and Maehwa classes to be released around this time. Enchanting will be increased up to and including +20, and the first world boss “Kzarka” will start spawning in Serendia Temple. New armor sets and various other items will also be added around this time which will impact each class greatly.
Valencia Part I
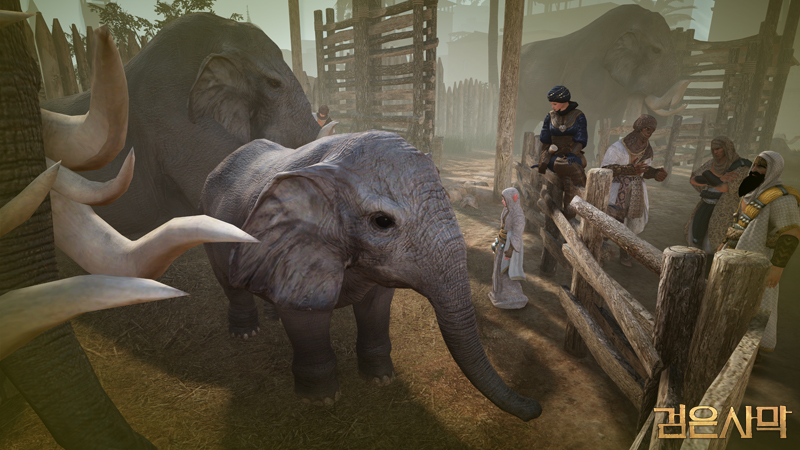
The Valencia Part I update will double the map size, unlock the desert region and increase the level cap to 60. Whilst in the desert region, you must drink Purified Water or Octagonal Tea to avoid heat stroke in the day and hypothermia at night. Random sandstorms will also occur and you must buy tents to shield yourself. The Valencia update will also welcome the Camel and Elephant mounts and the second world boss “Nouver” will also start wandering the desert and will drop legendary secondary weapons. If the EU/NA version follows the same timeline as other regions, we can also expect the Kunoichi and Ninja class to be released around this time.
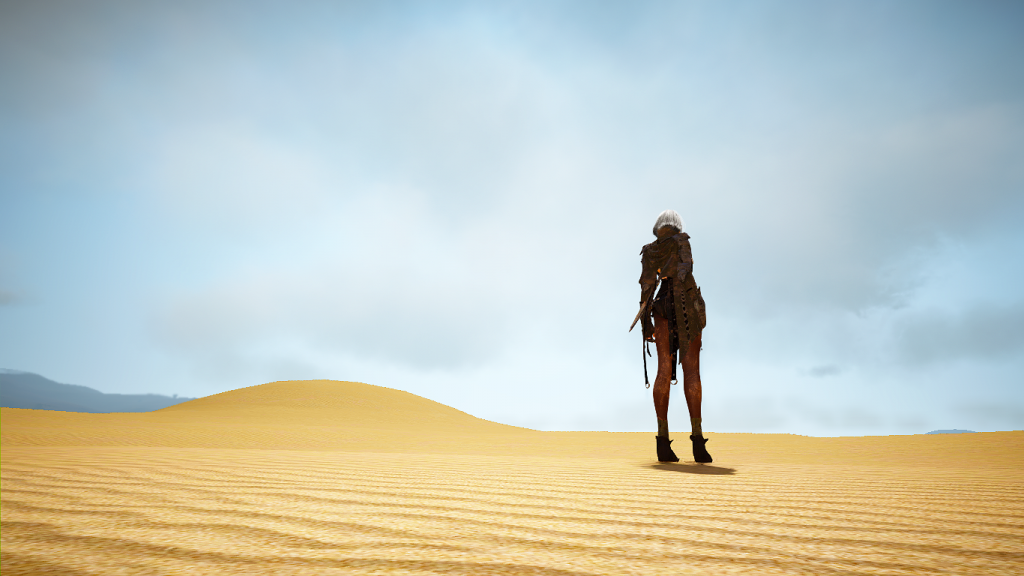
We should start to receive the Weapon Awakenings for each class as well. Weapon Awakenings are a seperate weapon you switch to whilst in combat which will replace your primary weapon. You must be level 56+ to unlock and use your Weapon Awakening.
Below are the Weapon Awakenings for each class:
- Warrior – Great Sword
- Sorceress – Scythe
- Ranger – Sword
- Beserker – Iron Gloves/Cannon
- Valkyrie – Lance and Shield
- Tamer – Bo Staff
- Musa – Crescent Blade
- Maehwa – Kerispear
- Kunoichi – Sah Chakram
- Ninja – Sura Katana
- Witch – Aad Sphera
- Wizard – Godr Sphera
- Dark Knight – Vediant
- Striker – Guardbrace
- Mystic – Cestus
- Lahn – Two Blade Chain
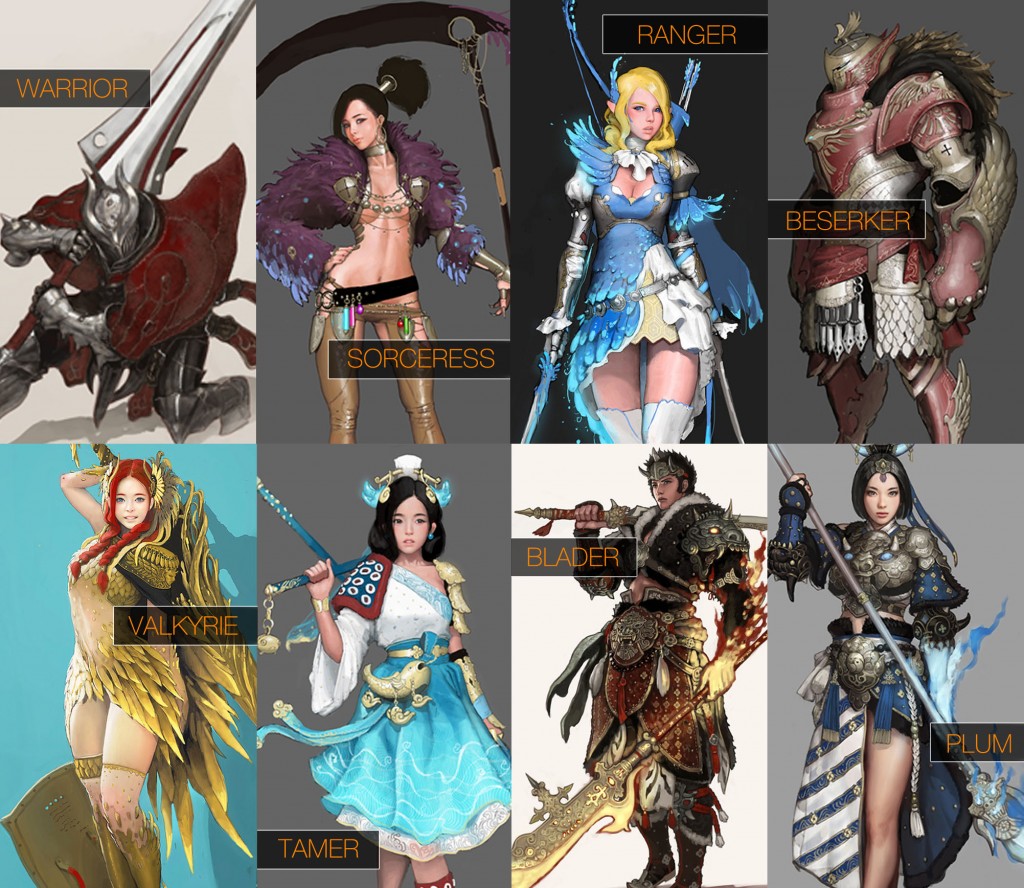
During the beginning of the Weapon Awakenings, the third world boss “Karanda” (Harpy Queen) will start spawning and dropping legendary Awakening weapons.
If we had to guess, we would expect this update to come to the EU/NA version ~6 months after initial release.
Valencia Part II
The Valencia Part II update has only just been released on the KR version and introduced a new PvP system (Valencia region only) which reduced PvP penalties and added an outlaw and jail system. Mui Quinn is a town specifically for outlaws where low karma players are welcomed and positive karma players are attacked by guards. New guild resource nodes were added which can only be installed in the desert and require constant upkeep and defense.
Along with these changes, the Villa buildings were unlocked, which is a social tavern for level 55+ and a place you can also look after your baby elephants, or receive daily buffs and services from the NPC merchants inside.
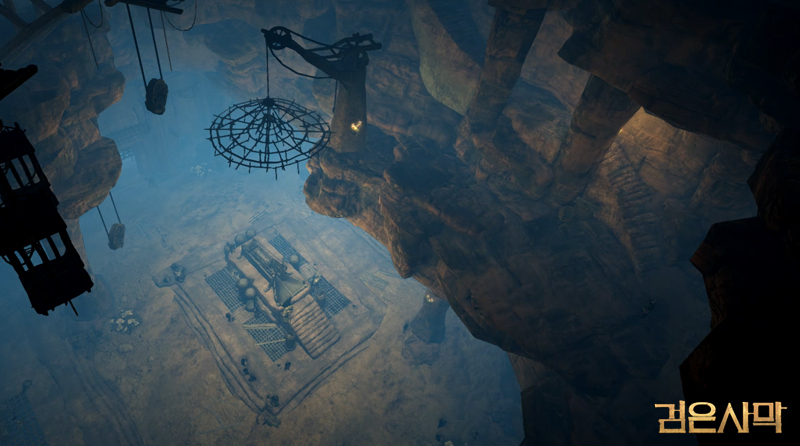
Two new underground dungeons were also added named “Ahkeuman Ruins” and “Hystria Ruins”. These dungeons are non-instanced and can only be entered through a portal that randomly spawns in the desert. The dungeon is recommended for level 56+ and contains elite monsters that drop rare and unique items.
Margoria
The Margoria update will expand the northern sea continent and bring a new area called Port Ratt. The sea will work in the same way as the desert, where you cannot view your location on the map and must rely on direction. Sea monsters and other deadly events can occur at sea, you can also hunt monsters for rewards using the new Epheria ships. Underwater gathering and diving is also reworked as well as a sailing profession and new world boss “Vell” being added in Margiora Part II.
Kamasylvia
Kamasylvia is another land expansion which is another new region around the same size as Calpheon and will be located just south of Calpheon. The new region will be the “Elven forest” and will include the lore of the Elf race along with high level monsters. New resource nodes as well as a new city and new worker race will be added. Several new grinding spots for level 56+ are also coming with the expansion and new catch up items as well as new boss gear. JIN/BON/WON crystals are also added which are harder to craft and give increased stats. Another updated that comes with Kamaslyvia is the introduction of Tier 9 horses such as the pegasus and unicorn. Finally, other updates such as Valtarra Training will come with Kamaslyvia.
Other
There are also various other improvements planned, including joy pad support, interface changes, and content updates (Fishing, Cooking, Alchemy, Trading, etc.). We currently don’t know much about it, but there is also another region planned for the future which will be the Dwarven region, located south of Valencia and will be snowy/icy.
Useful Links/ResourcesBACK TO TOP
Youtubers
https://www.youtube.com/user/itsThePaindog
https://www.youtube.com/channel/UCYdoiAO7ax1p0ZbHovrY4Tg (pvtwiggles)
https://www.youtube.com/user/Domeran (Hakurai)
https://www.youtube.com/playlist?list=PLSKvsoulJB_beQRYqq4-cQ4uE2gA5uuhe (KineticGTR)
https://www.youtube.com/user/T1GamingDN
https://www.youtube.com/user/SteparuTV
Twitch Streamers
http://www.twitch.tv/thepaindog
http://www.twitch.tv/pvtwiggles
http://www.twitch.tv/chrisrobbins08
http://www.twitch.tv/the_buzz_stream/
http://www.twitch.tv/wolf__girl
http://www.twitch.tv/ryuthered
http://www.twitch.tv/t1gamingdn
Guides
https://www.blackdesertfoundry.com/list-of-guides/
Skill Calculator
http://www.blackdeserttome.com/calculator
Interactive Map
https://www.blackdesertfoundry.com/map/
Database
Guild Databases
https://www.blackdesertfoundry.com/guilds/
http://forum.blackdesertonline.com/index.php?/forum/10-guild/
https://www.reddit.com/r/BDOGuilds
Other Websites
http://www.mmorpg.com/gamelist.cfm/game/944/Black-Desert-Online.html
https://www.reddit.com/r/blackdesertonline (Reddit)
http://bdo-templates.com/ (Character Creations)
http://blackdesertroleplayers.com/ (Roleplayers)
http://www.bd-rp.de/ (German Roleplayers/Deutsche Rollenspiele)
http://www.blackdesert-online.de/ (German/Deutsch)
http://blackdesert.com.pl/ (Polish/Polski)
https://www.blackdesertsp.com/ (Spanish/Español)
http://www.blackdesertitalia.it/ (Italian/Italiano)
http://www.jeuxonline.info/portail/Black_Desert_Online (French/Français)
The Twitch Streamers and Youtubers on this list are all people who have stood out to us. If you are a Twitch Streamer or Youtuber and think you should be on our list, please leave a thread in our forums with your a link to your channel and we will check you out. It is possible that we could have accidentally missed you out! Since this is a guide specifically for new players, we only really want to add people who are actively trying to help new players learn the game. This can simply mean answering questions in chat or creating video guides.



This is the best general guide I have found. Please update it so its even more awesome! I would also consider adding a preface (‘coz this guide is quite long) like “If you are totally new player for starters just make ‘ghost’ quests till lvl 50 and train stamina link while afk.” but with better form ;P
Thanks for the feedback and kind words 🙂 I’ve updated the majority of the post so it’s now a bit more up-to-date whilst still being more Starter/Launch focused. I also added the disclaimer/info at the top like you recommended. If you have any other suggestions don’t be afraid to leave another comment or join our Discord for direct contact with me. Thanks again!
Regarding:
“WHERE DO I GET MY FIRST DONKEY/HORSE?
You can get your first donkey from a level 15 – 17 quest in Velia Town at the NPC “Igor Bartali”. Talk to him by pressing “R” then accept and complete the quest. As a reward you will be given an emblem which you give to a stable master in exchange for a donkey. Talk to the stable master and select “Stable” then “Register Item”. Right-click the emblem in your inventory and enter a name for your donkey.”
You also get a donkey from a quest in Western Guard Camp, as well as a wagon, but I don’t know exactly what requirements there are. Are they linked to a level of crafting/trade or something? I received a donkey in CBT1 NA but wondered how I was missing it so long until I saw it offered at 15 finally in soft launch for NA.
“On your second day of playing you should receive a horse emblem in your achievement window.”
For western launch I don’t think this is active. I have played 3 days straight with Conqueror’s package and never received this.
On the western launch, the NPC search comes up well before 20.
It is there at least by 14 that I remember.