How to create a character
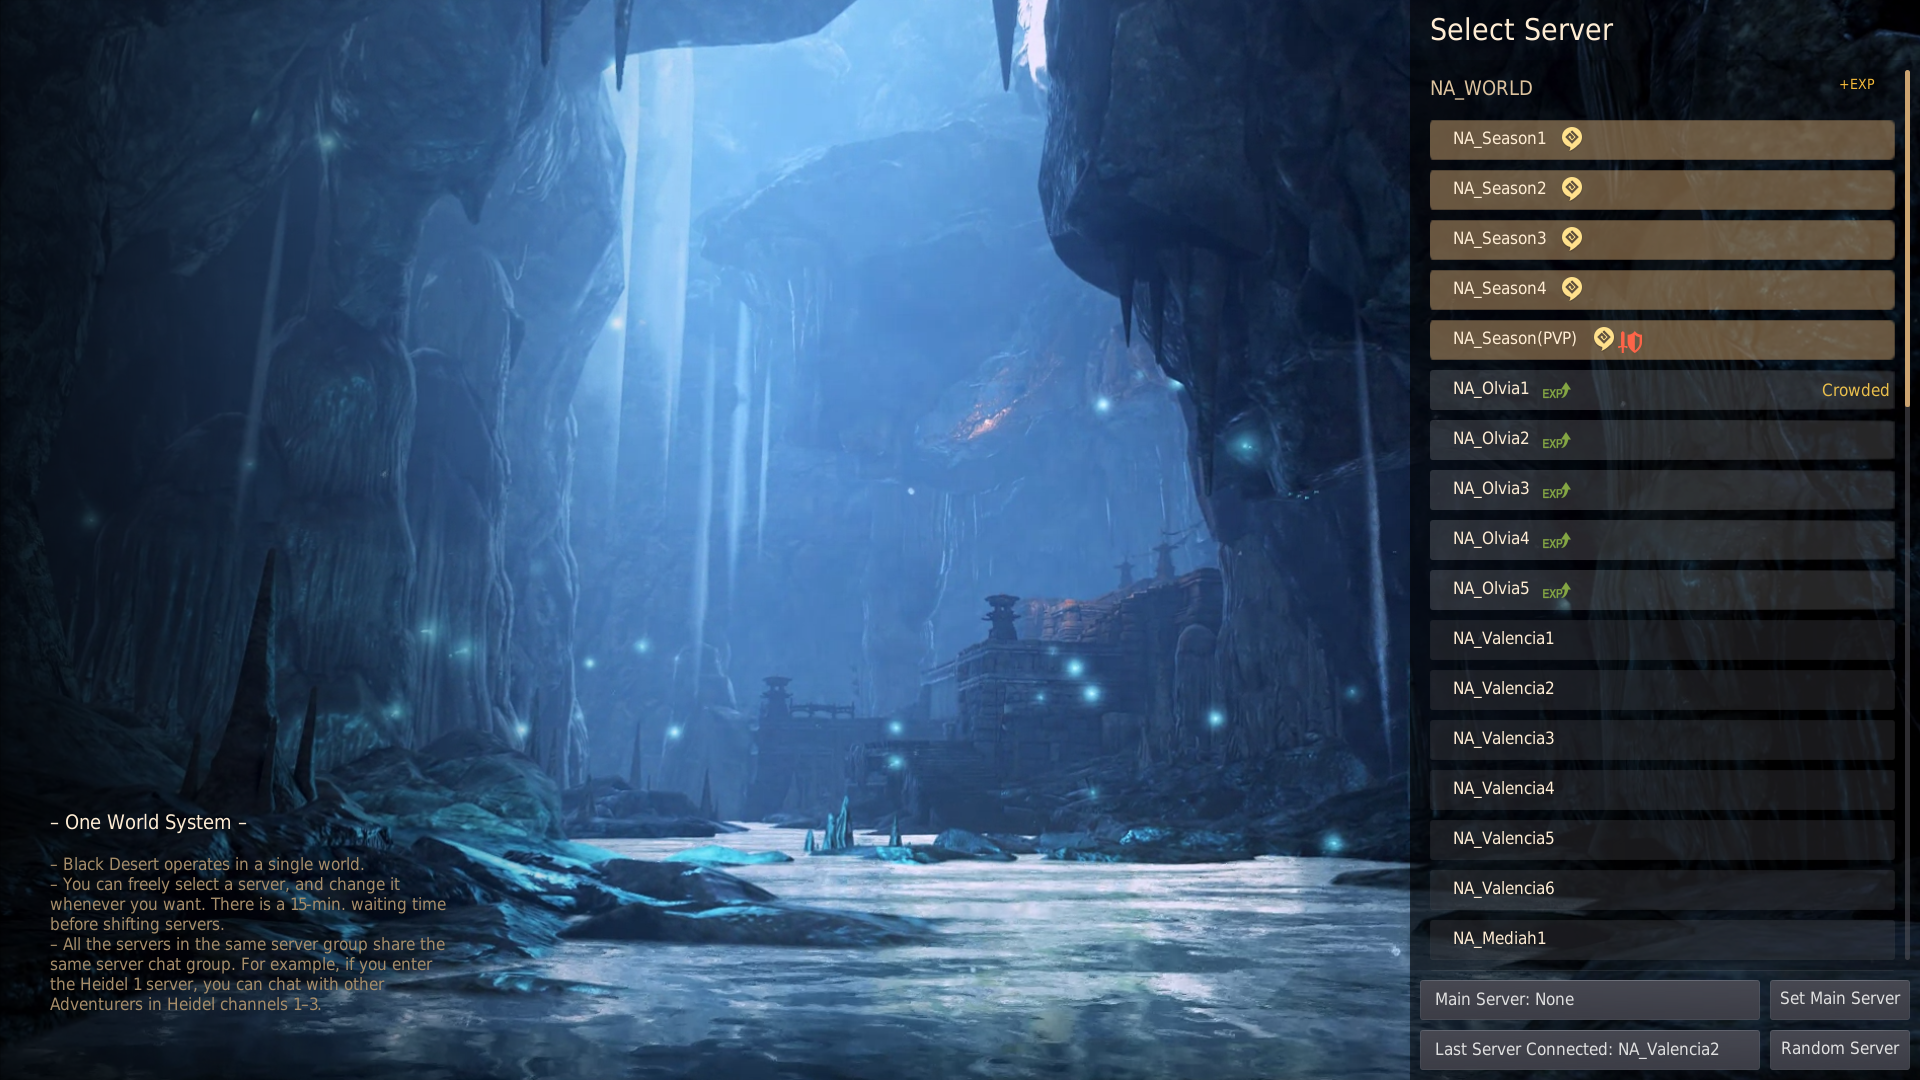
Once you have launched your game, select the channel you would like to enter. It doesn’t matter too much which channel you start off in because you can swap between channels every 15 minutes.
Oliva channels can only be accessed by new or returning players and Season channels can only be accessed by season characters.
If you are completely new to the game, I recommend making a season character if possible, and joining one of the Season channels. This is because the season channels have special benefits.
You can read more about the season channels in our guide.
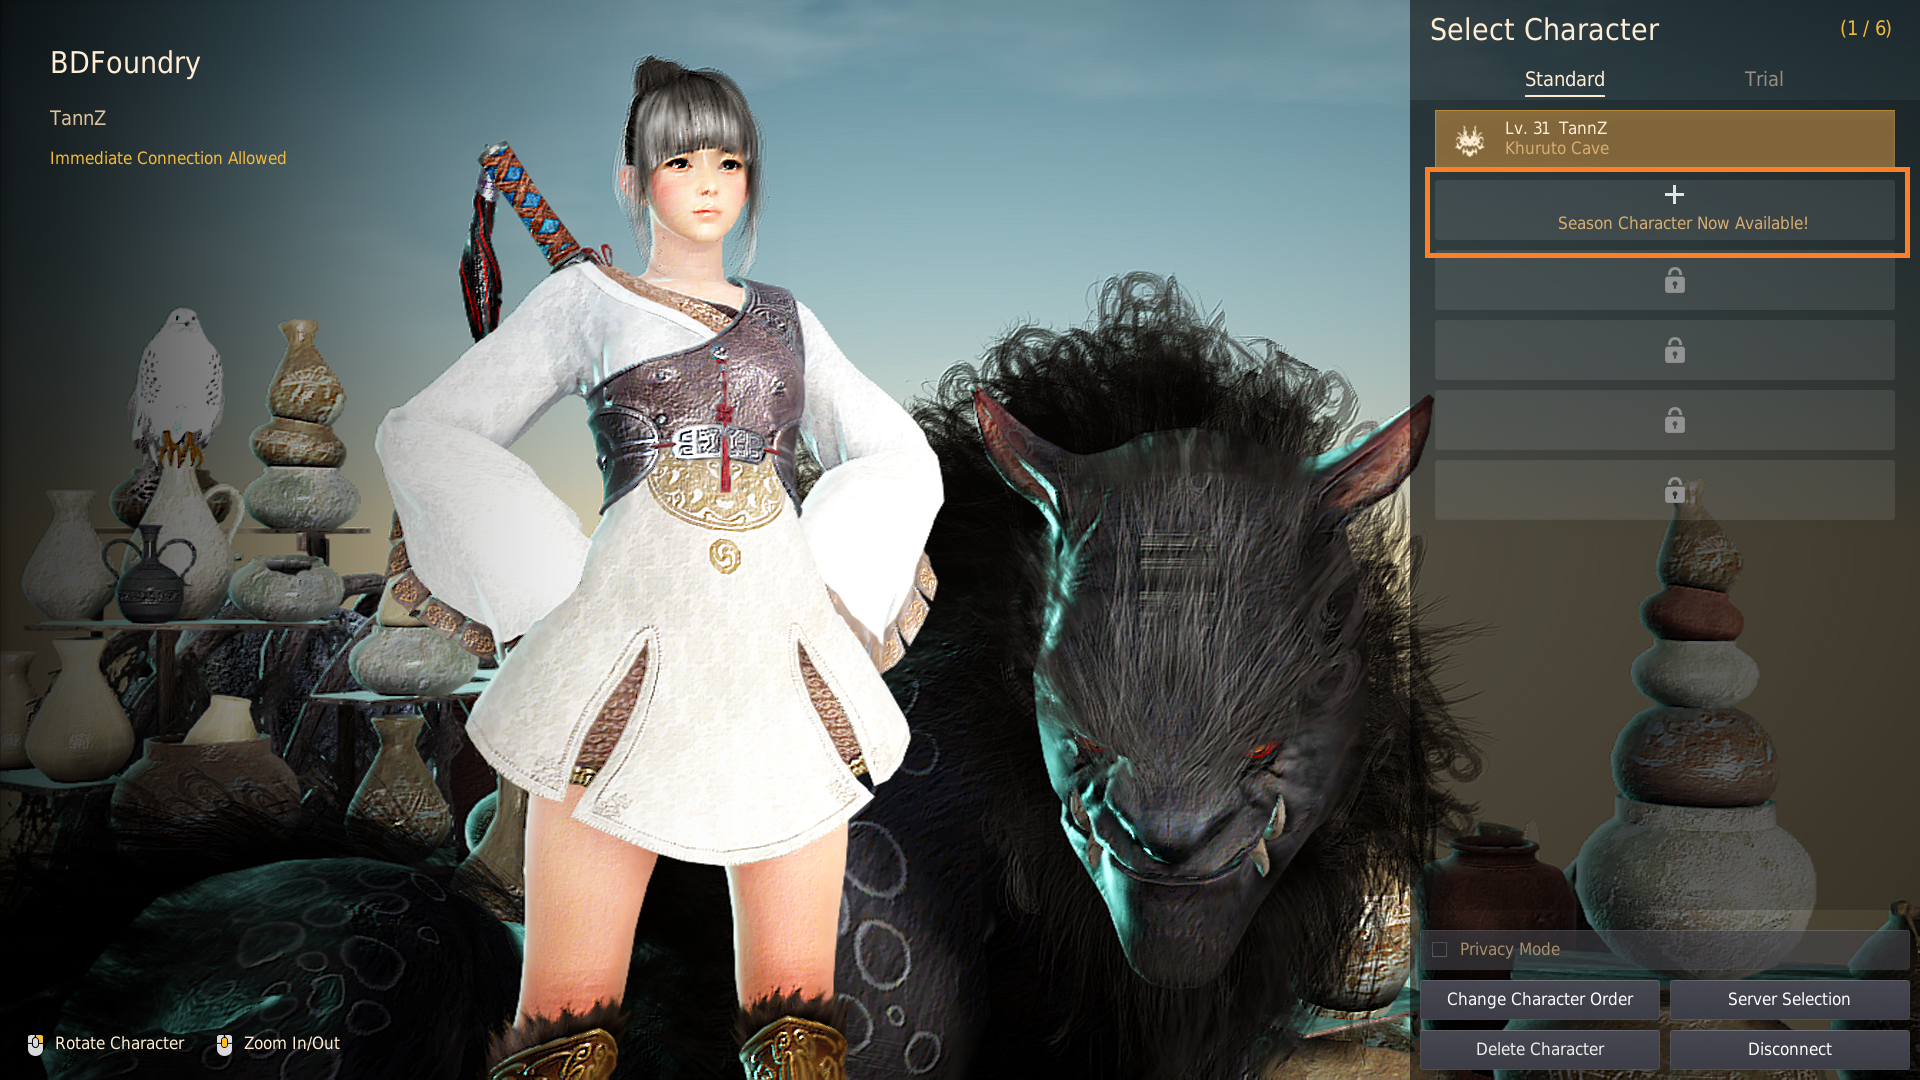
After selecting a channel to start in, click the + button to create a new character.
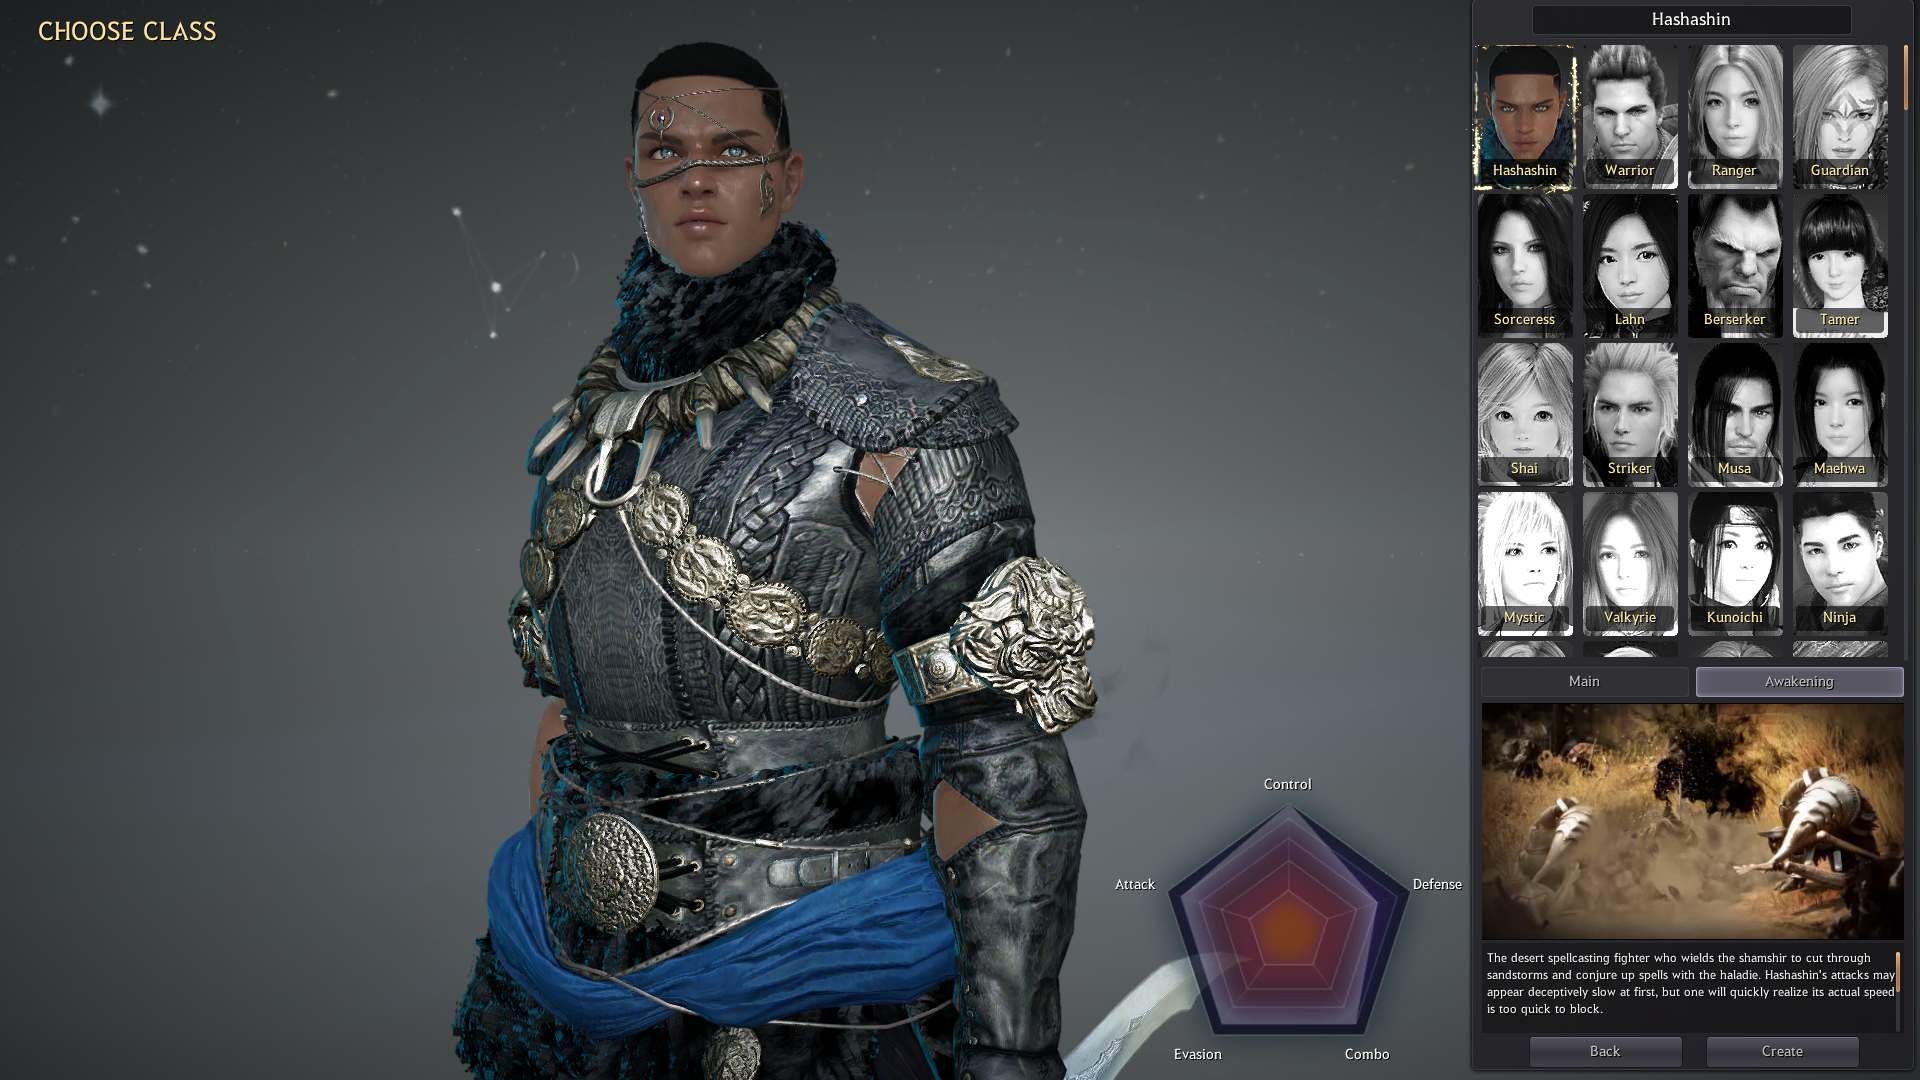
You are now taken to the class selection screen and can choose your class by clicking the class icons in the top-right. All classes are gender locked. At the bottom of the screen information about the class is shown as well as a quick video and back story. Once you are happy with the class you have selected, click “Next”.
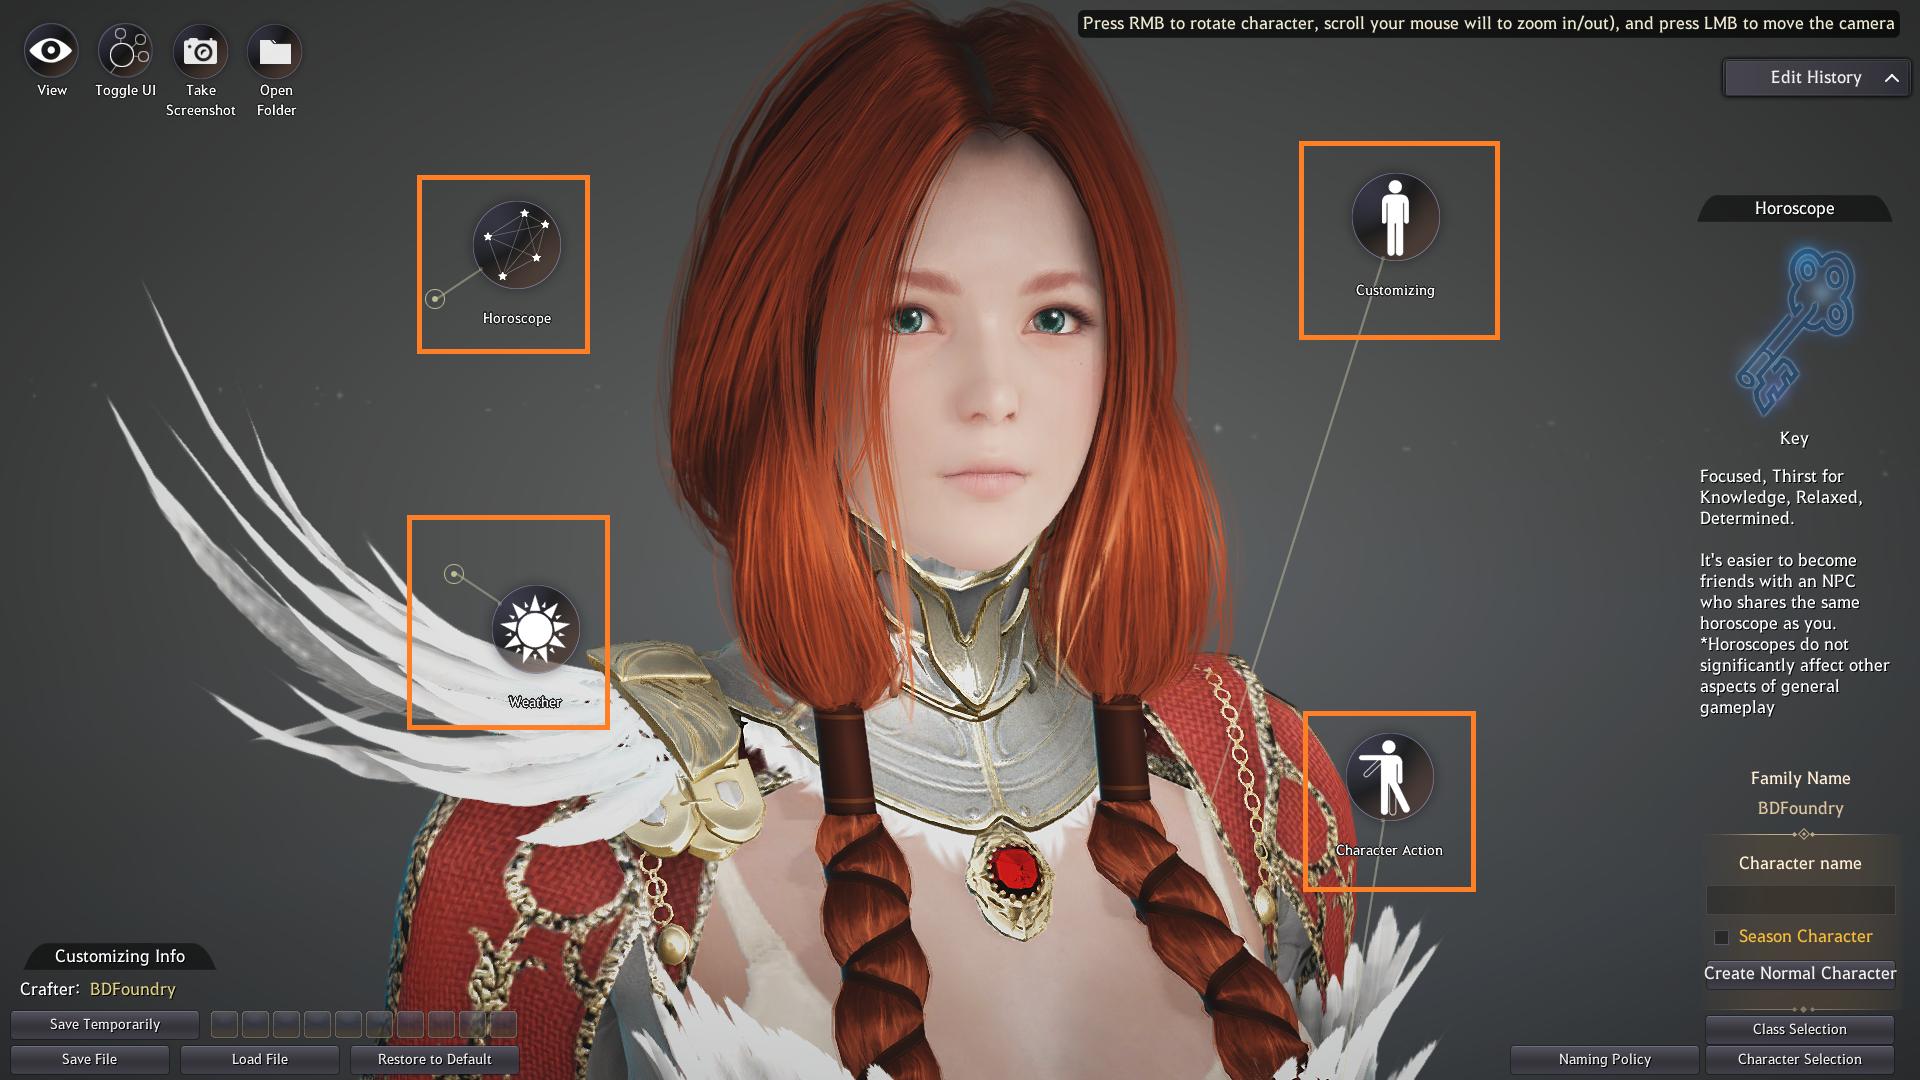
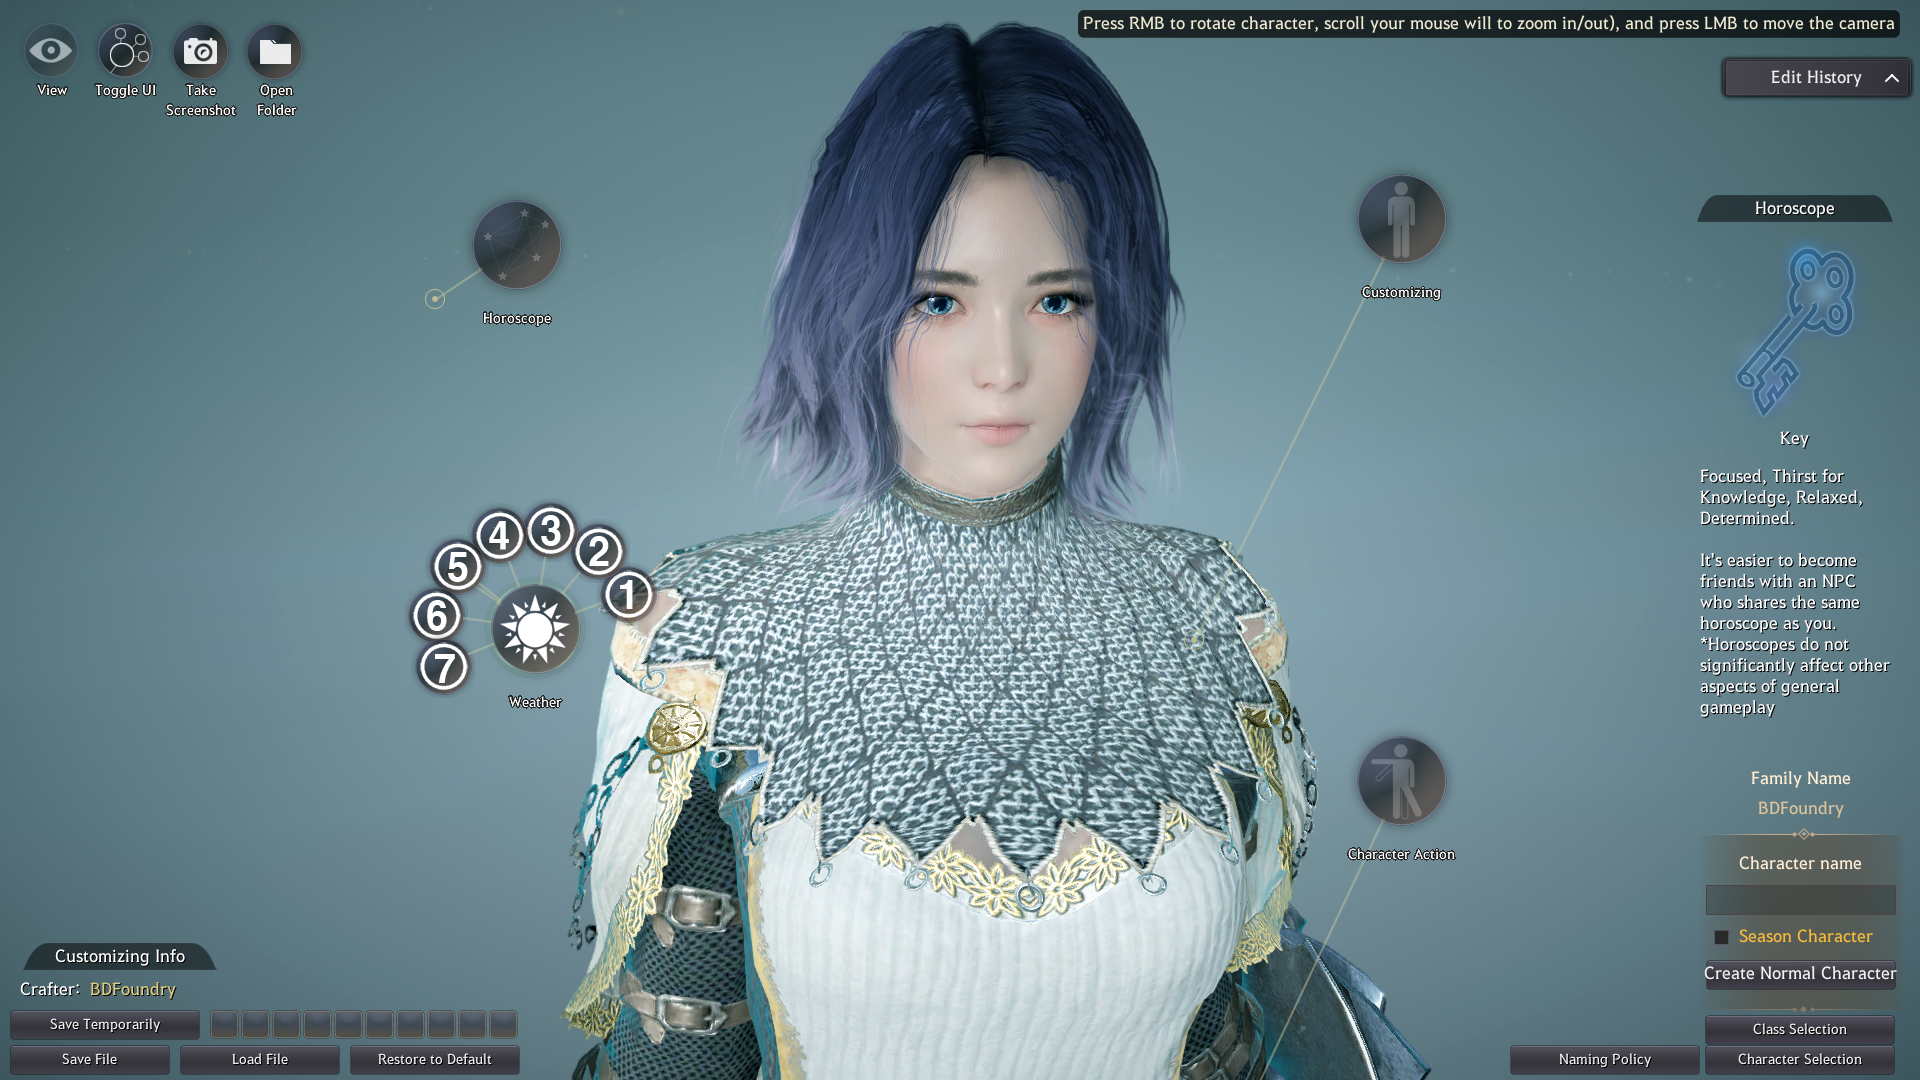
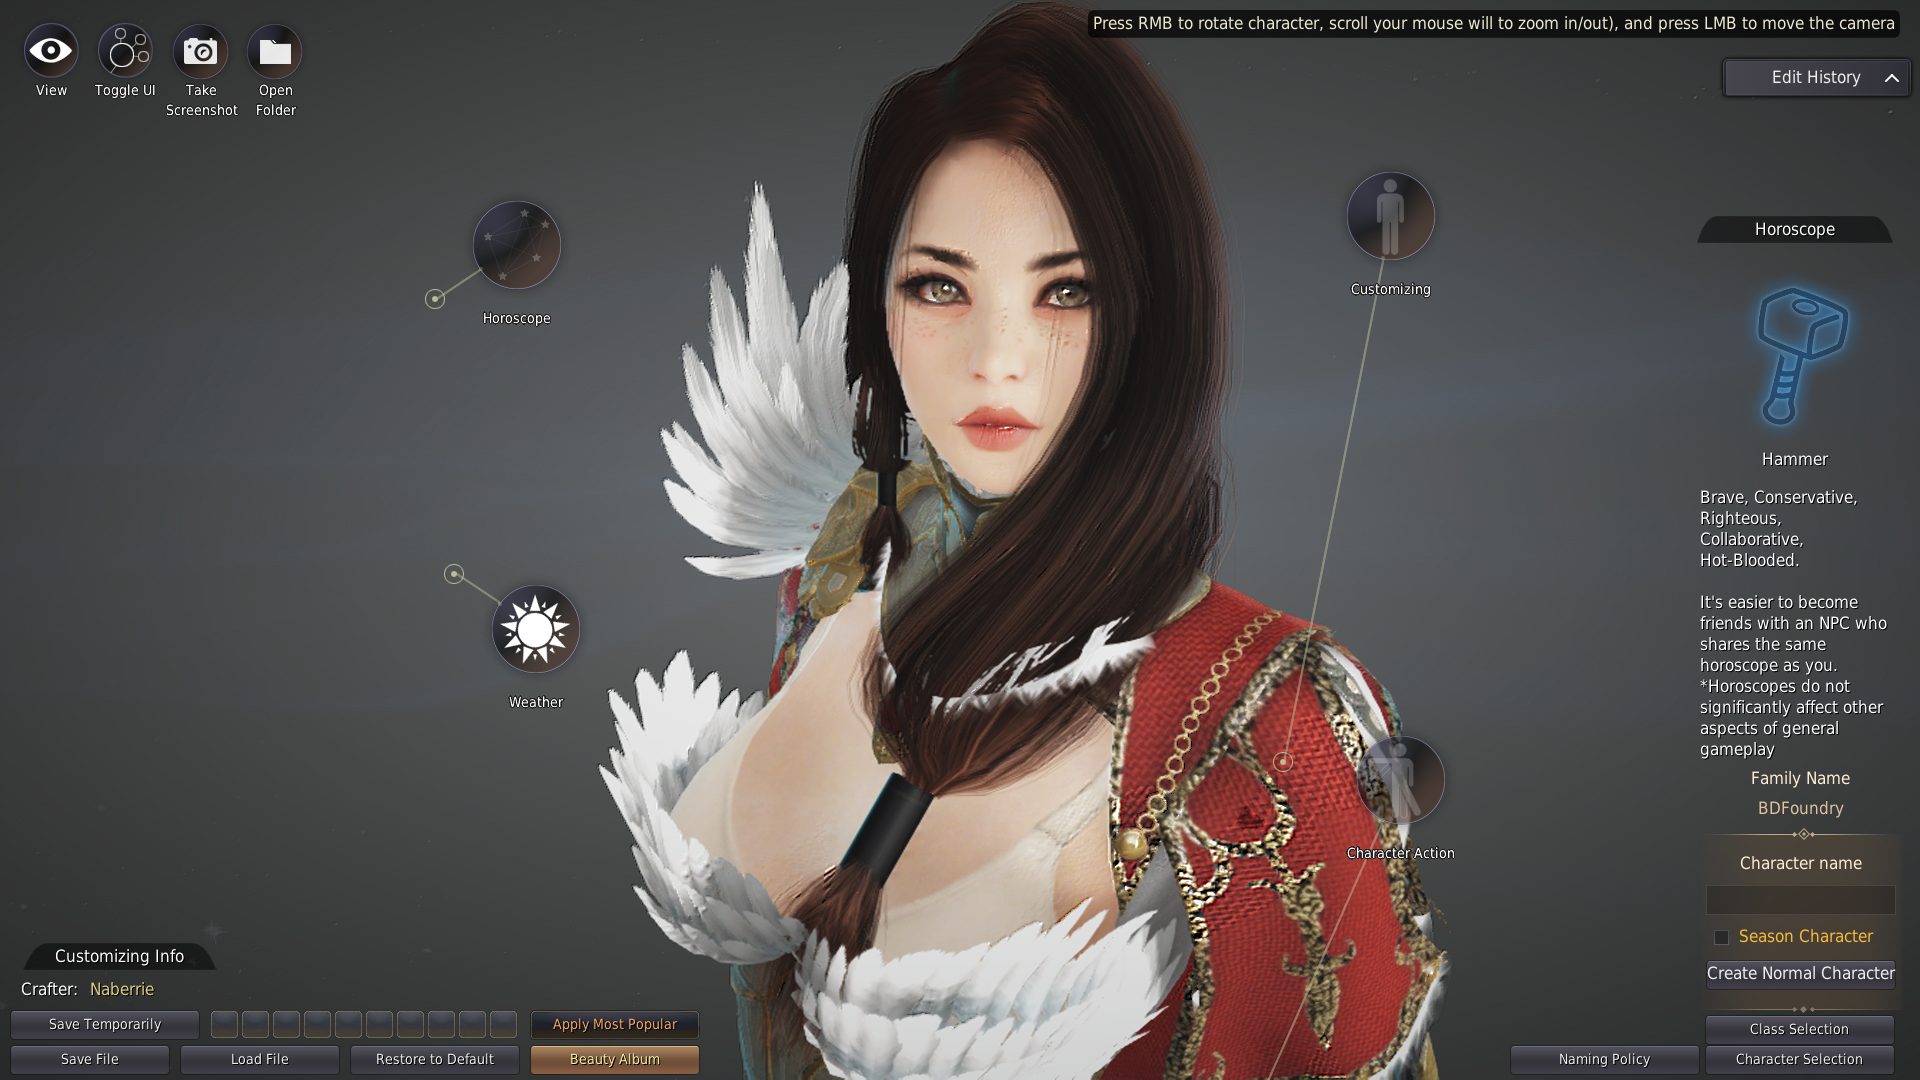
These are the tools for creating your character.
- Customizing – change your characters hair, face shape, skin colour, eyes, makeup, body etc.
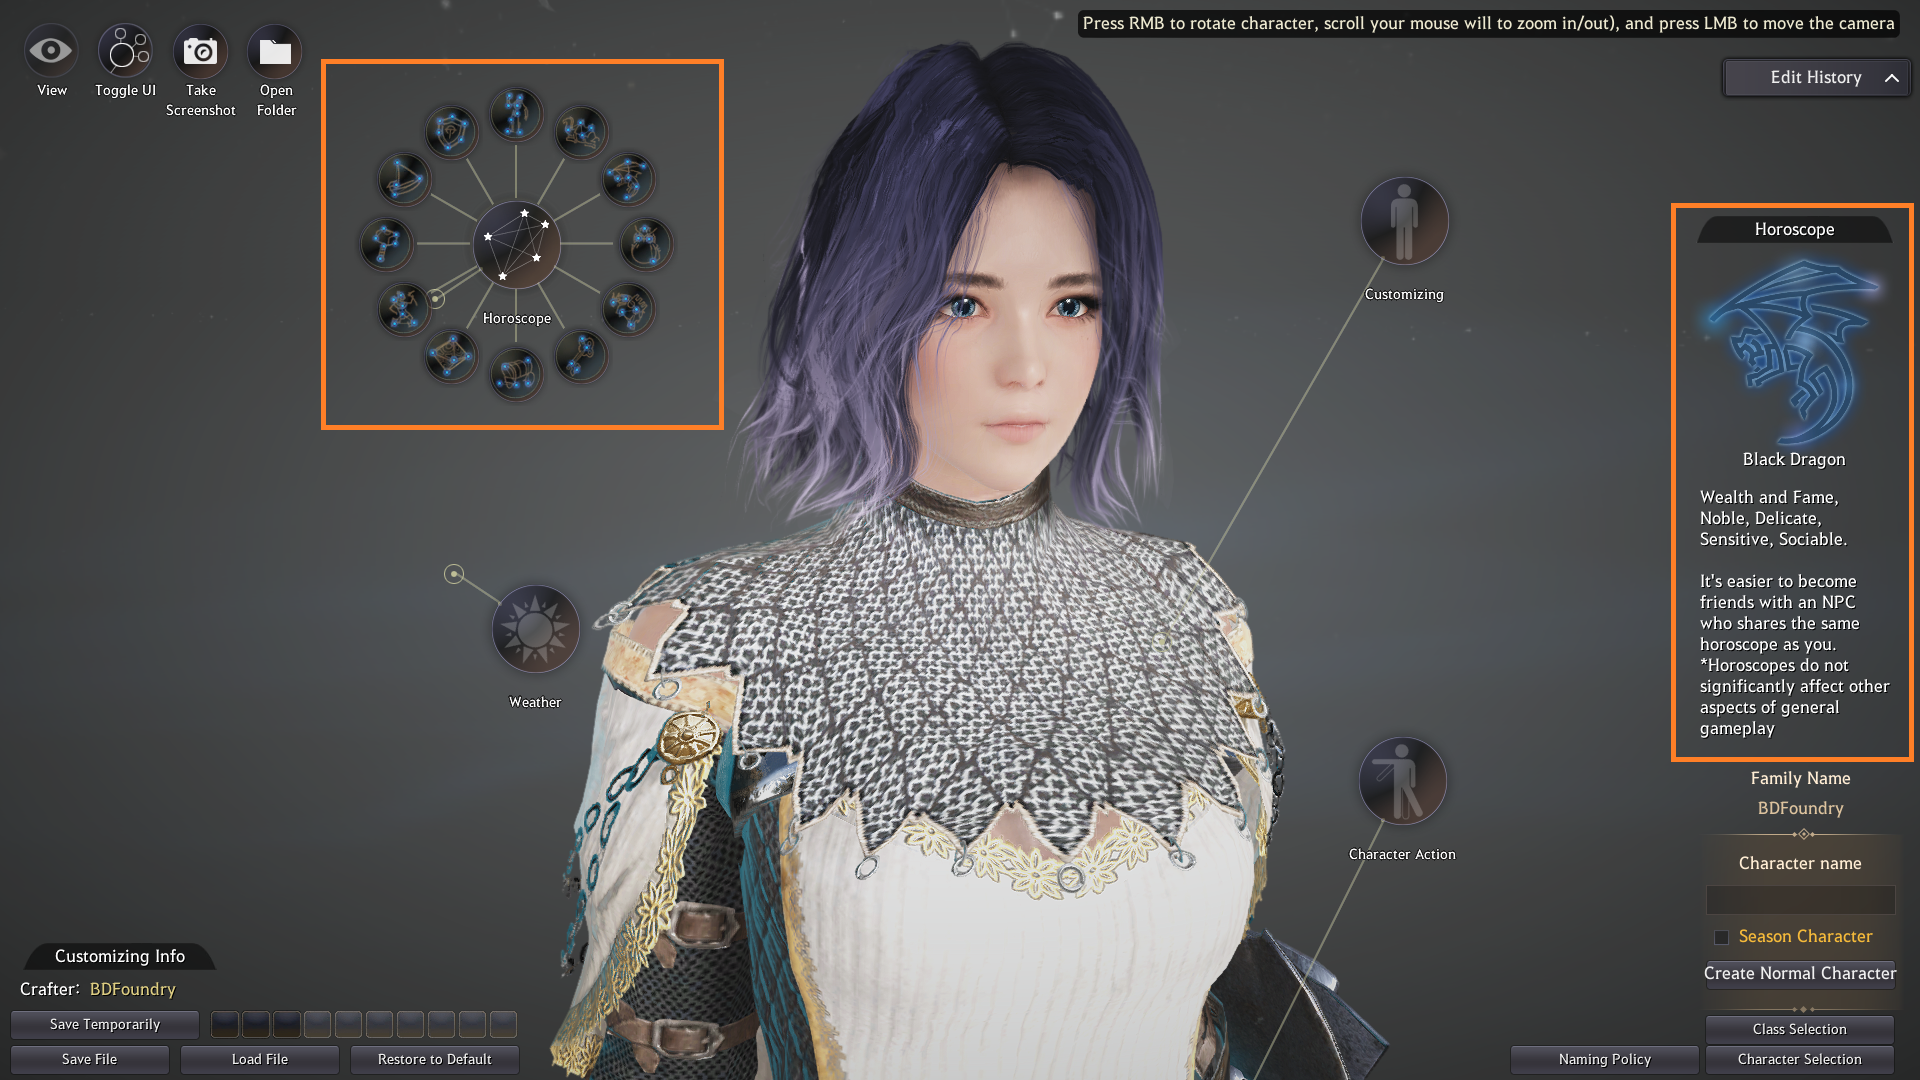
- Horoscope – change your character’s horoscope. The horoscope you choose is not too important and do not significantly affect gameplay
- Weather – view your character in different in-game weather conditions
- Character Action – view your characters different emote actions and costumes
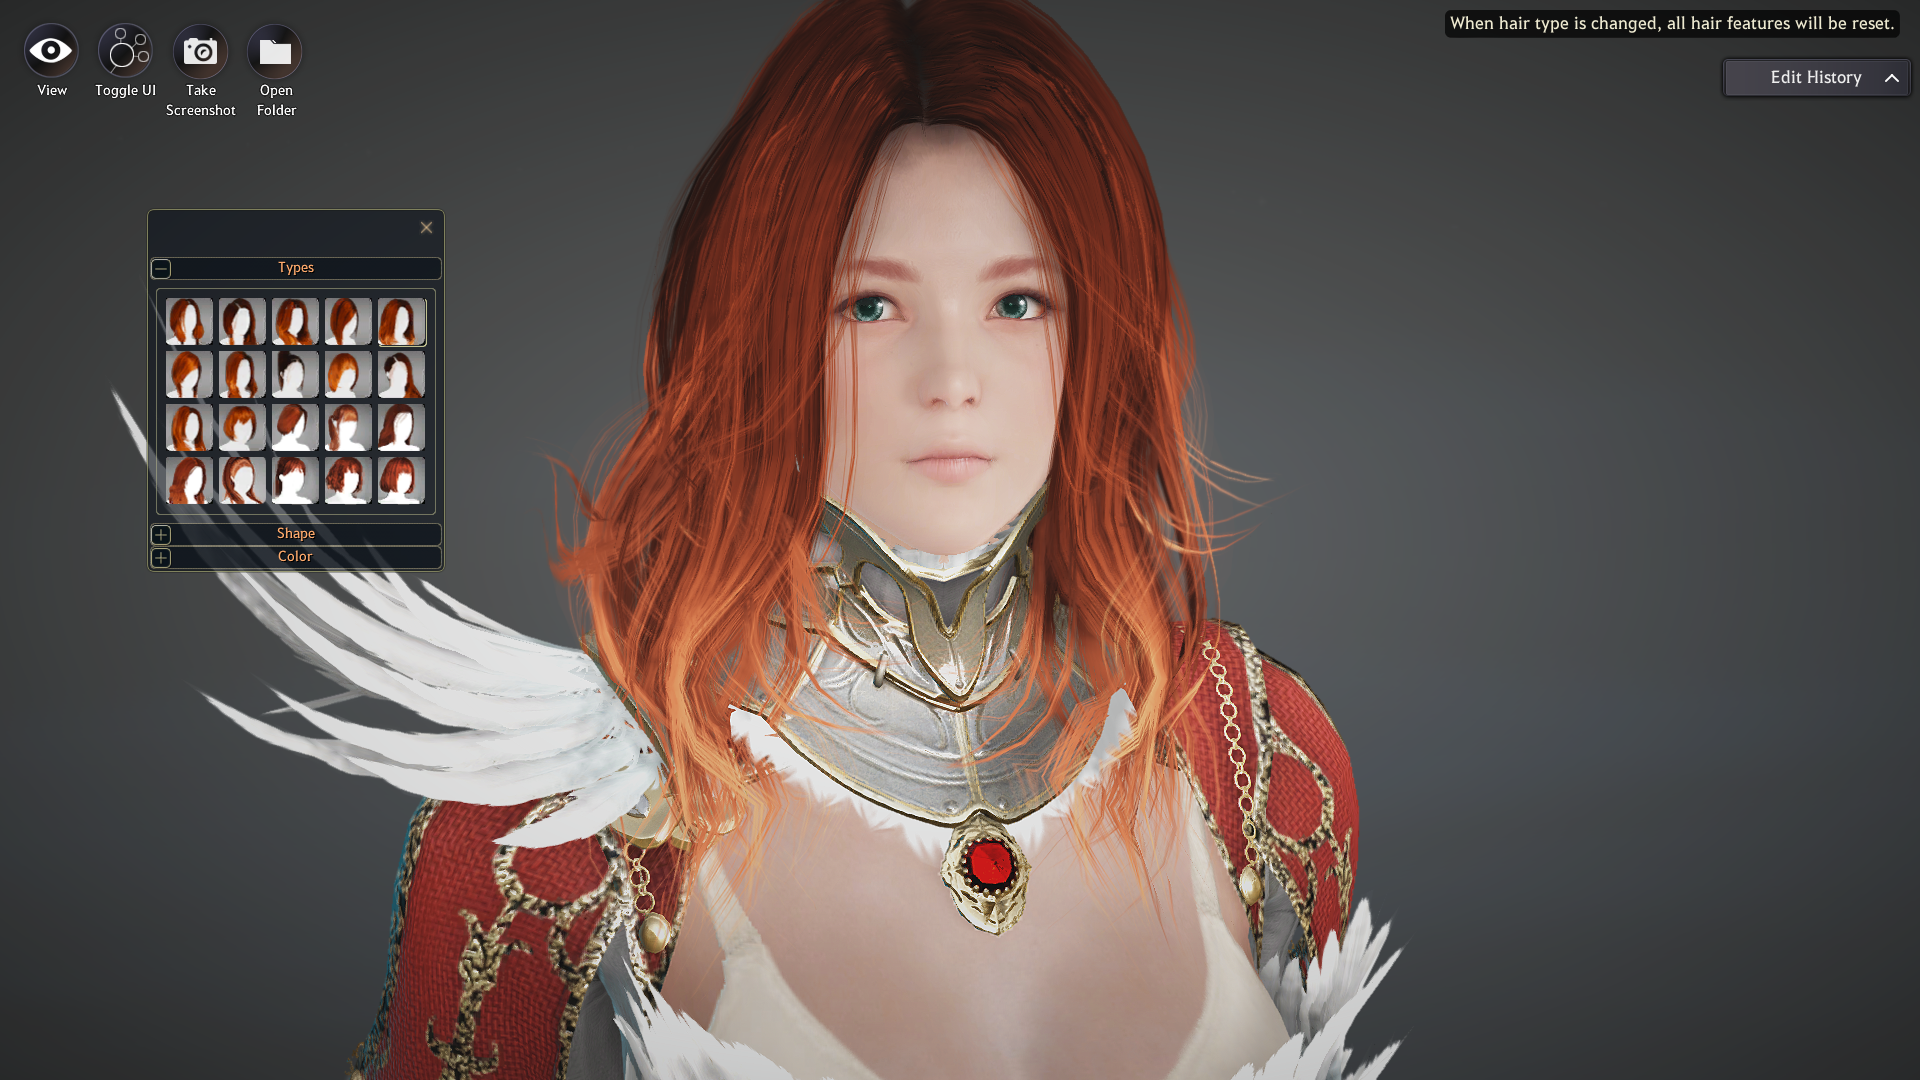
Select the customize option then hair. Here you can customize your characters base hair shape.
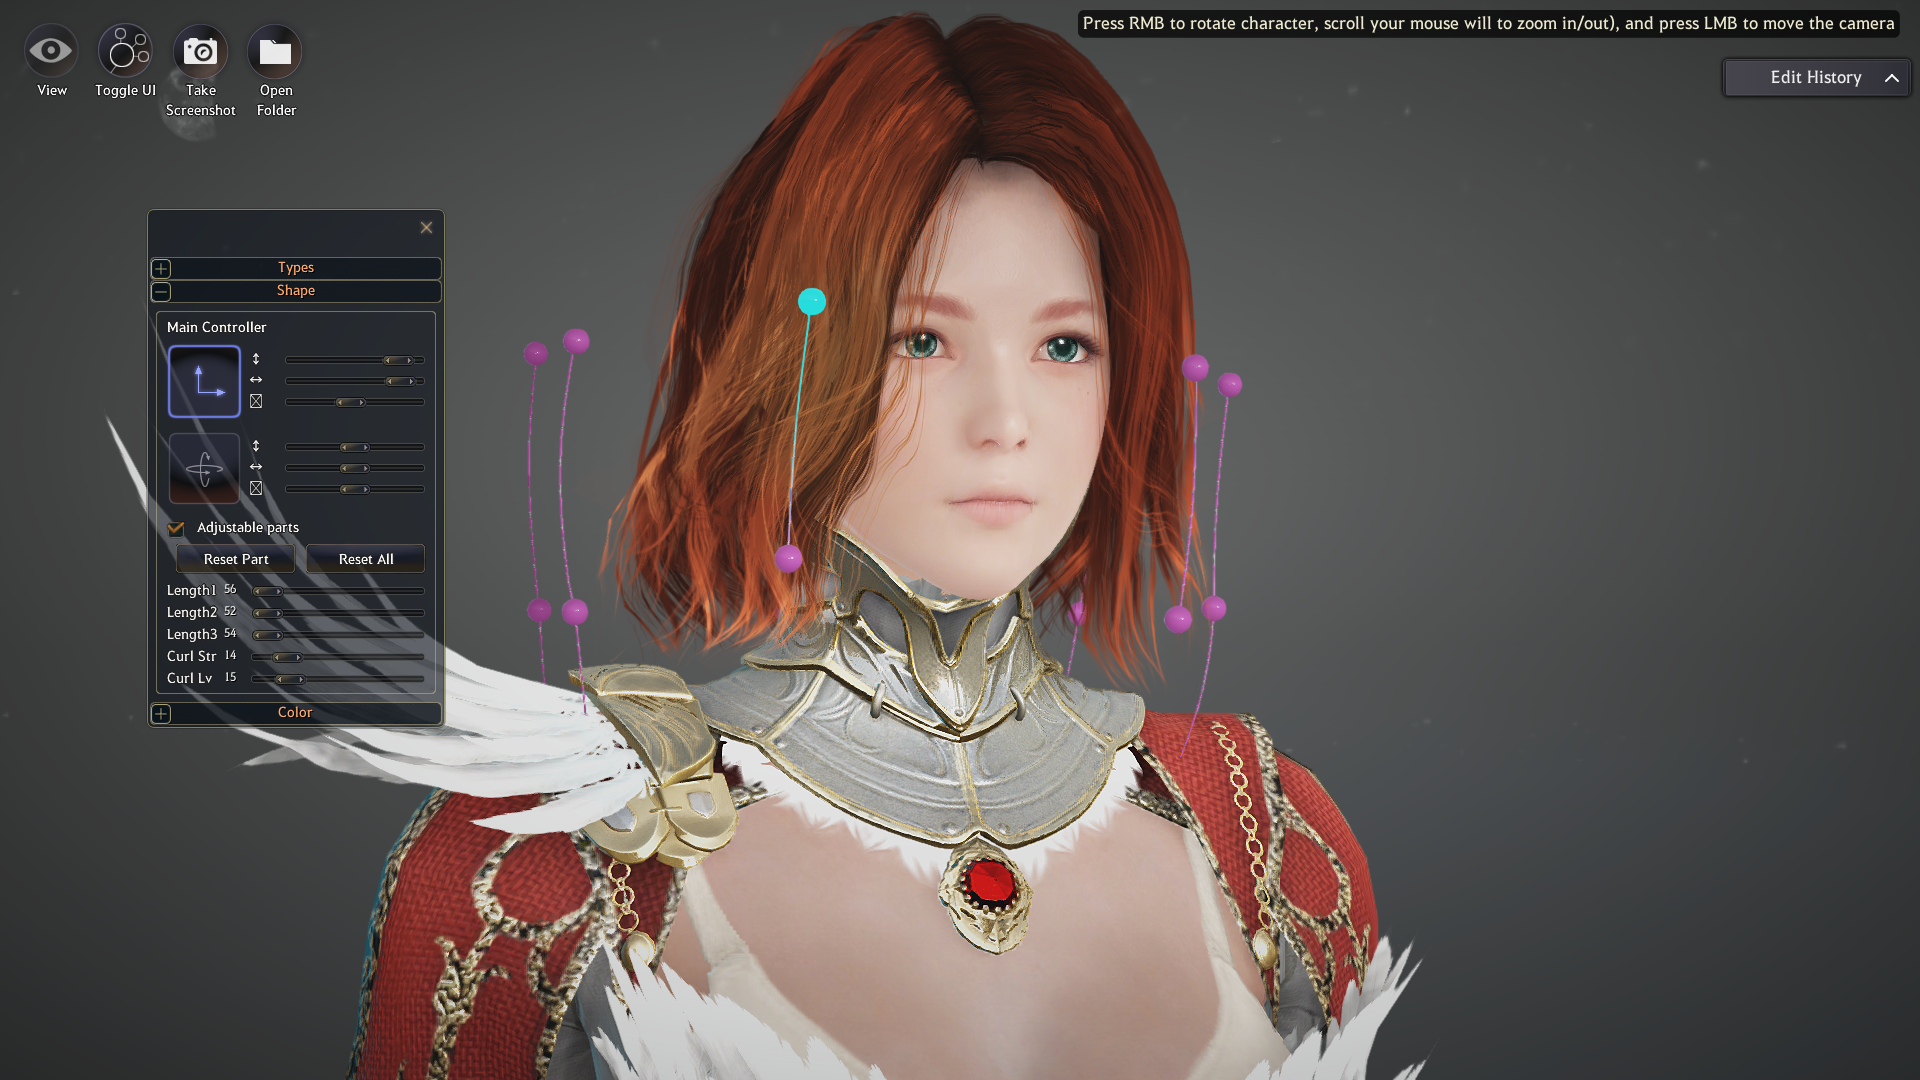
Select the Shape option in the customize window to change the shape of the hair. You can change the length by adjusting the sliders as well adding curls to the hair. You can also change the shape by clicking and dragging a piece of hair.
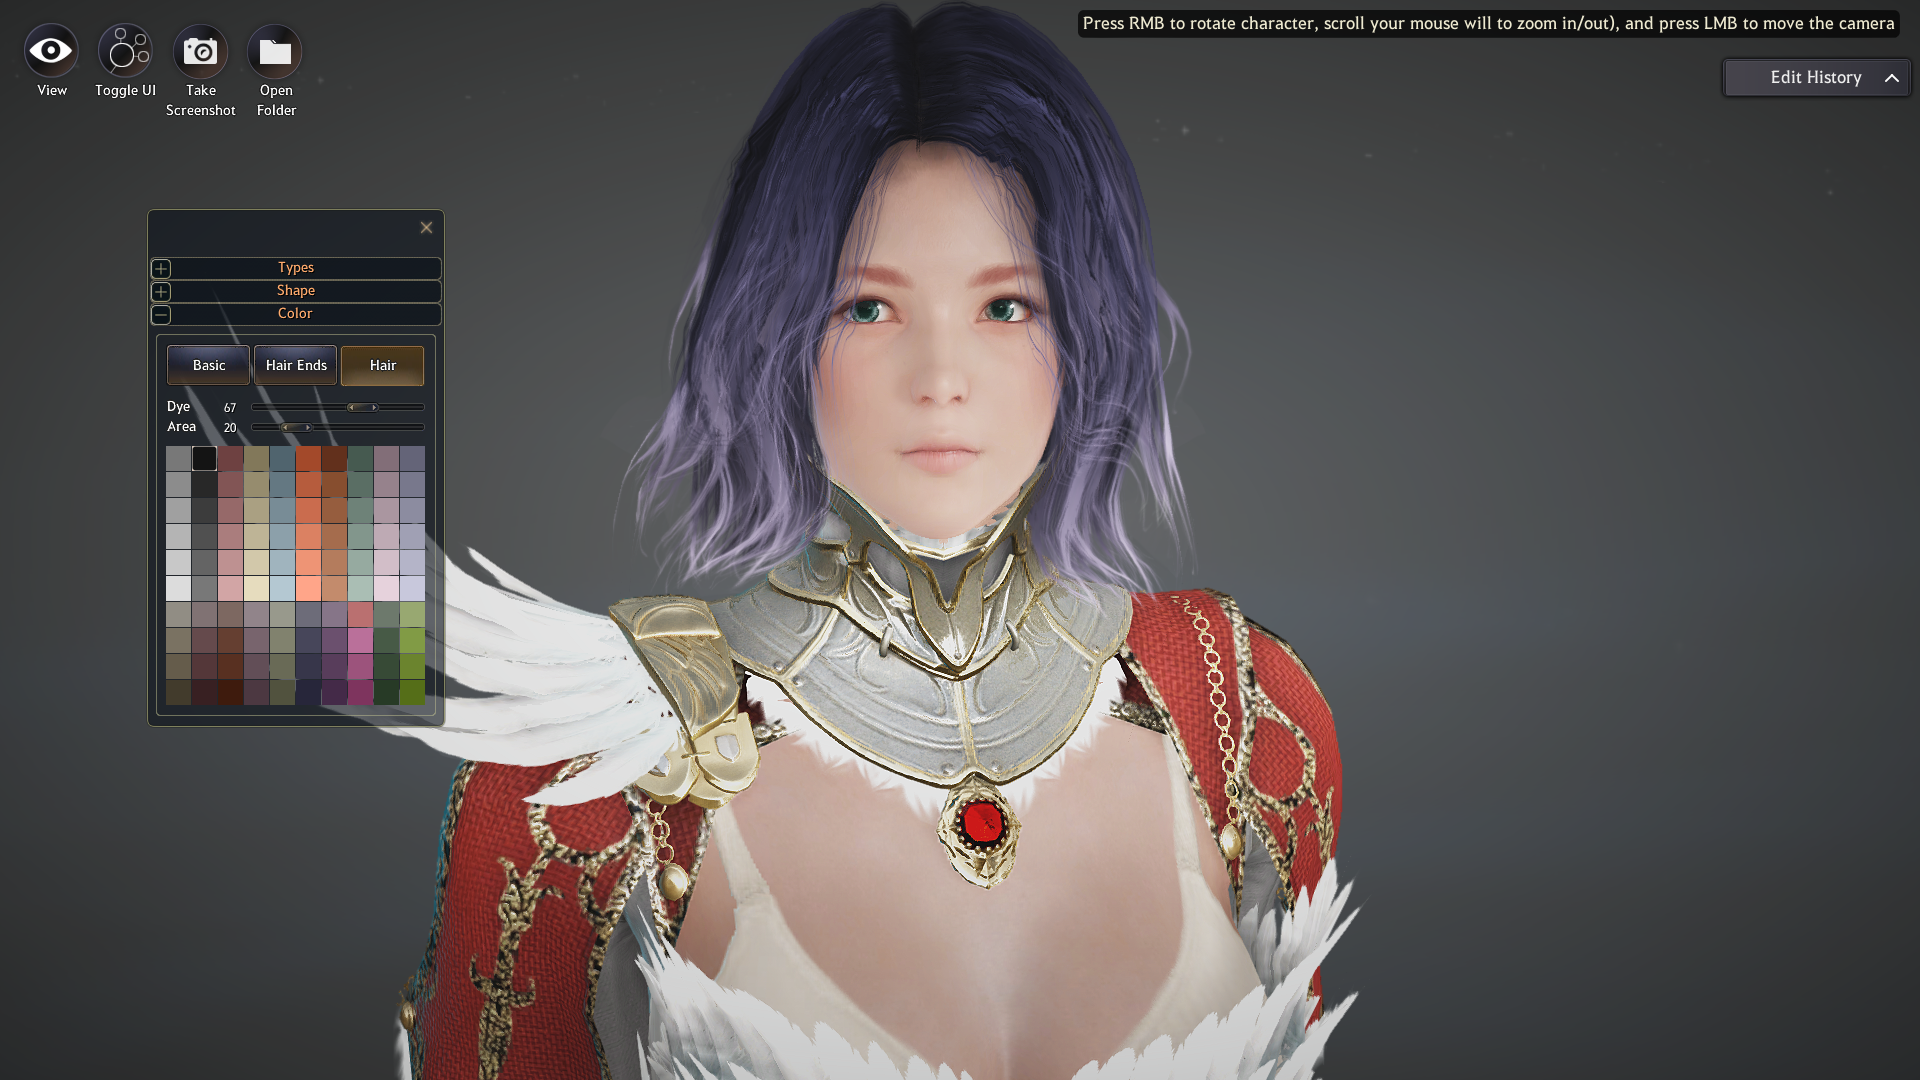
Now you can customize the colour of the hair including the base colour, highlights and roots. Once you are done customizing the hair click the “x” at the top-right of the window to go back or press ESC.
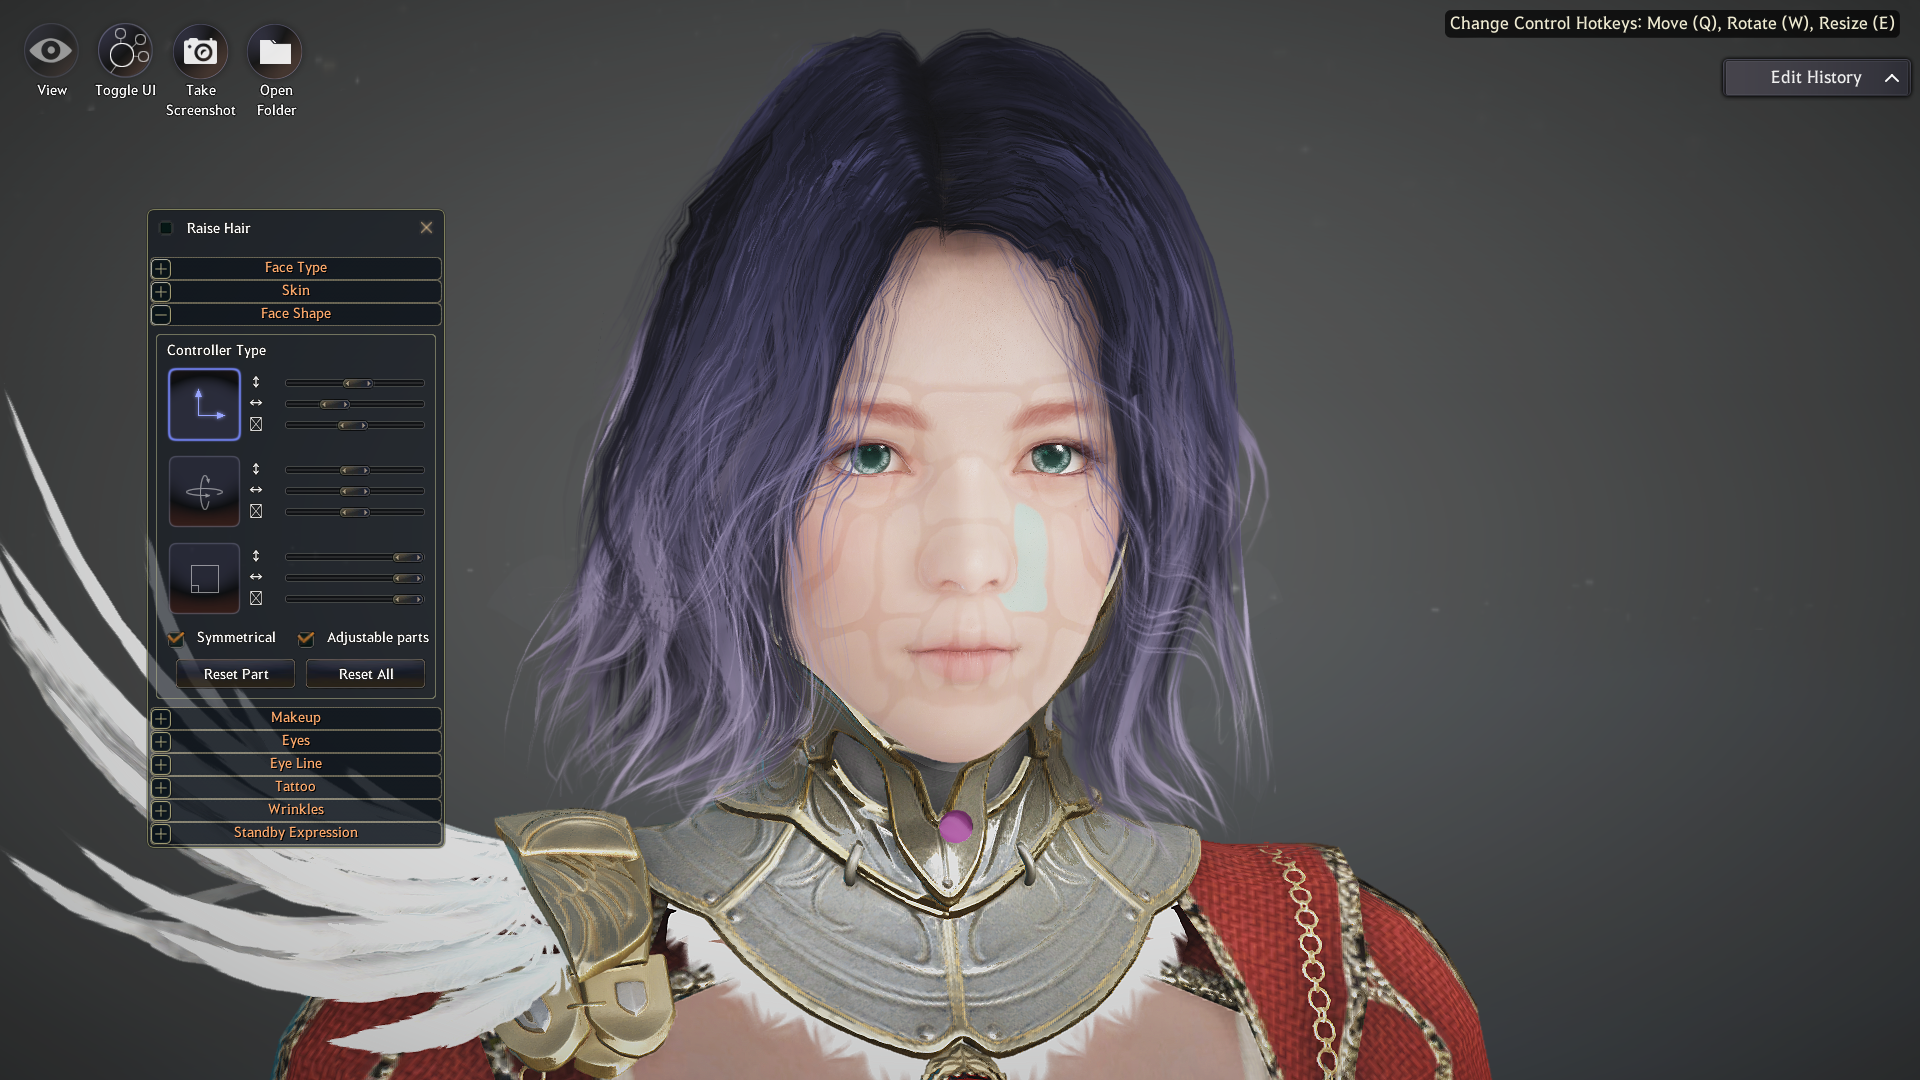
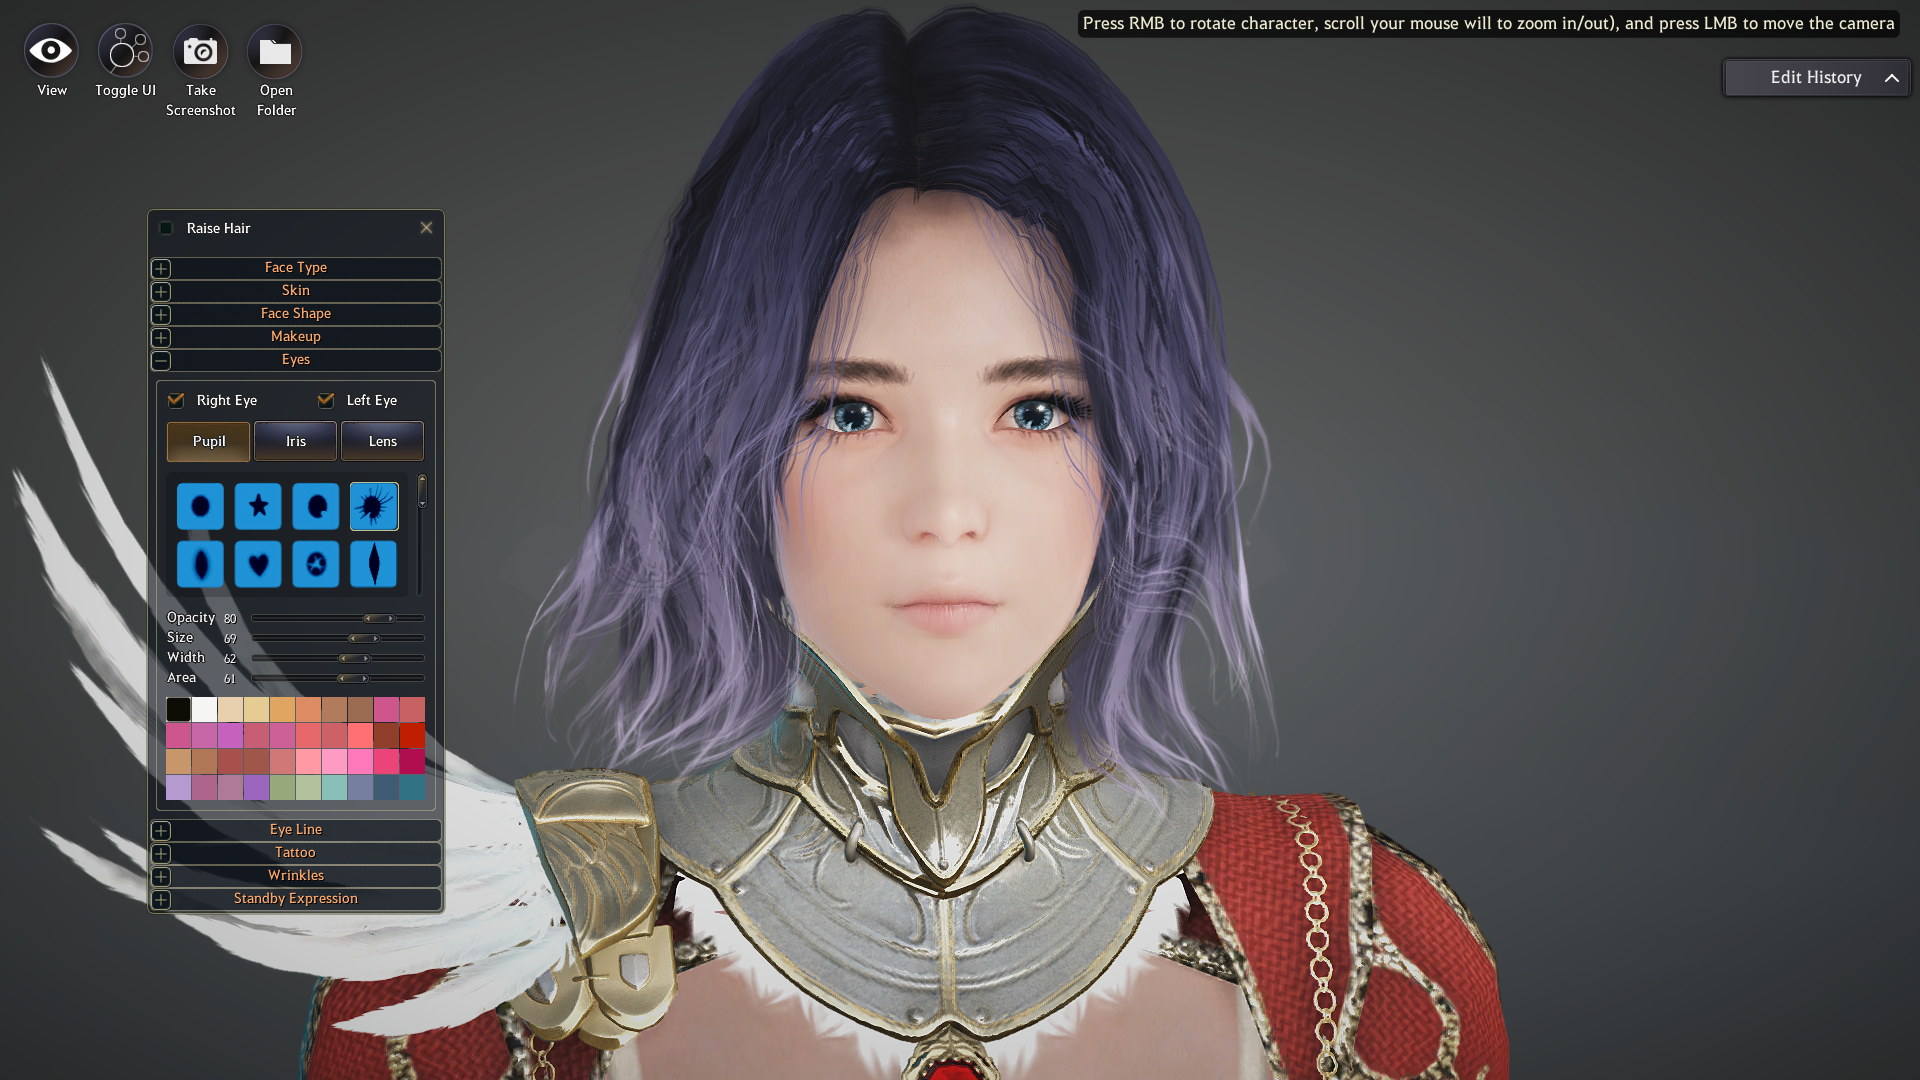
These are the options for customizing the face. Here you can change the shape of the face, skin colour, add make-up, change the colour of the eyes, add eyelashes, face tattoos and wrinkles.
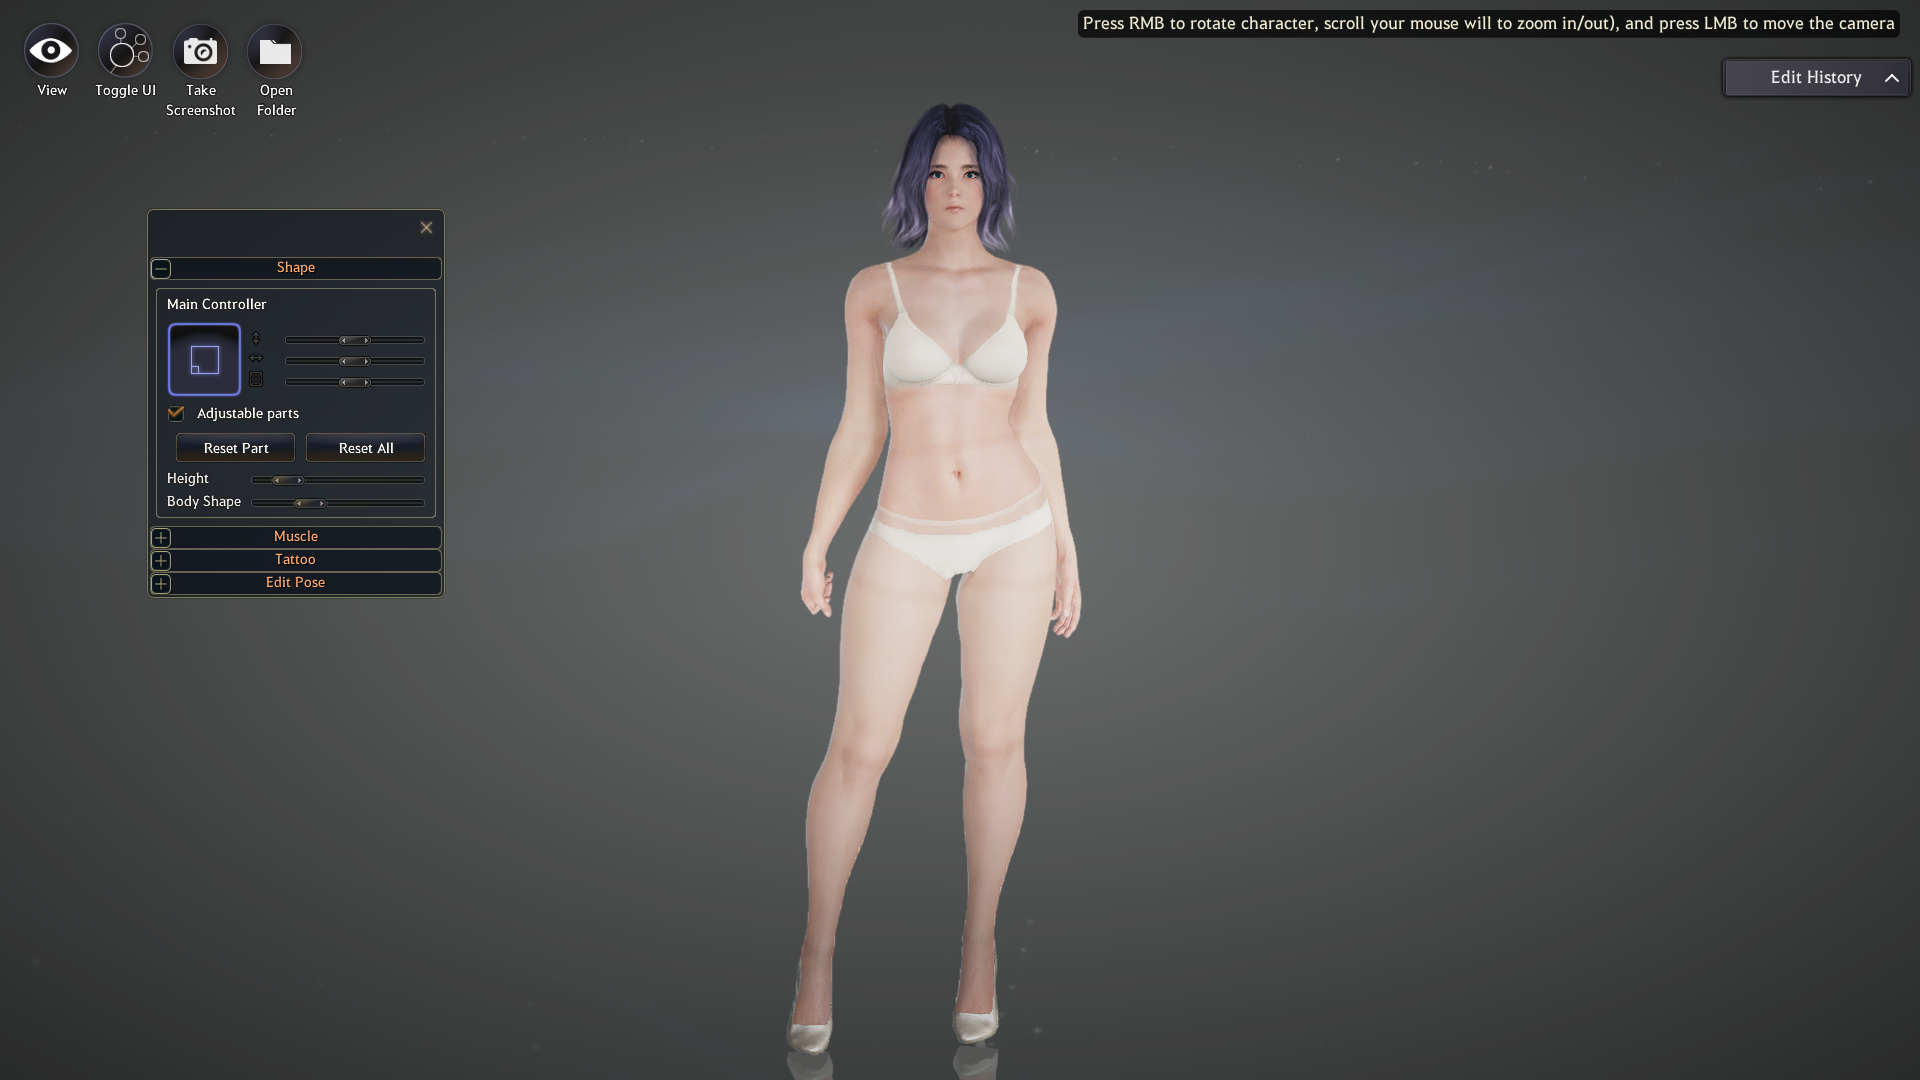
These are the options for changing the body. You can change the shape, add muscle, tattoos and create an original pose for your character. The pose will only appear randomly when your character is idle in-game.
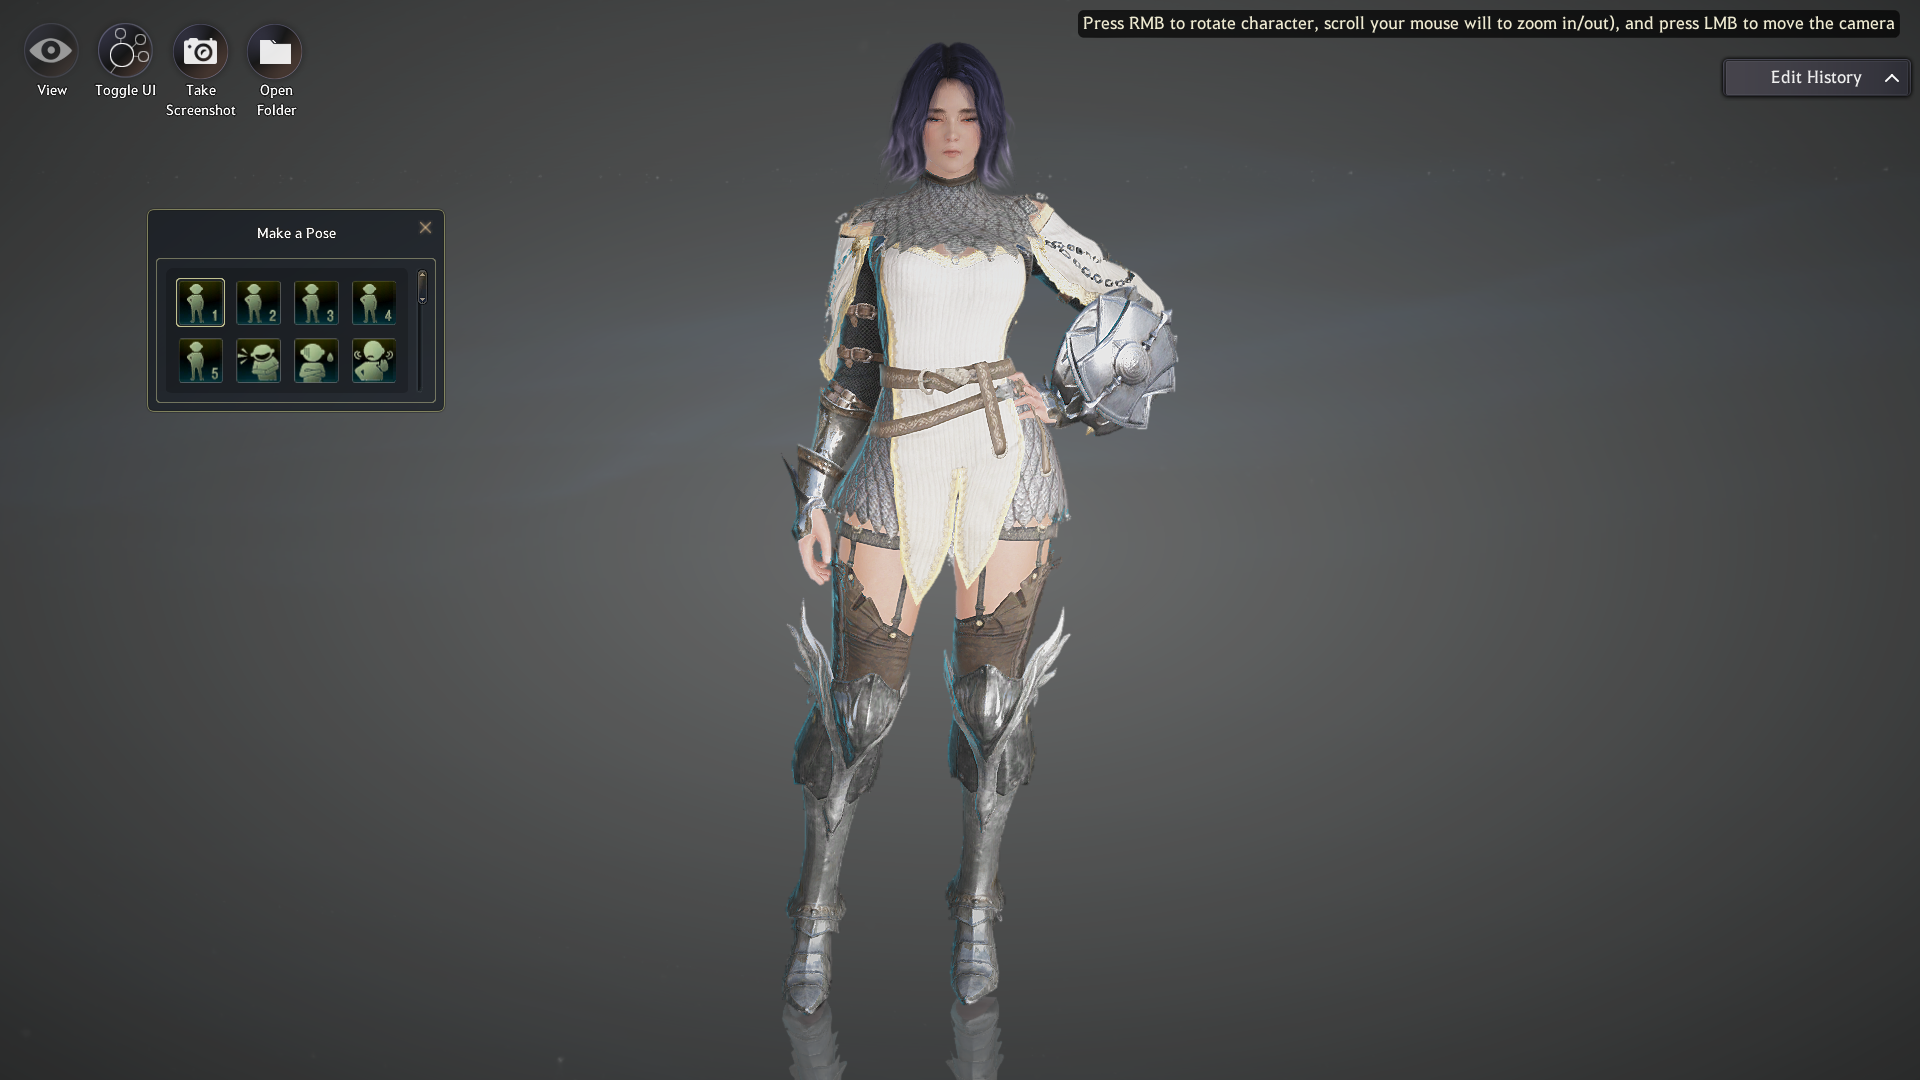
Under “Character Action” you can view expressions, costumes and poses. You cannot choose which outfit to start off with in this section and it is simply to view the different costumes and outfits available in-game.
The weather tool is to view what your character looks like at different times of the day and in different weather conditions.
Here you can change the zodiac sign of your character. Zodiac signs effect the personality of your character and are influential when having conversations with NPCs.
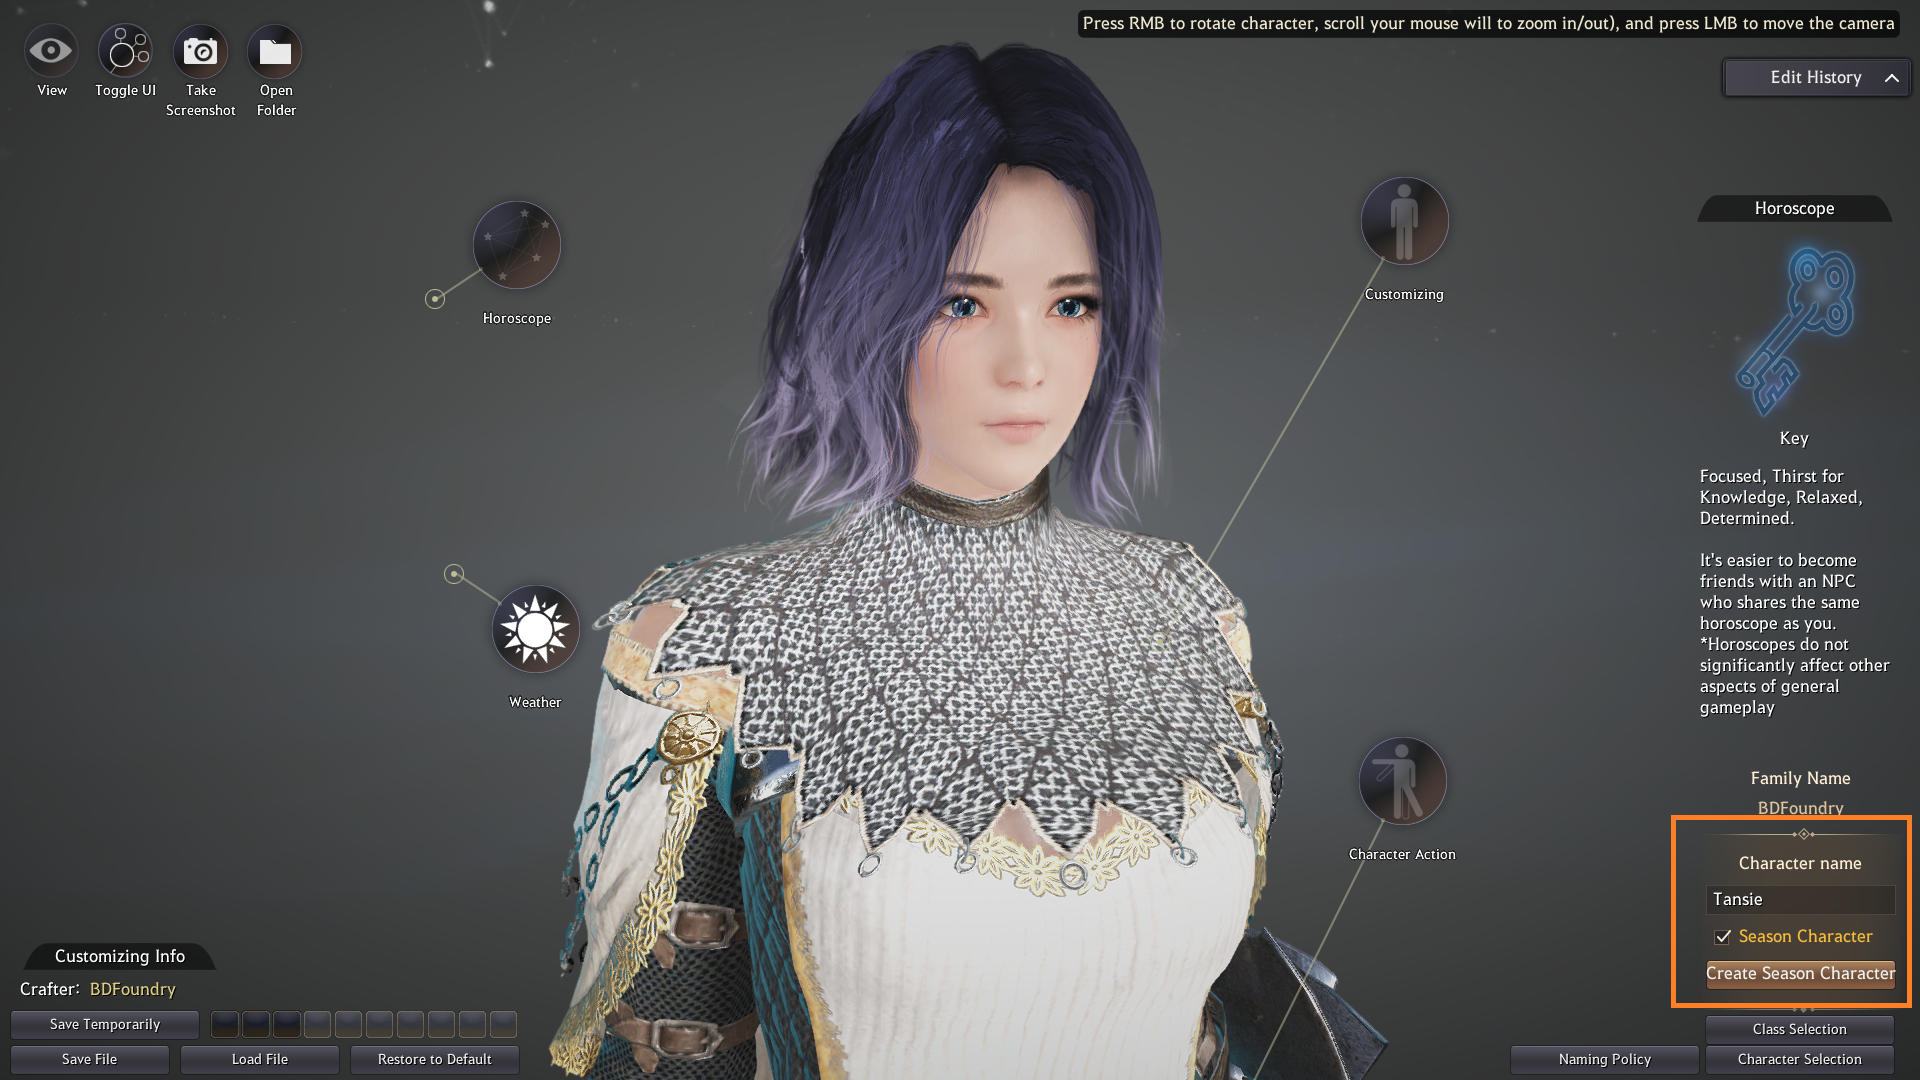
Once you have finished customizing your character, enter a character name. You can also check the option to create a season character, or leave it unchecked if you would like to create a regular character.
Below are some examples of what you can create.
How to save characters and undo changes
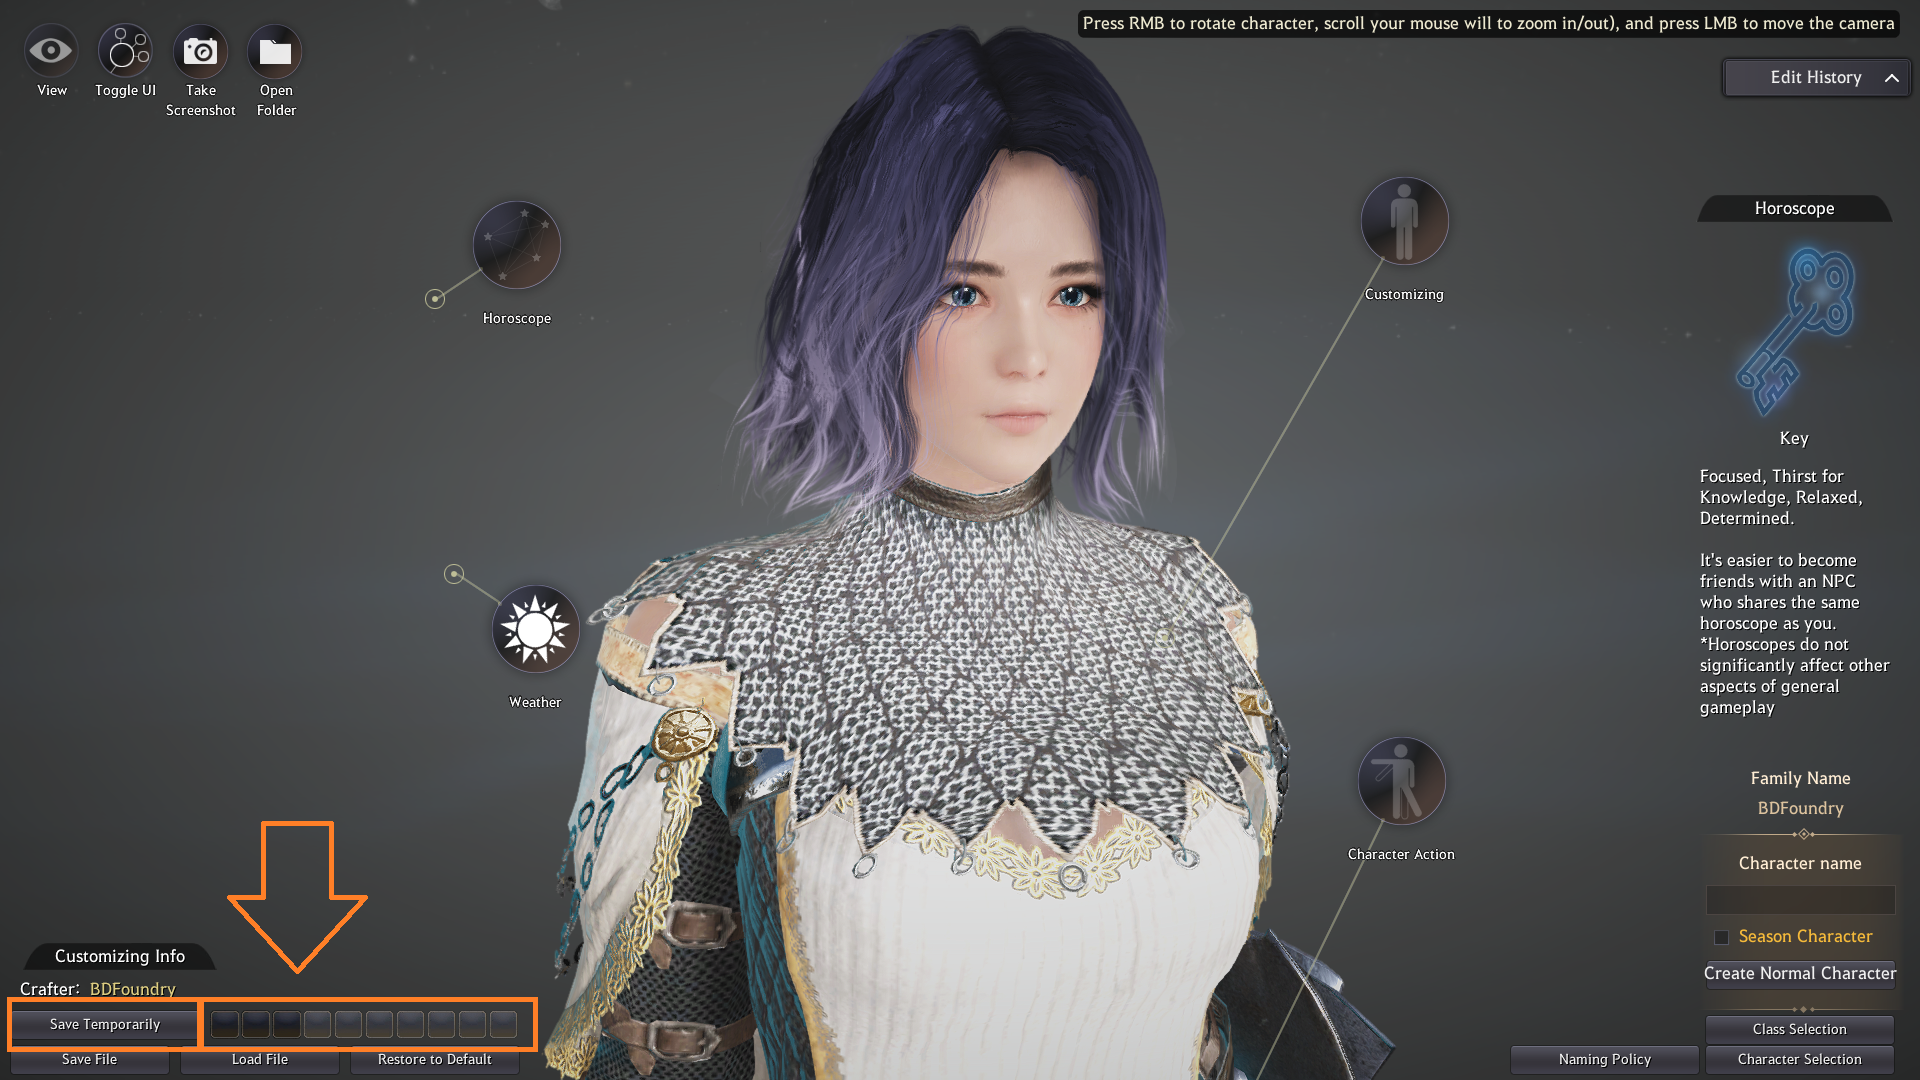
You can temporarily save your changes by clicking the “Save Temporarily” option at the bottom. This will then add a save which you can load by clicking the squares at the bottom.
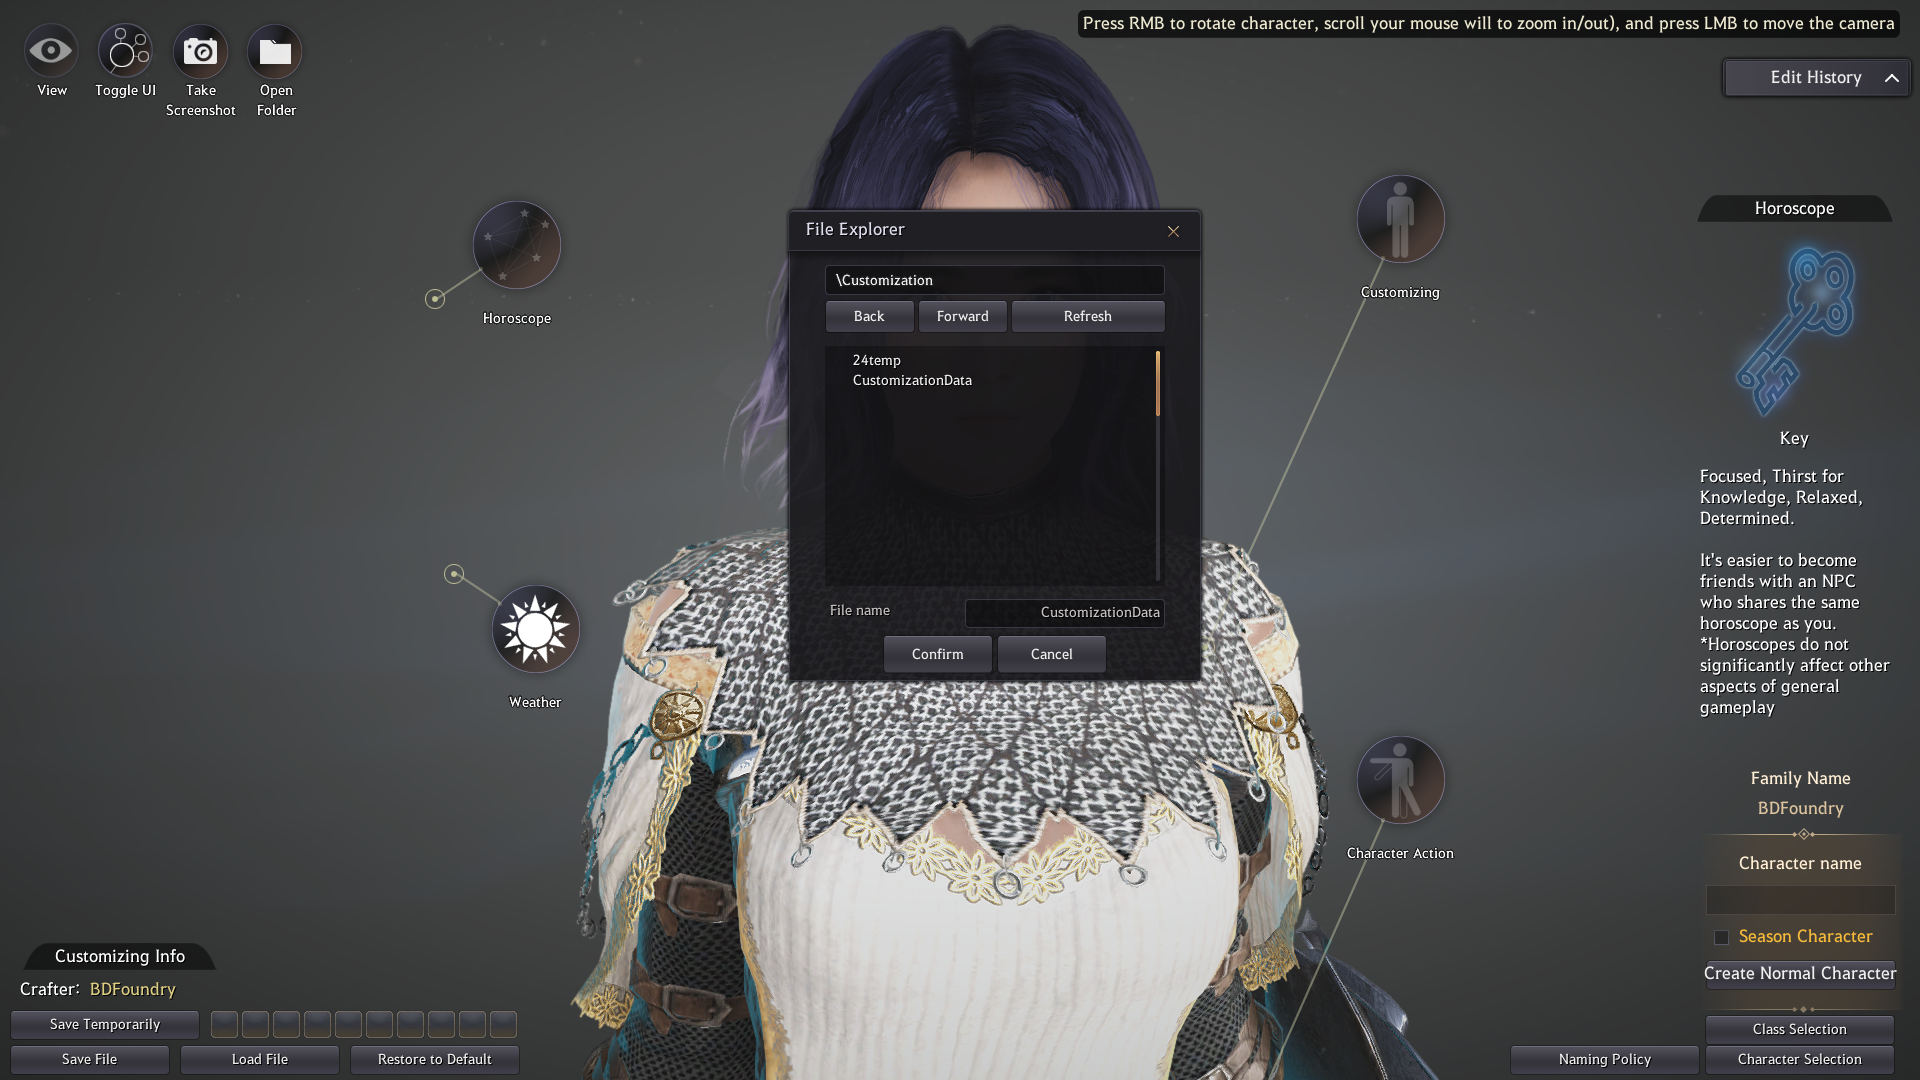
You can also save your character creation as a file on your computer by clicking the “Save File” button. This will bring up a File Explorer window where you can choose the save location and set the name for the save. You can load this file up again by clicking the “Load File” button next to it and selecting the file using the File Explorer.
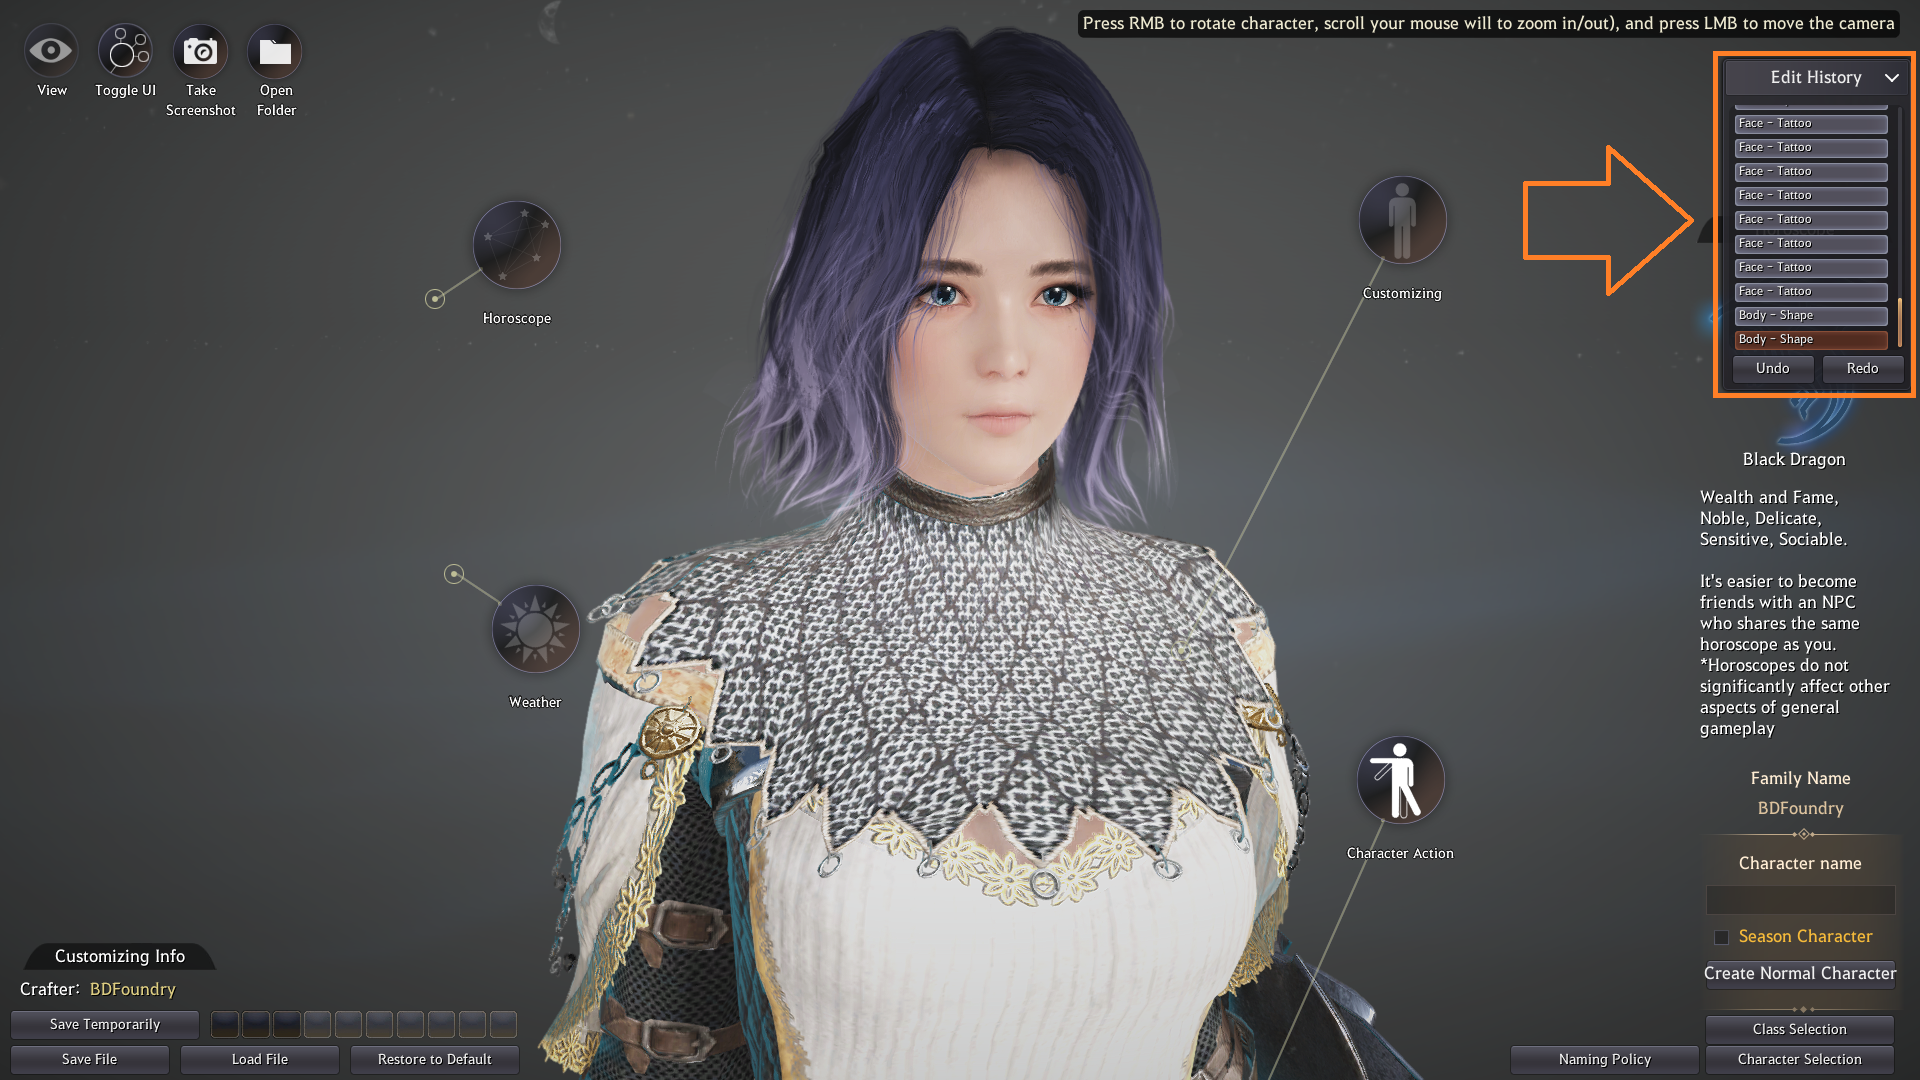
There is also an undo/redo option under the Edit History tab which can found in the top right. This allows you to view all the changes you have recently made and revert any changes.
How to change your character’s appearance
Once you have created your character, you will need an Appearance Change coupon to make any changes.
These can be bought from the Pearl Store:
- Pearl Store (F3) > Beauty > Appearance Change Coupon (1 time use) – 800 pearls
- Pearl Store (F3) > Beauty > Appearance Change Coupon (unlimited use for 30 days) – 1,000 pearls
You can also freely change your character’s appearance if you have a Value Pack applied.
Once you have an Appearance Change coupon you can press F4 to access the Beauty Salon and make any changes to your character’s appearance.
How to get more Character Slots
You must buy more character slots if you have reached the maximum amount of characters.
Character Slots can be bought from the Pearl Store:
- Pearl Store (F3) > Loyalties > Character Slot Expansion Coupon – 5,000 Loyalties**
- Pearl Store (F3) > Function > Character Slot Expansion Coupon – 600 Pearls
**You earn 200 Loyalties each day by logging in, these can be collected from your challenge rewards.
Trial Characters
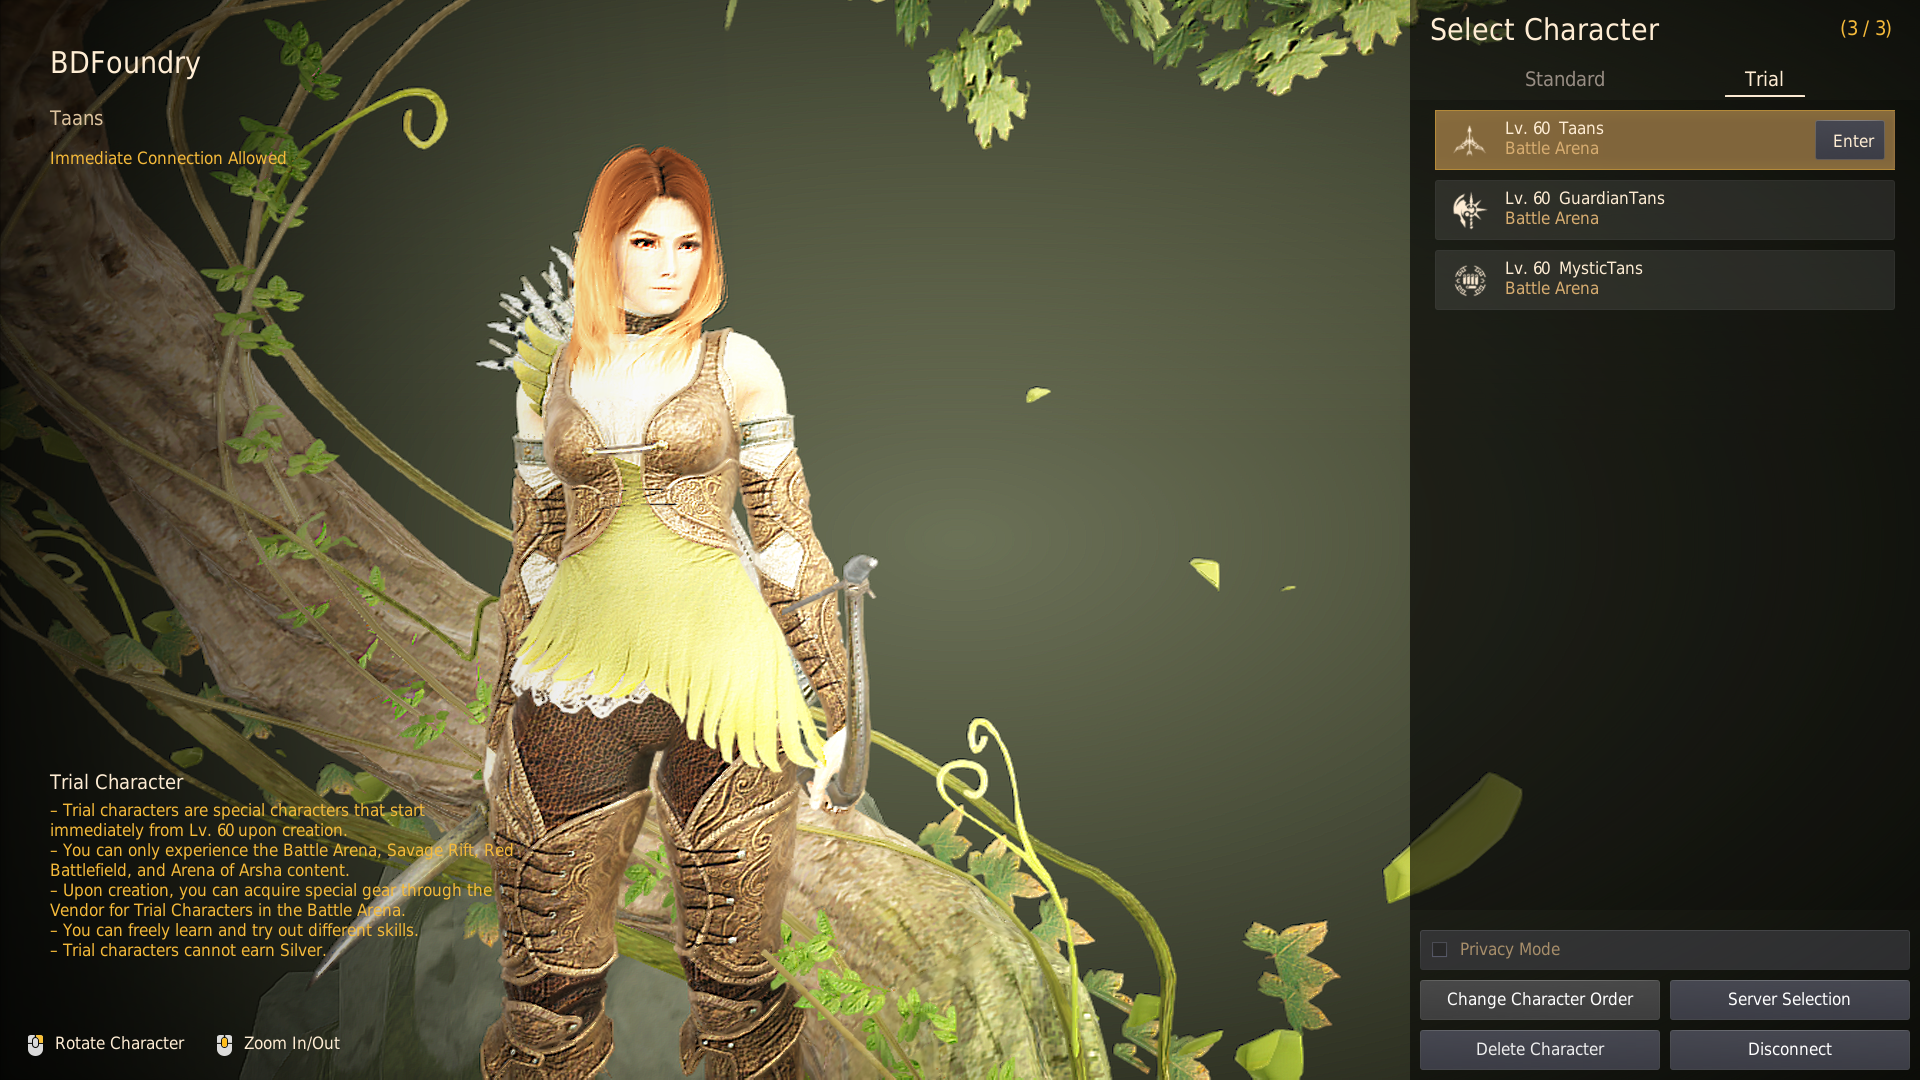
Trials characters are special characters that can only access the Battle Arena, Savage Rift, Red Battlefield or Arena of Arsha. A trial character automatically starts at level 60, they can freely change their skills, and you can buy special gear for them at the NPC in Battle Arena. They are designed to allow you to test different classes without having to level them and get gear for them yourself.
Beauty Album
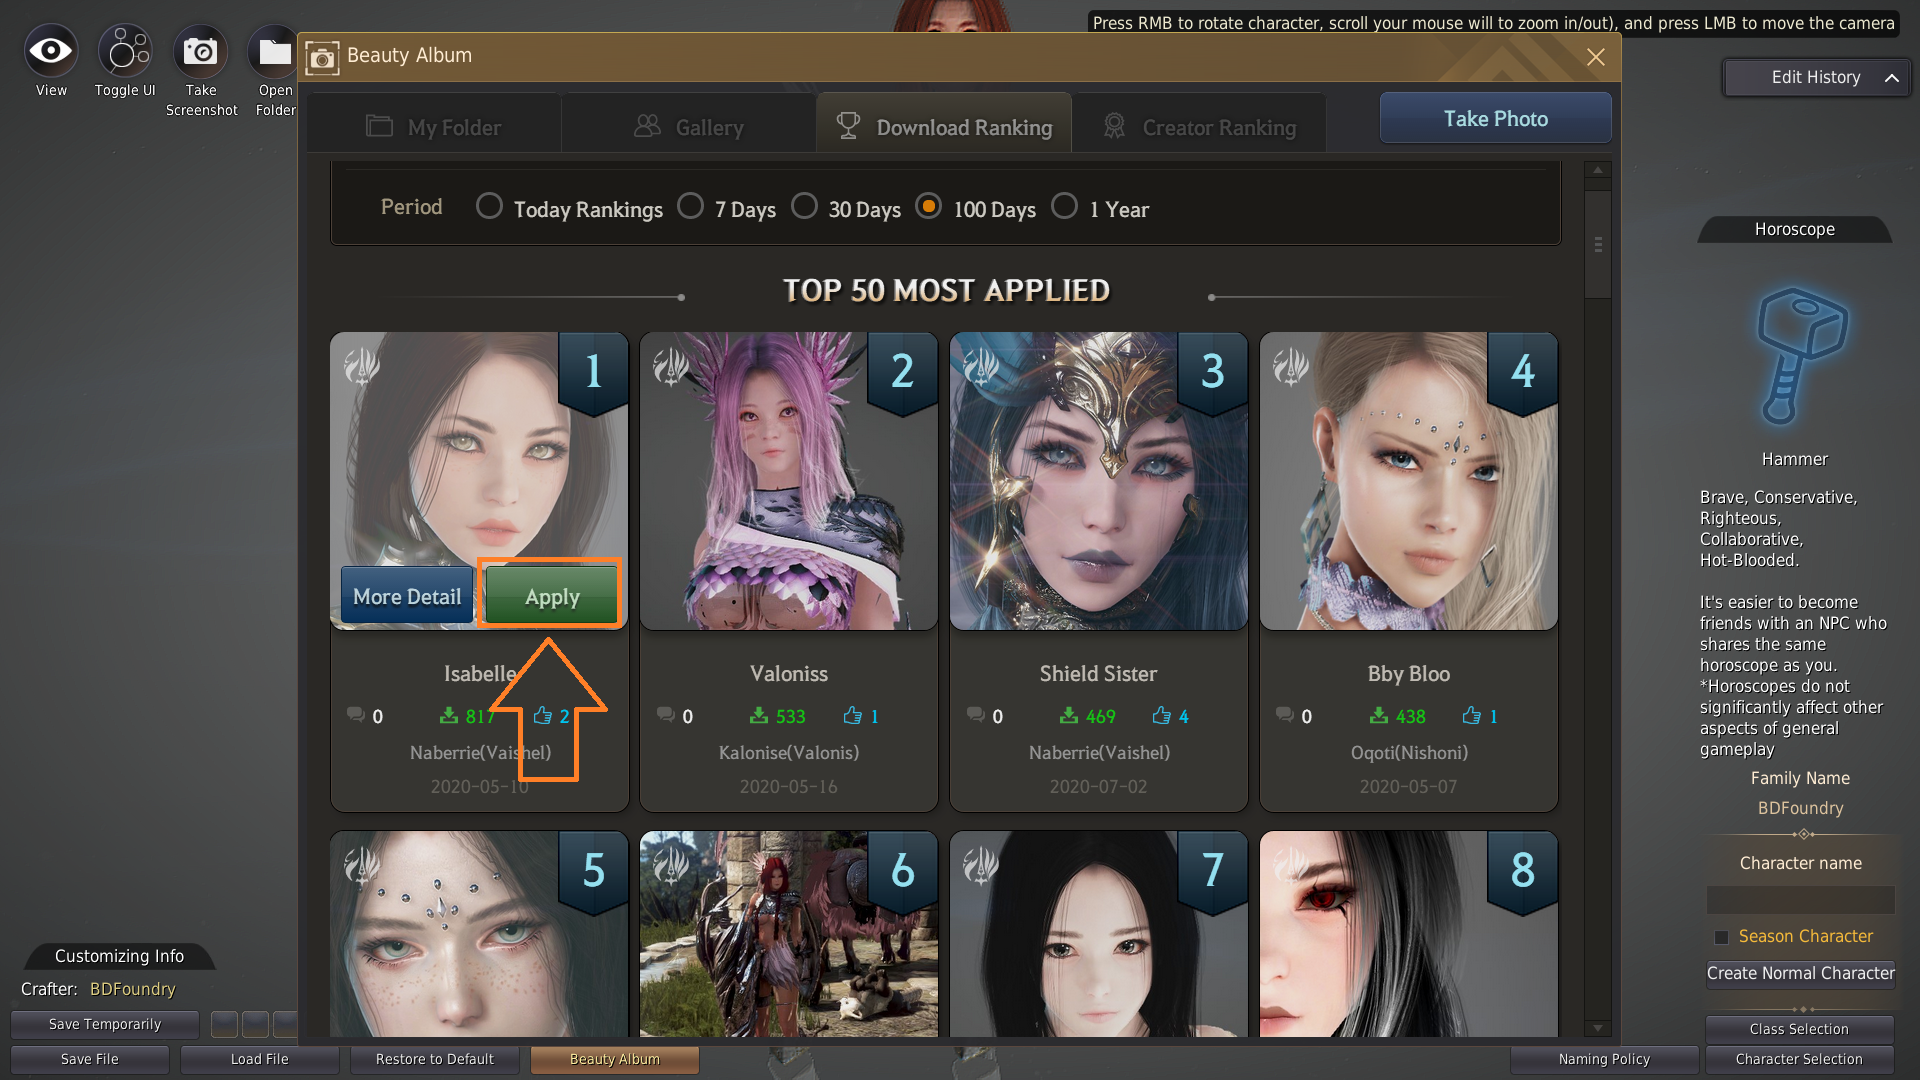
The Beauty Album can be accessed by clicking the Beauty Album button along the bottom.
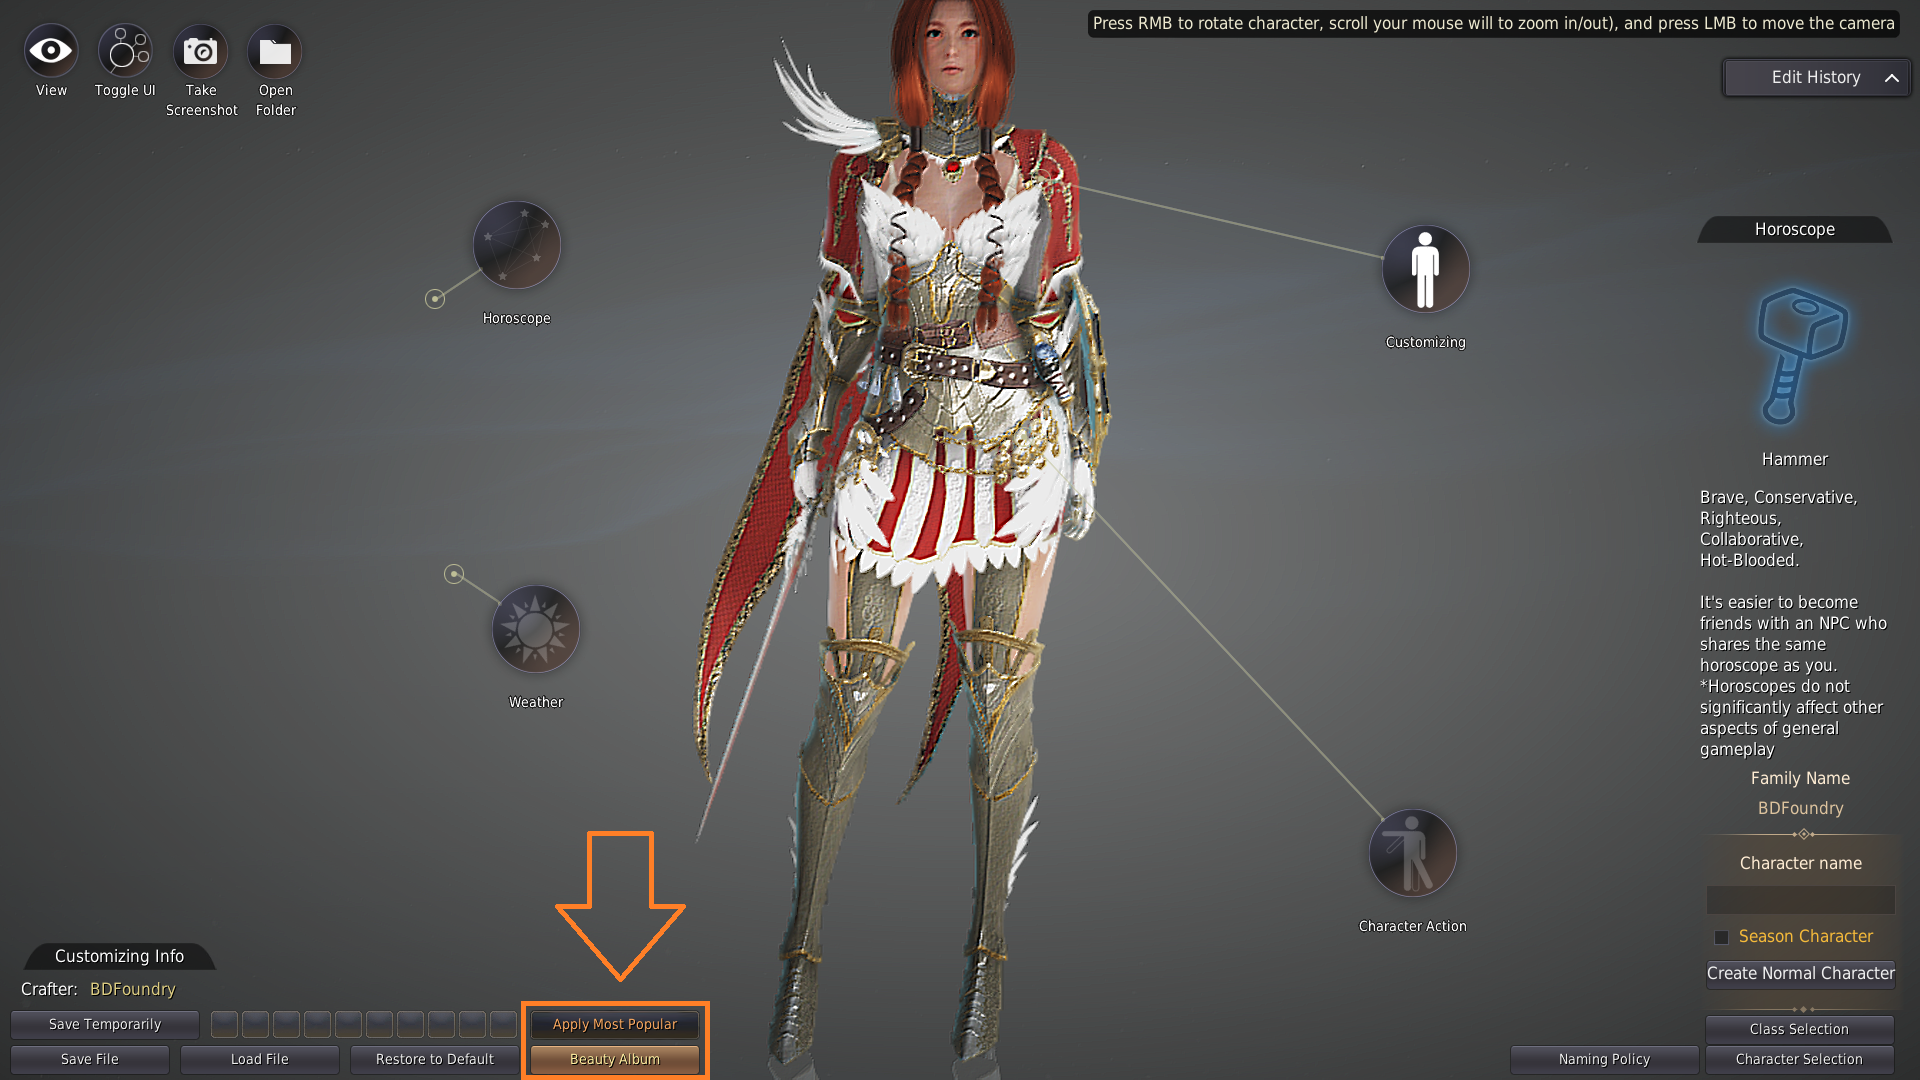
This will open the Beauty Album window where you can upload your character creations or view other player’s character creations. You can filter by class, popularity, or search for a specific player’s creation. Hover over the thumbnails and choose “apply” to view the appearance on your character. You can then make any changes before saving.
Natural Hair Colors Tutorial
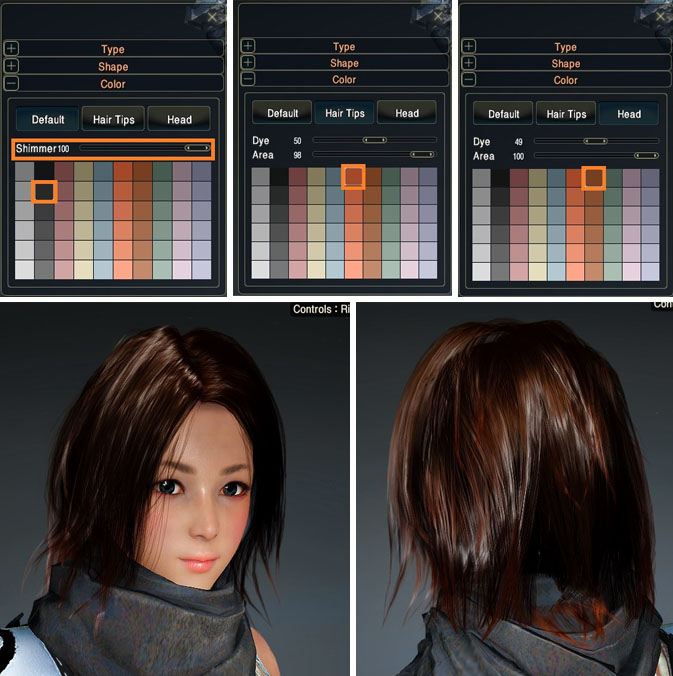
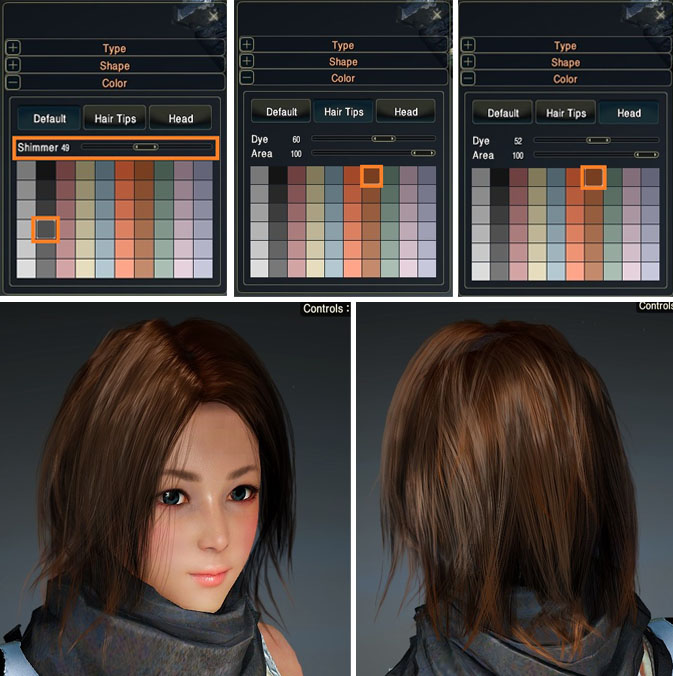
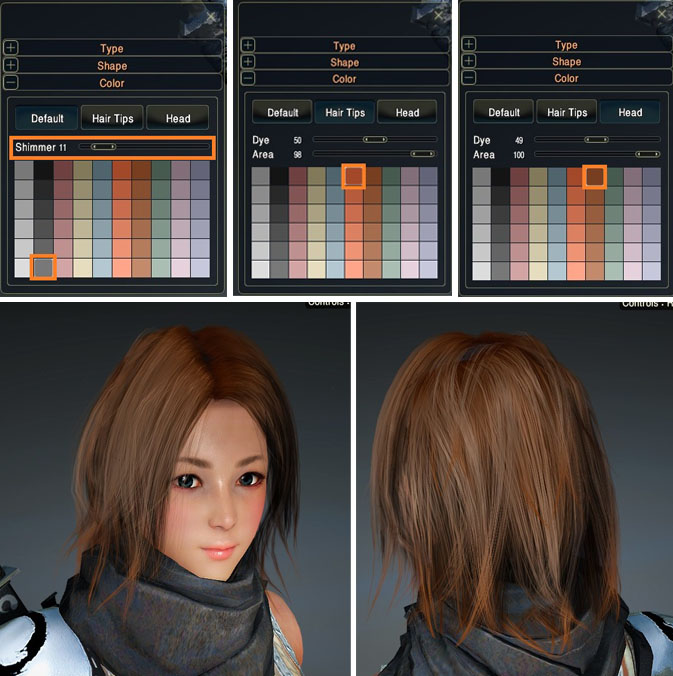
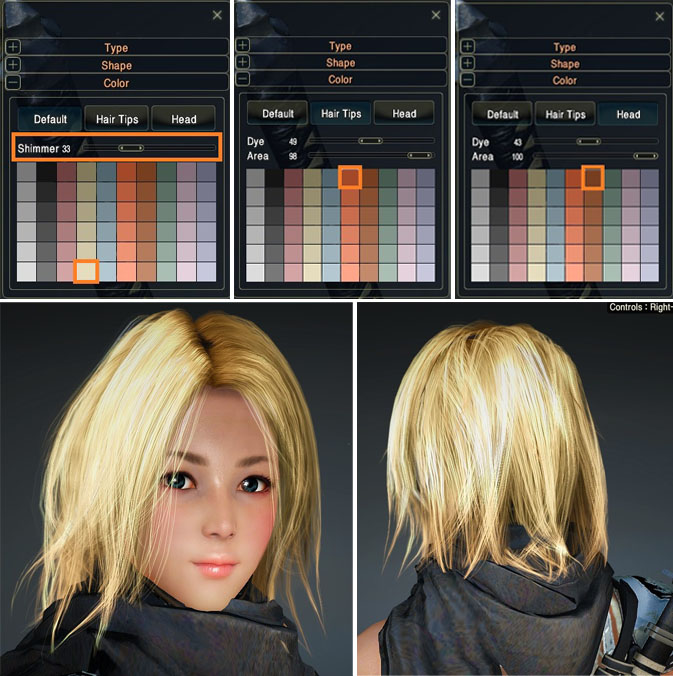
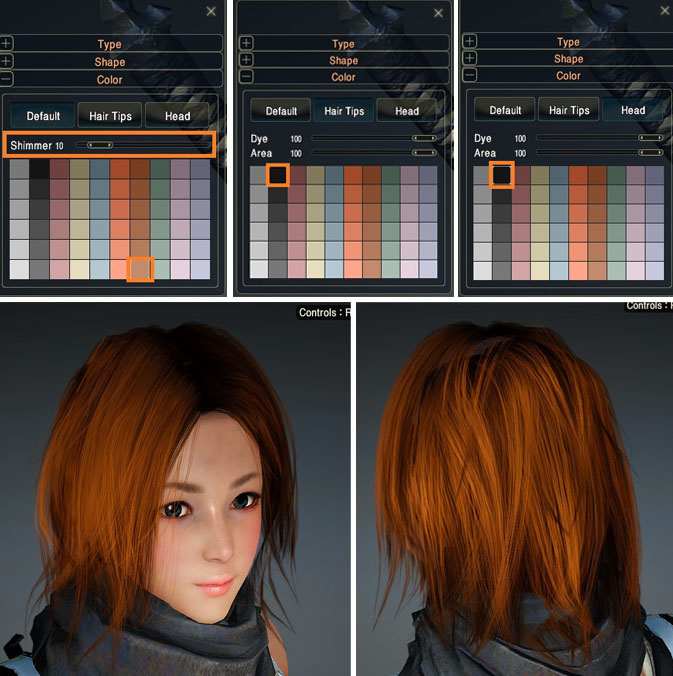
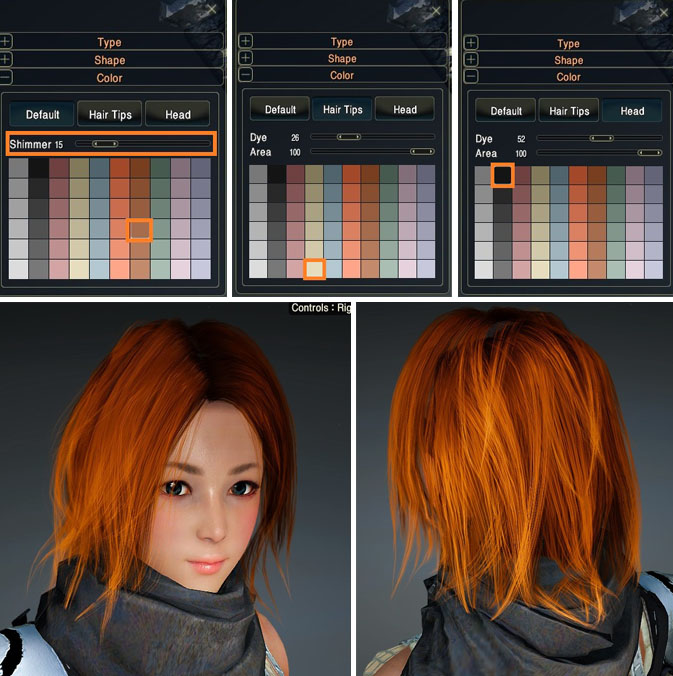
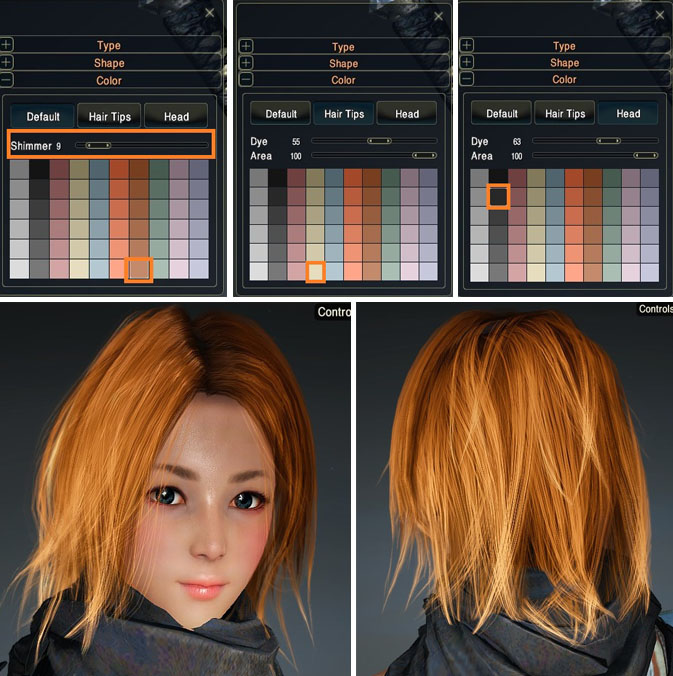
Below are some general options to follow in order to achieve a more natural-looking hair color you can also use the Color Pallete to use RGB colors.
You may need to tweak the settings slightly to get the color you want. It depends on the hairstyle you choose, I found that it was much harder to get the right color on straight hairstyles. These options work best for curly or layered hairstyles. The blonde color is actually probably the hardest one to get right because it ends up looking way too green to me. My model for this part of the tutorial was the Kunoichi class.
Brown Hair
Blonde Hair
Ginger Hair





Oh God, it’s going to take me days to get past the character customization…
I took me ages when I made my first character and I hardly changed it! We’ve literally just added a quick section for making more natural hair colors 🙂